How to Make Hoshigaki (Japanese Dried Persimmons)
A traditional Japanese method for drying persimmons at home. No special equipment needed—just persimmons, string, and time. Control the texture from soft and creamy (anpo-gaki style) to firm and chewy.
Equipment
- Knife or peeler
- Large pot (for boiling water)
- String (or hoshigaki hangers/drying baskets)
- Clothesline pole or drying rack
- Location with good airflow (under eaves ideal)
- plastic wrap
- Storage bags or containers
Ingredients
- persimmons astringent persimmons with stems attached preferred; sweet persimmons also work
Instructions
Peel
- Leave the persimmon stems in a T-shape, about 2–3 cm longpersimmons
- Peel the skin away, leaving the calyx attached*Peel straight down from top to bottom, or in a spiral—both work
- Cut away any soft or damaged spots
Tie
- Wrap string around each stem and tie securely*Space them about 15 cm apart along the string
Dip in Hot Water
- Bring a pot of water to a boil
- Dip each persimmon for 3 to 5 seconds
- Lift out and set on a plate
Hang
- Hang somewhere with good airflow—under the eaves works well*Ensure they get some gentle sunlight and are protected from rain
- Leave for 2 to 4 weeks, depending on size and moisture content*On rainy or very humid days, bring them inside
Massage
- Once the surface feels dry (usually after 1 to 3 weeks), massage gently with your fingers*Don't press hard—just enough to soften the inside a little
- Repeat every few days, 2 or 3 times total
- Optional: Change their orientation every few days for even drying
Store (or Eat)
- When they reach your preferred texture, take them down
- Eat right away, or store in fridge or freezer depending on firmness
Notes
➤ Choosing Persimmons
- Astringent persimmons with stems are traditional and sweeter when dried
- Sweet persimmons work but take longer and are less sweet
- Choose firm ones without bruises, with orange-colored skin
- Thinner peels help moisture escape faster
- Keep the stems—they're what you tie the string to
- Hot water dip sterilizes the surface
- Keep persimmons from touching while drying—trapped moisture causes mold
- Bring them inside on rainy days
- Good airflow is essential
- Under eaves or similar spot with airflow and partial sun
- Must be protected from rain and dew
- If weather turns bad, continue drying indoors
- Helps sugars spread evenly and creates softer texture
- Don't worry if you forget—they'll still turn out fine
- Changing orientation every few days helps even drying
- Timing varies greatly by size and moisture content
- Check often and stop at your preferred texture
- See "How I Decide They're Ready" section for detailed guidance on textures:
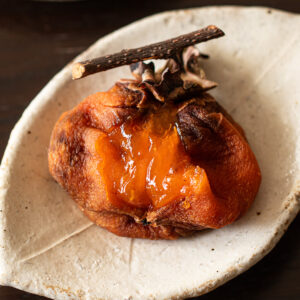
- Semi-dried (1-2 weeks): Soft and creamy, anpo-gaki style
- Soft and moist (3 weeks): Chewy and dense
- Well-dried (3-4+ weeks): Firm with concentrated sweetness
- Semi-dried: Freeze for long-term (eat soon at room temp)
- Soft and moist: Refrigerate or freeze
- Well-dried: Room temp in cool, dark place (1-3 months), or refrigerate/freeze for longer
- Watch for condensation in containers—it causes mold