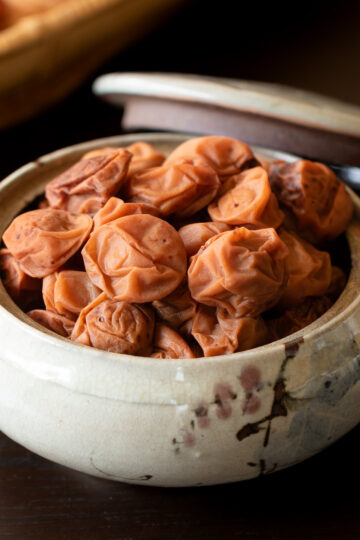
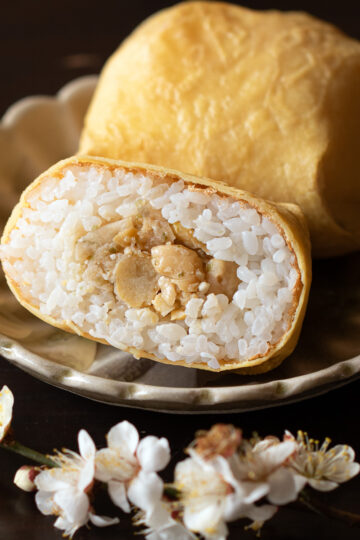
A low-sodium umeboshi recipe made with just three ingredients — ripe ume plums, coarse salt, and shochu.
At 10% salt, pickling and storage are both done in the refrigerator.
Less salty, more delicate — and still completely additive-free.

✉️ About Low-Sodium Umeboshi
Once you're comfortable making umeboshi at the standard 15–18% salt, reducing the salt is a natural next step — and a rewarding one.
Lower salt means a softer, more delicate flavor. But it also means a higher risk of mold, which is why this recipe takes a different approach: pickling in a Ziploc bag, in the refrigerator, from start to finish.
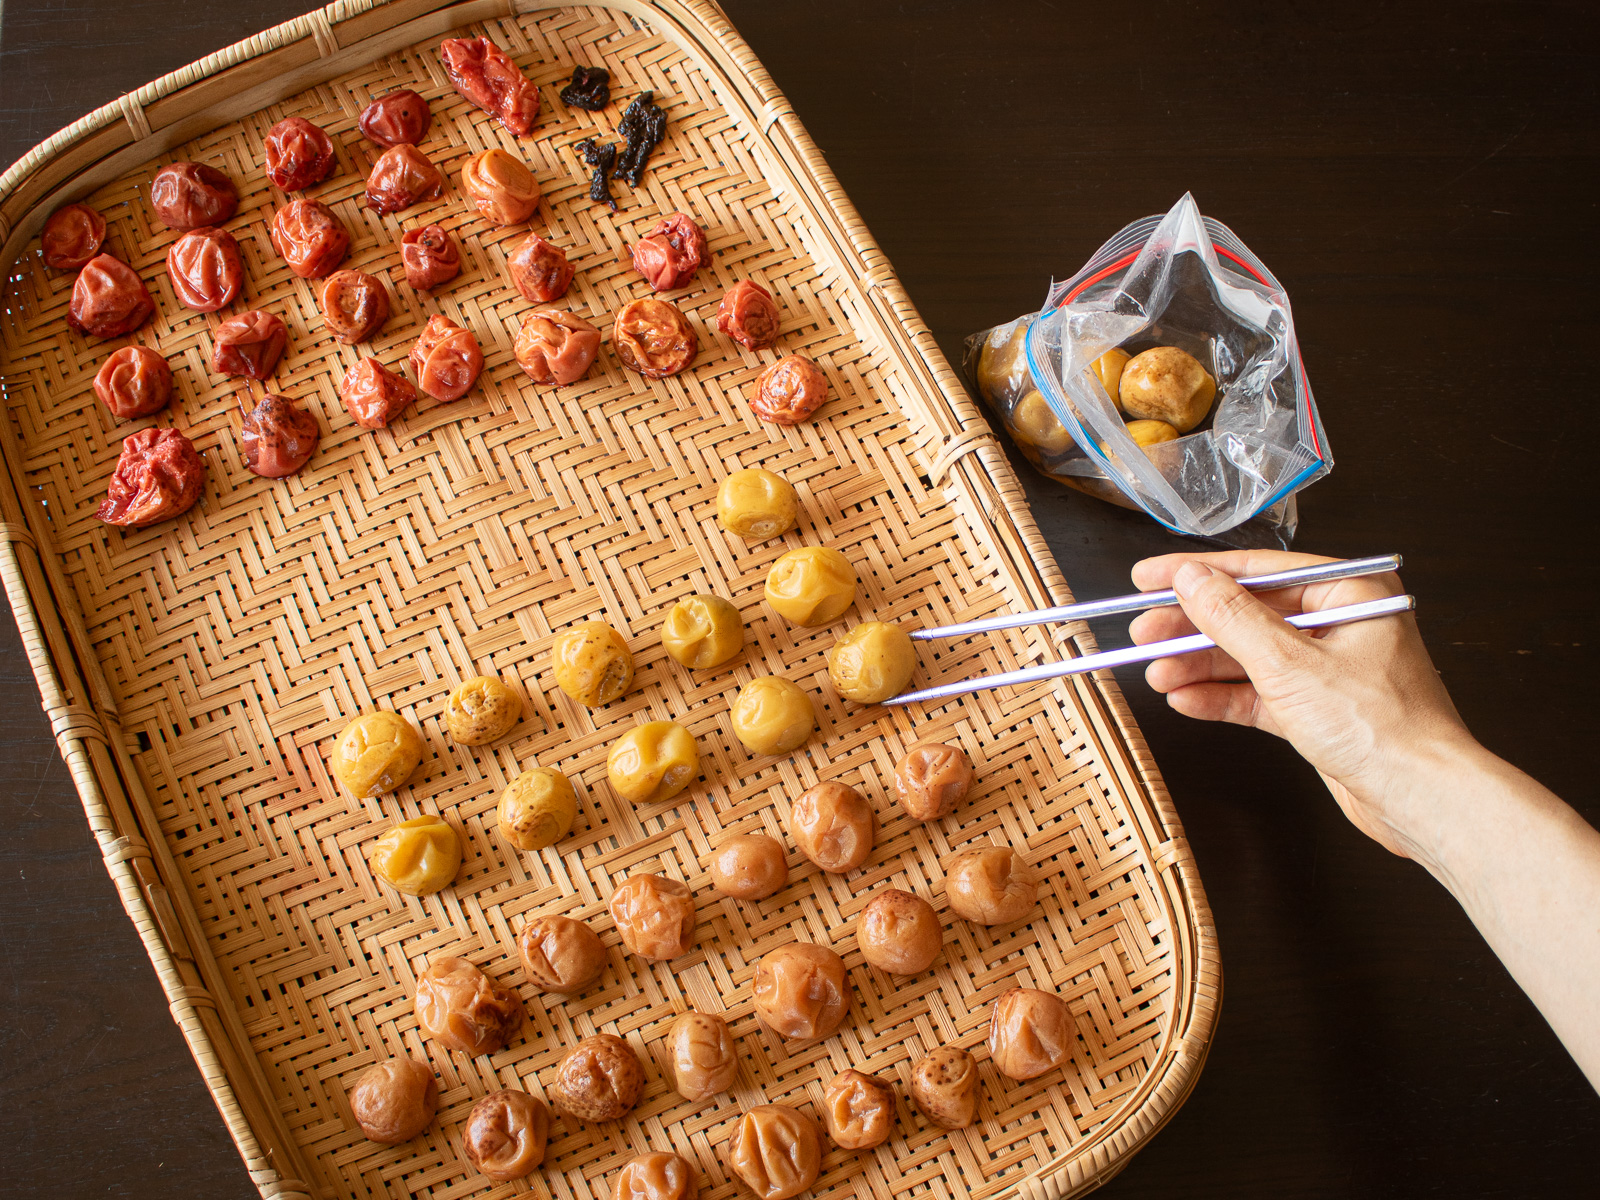
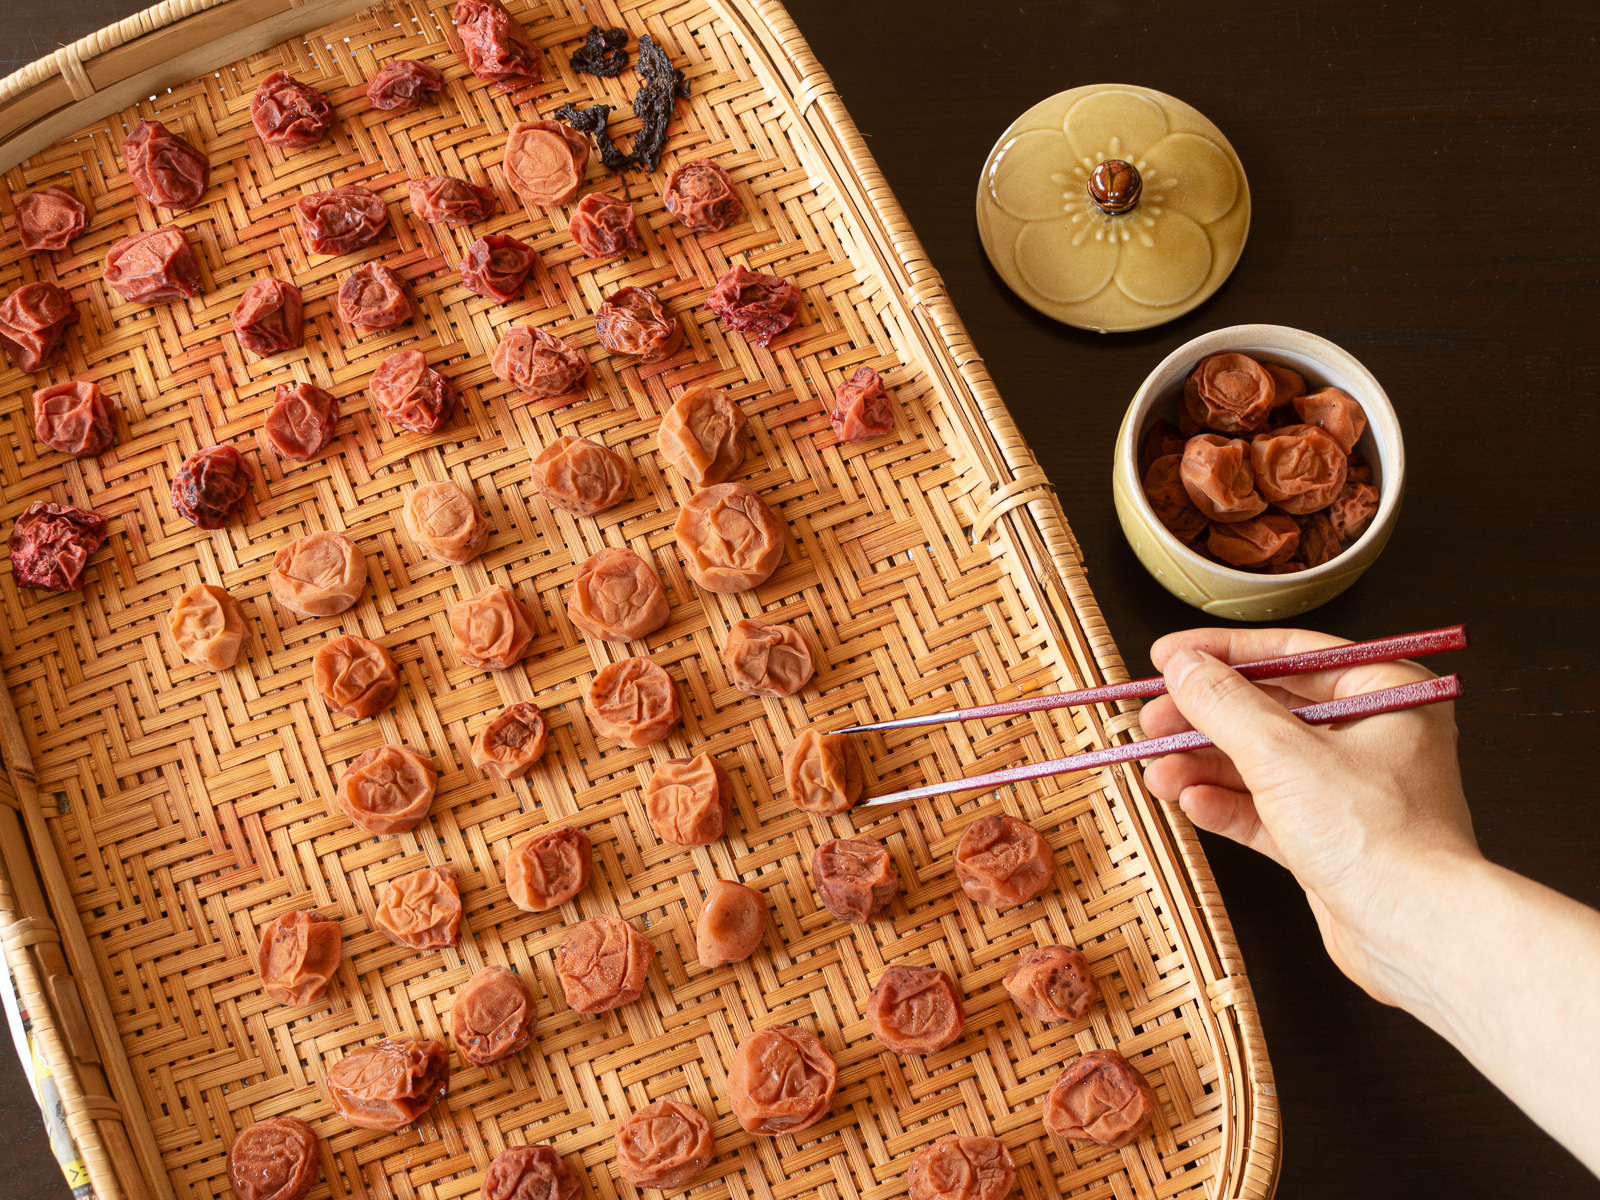
This year I tried four different batches at 10–13% salt, experimenting with different liquids — white ume plum vinegar, shochu, or no liquid at all. The liquid, it turns out, makes more of a difference than I expected. Each batch taught me something new.
That's what I love most about the annual ume season. There's always something left to try, always something to observe. Each finished plum carries a little of that curiosity with it.
Next year, I'm already thinking about going lower — down to 5%. The ume season never really ends.

Jump to:
🧺 What Makes This Recipe Special
A simple, additive-free low-sodium umeboshi recipe made with just three ingredients: ripe ume plums, coarse salt, and shochu or white ume plum vinegar.
- 10% salt — less salty, with a softer, more delicate flavor
- Ziploc bag method — contains the liquid neatly and reduces the risk of mold
- Refrigerator from start to finish — cooler temperatures keep mold risk low throughout
- Naturally vegan — no honey, no additives
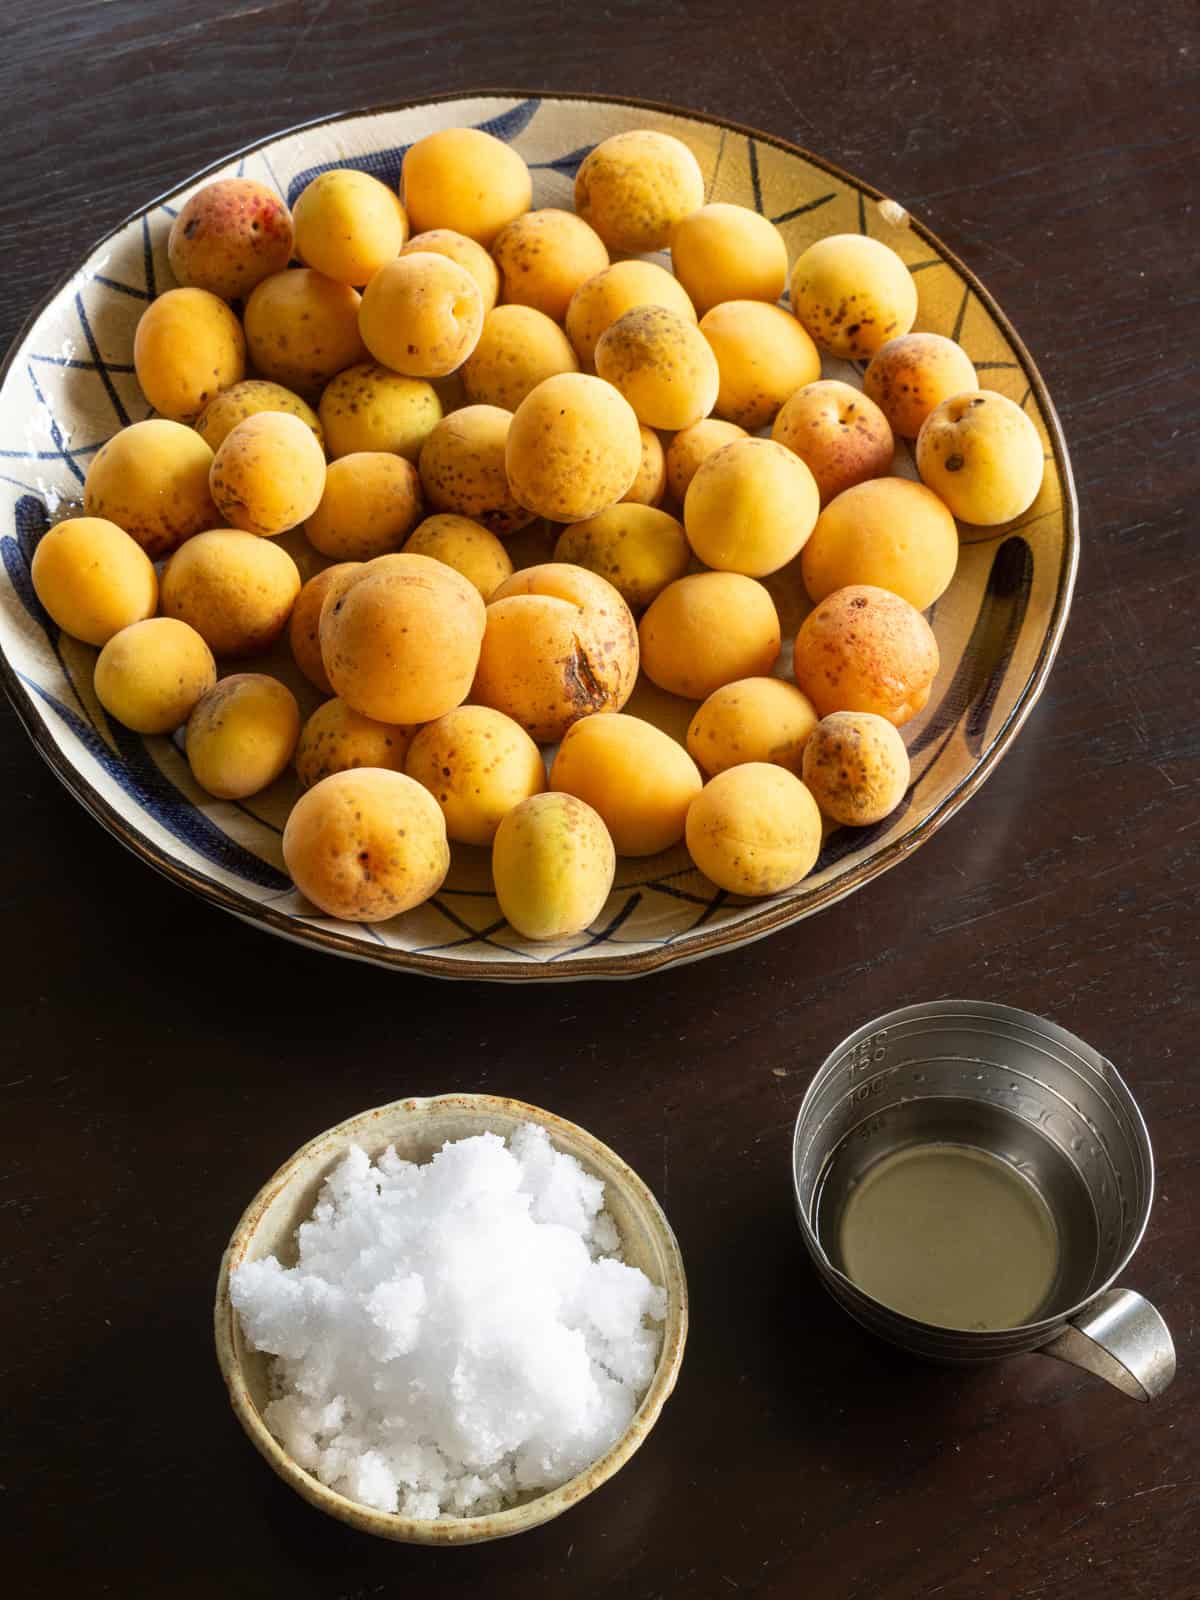
🍑 Ingredients & Equipment
▶︎ Ingredients
● Ripe ume plums — Use fully ripe fruit only. Unripe or firm green ume won't release enough liquid, which increases the risk of mold. See the basic umeboshi recipe for tips on ripening ume at home.
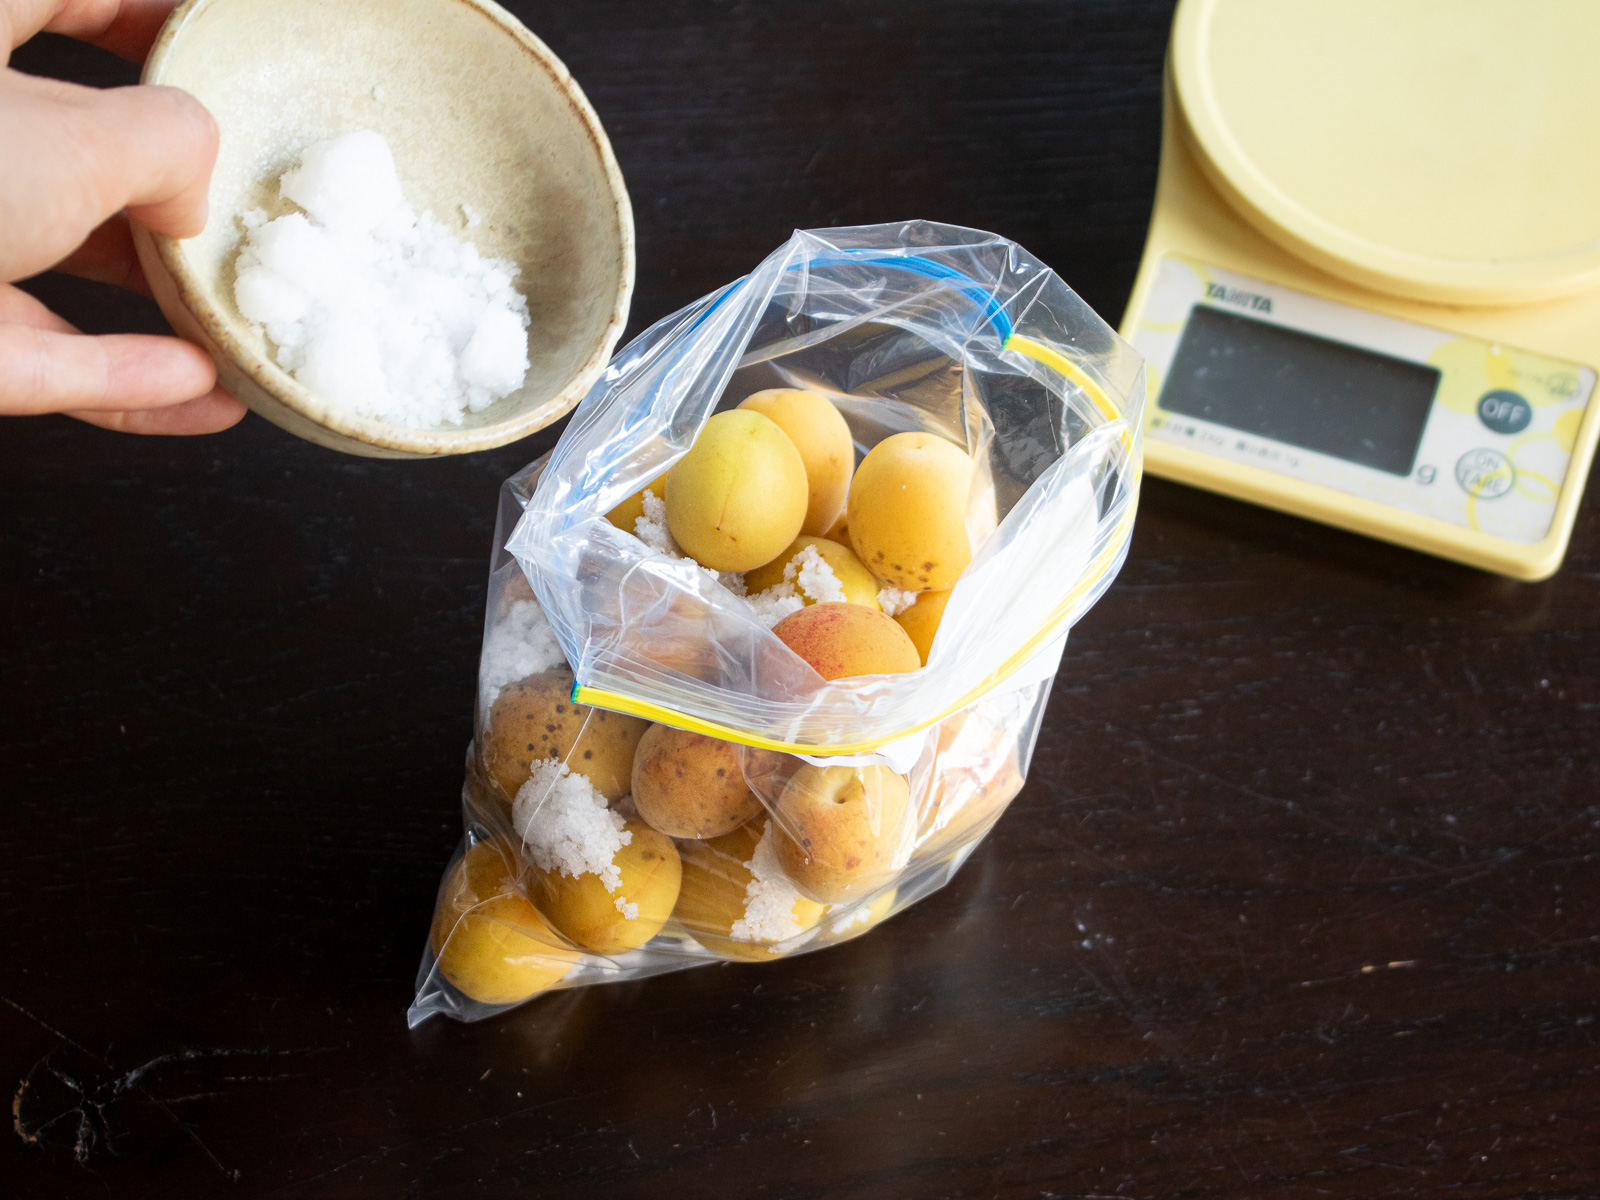
● Coarse salt — Choose a natural or sea salt with minerals, not refined table salt. For this recipe, salt is 10% of the weight of your ume. See About the Salt in the basic recipe for more on choosing the right salt.
● Shochu, vodka, or white ume plum vinegar — Helps the pickling liquid rise quickly and prevents mold. In Japan, white liquor (ホワイトリカー) is the most common choice. If you've made umeboshi before and have leftover white ume plum vinegar, that works too.
Exact quantities are in the recipe card below. 👇
▶︎ Equipment
➤ For preparation:
- Large bowl — for washing the ume
- Plate or colander — for drying
- Kitchen towel
- Knife
➤ For drying:
➤ For pickling & storage:
- Ziploc bag (medium size)
- Container — to hold the bag, catch any leaks, and act as a weight
📖 Instructions
The steps follow the basic umeboshi recipe — with two key differences: a Ziploc bag instead of a container, and the refrigerator instead of room temperature.
- Wash
- Gently wash the ripe ume in water to remove any surface dirt.
- Dry
- Transfer to a plate or colander and let dry completely. Patting with a kitchen towel speeds things up.

- Trim
- Cut away any damaged or discolored spots with a knife.
- Remove the stem ends using a bamboo skewer or the tip of a knife.
- Coat
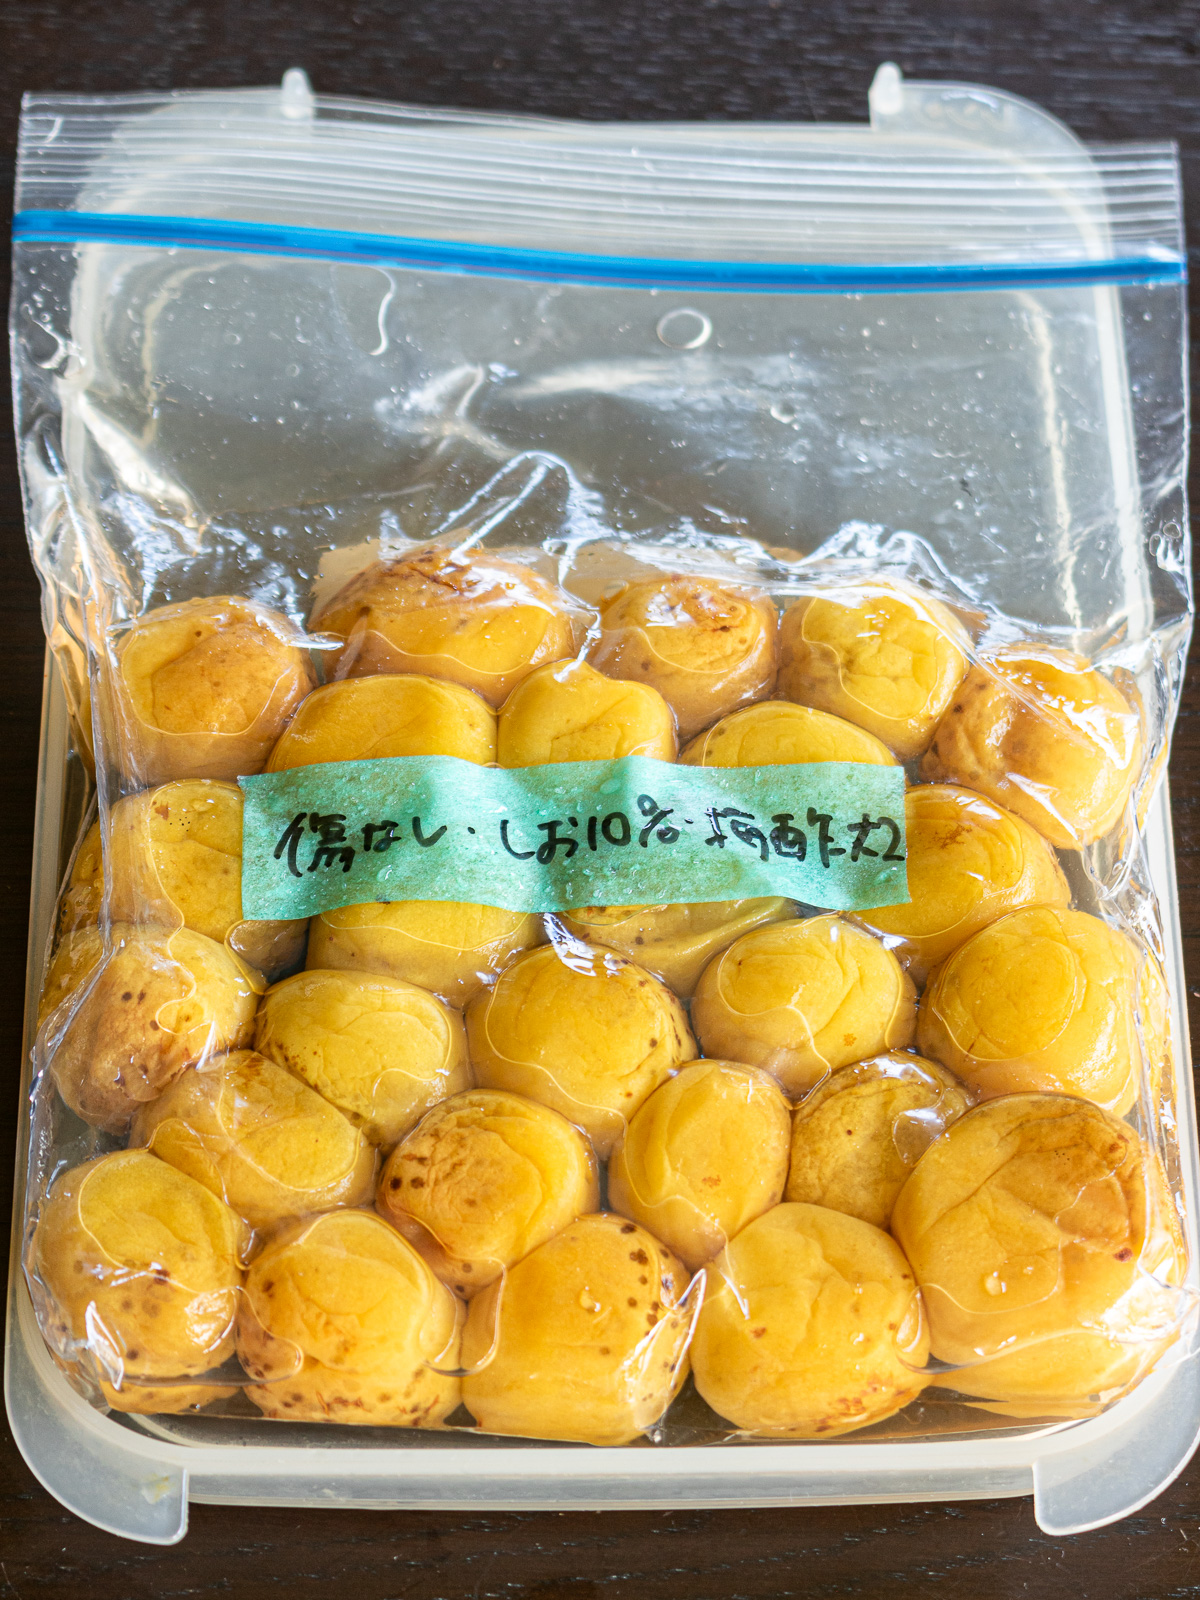
- Place the ume in a Ziploc bag.
- Add the shochu or white plum vinegar, then the salt.
- Mix
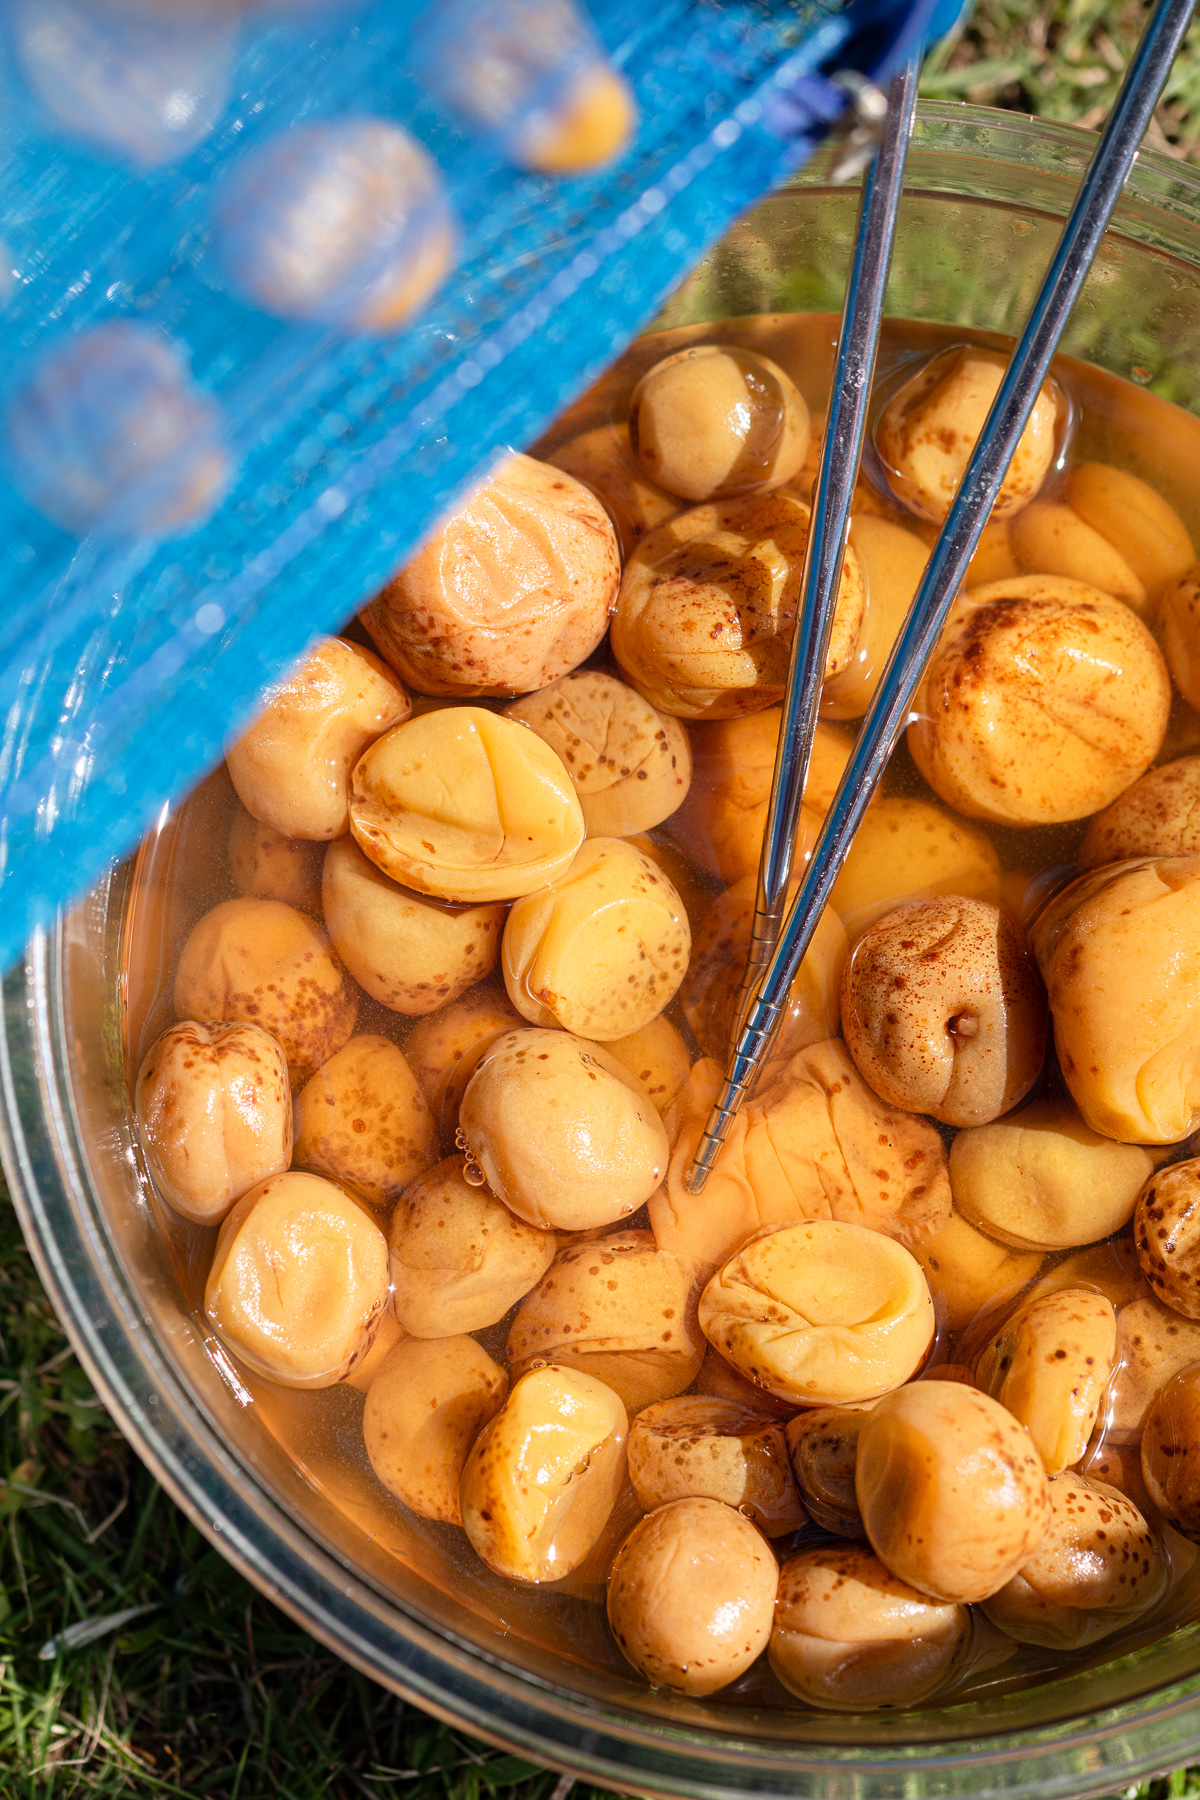
- Loosely seal the bag and gently roll the ume around from the outside until the salt clings to every plum in a damp, even coat.
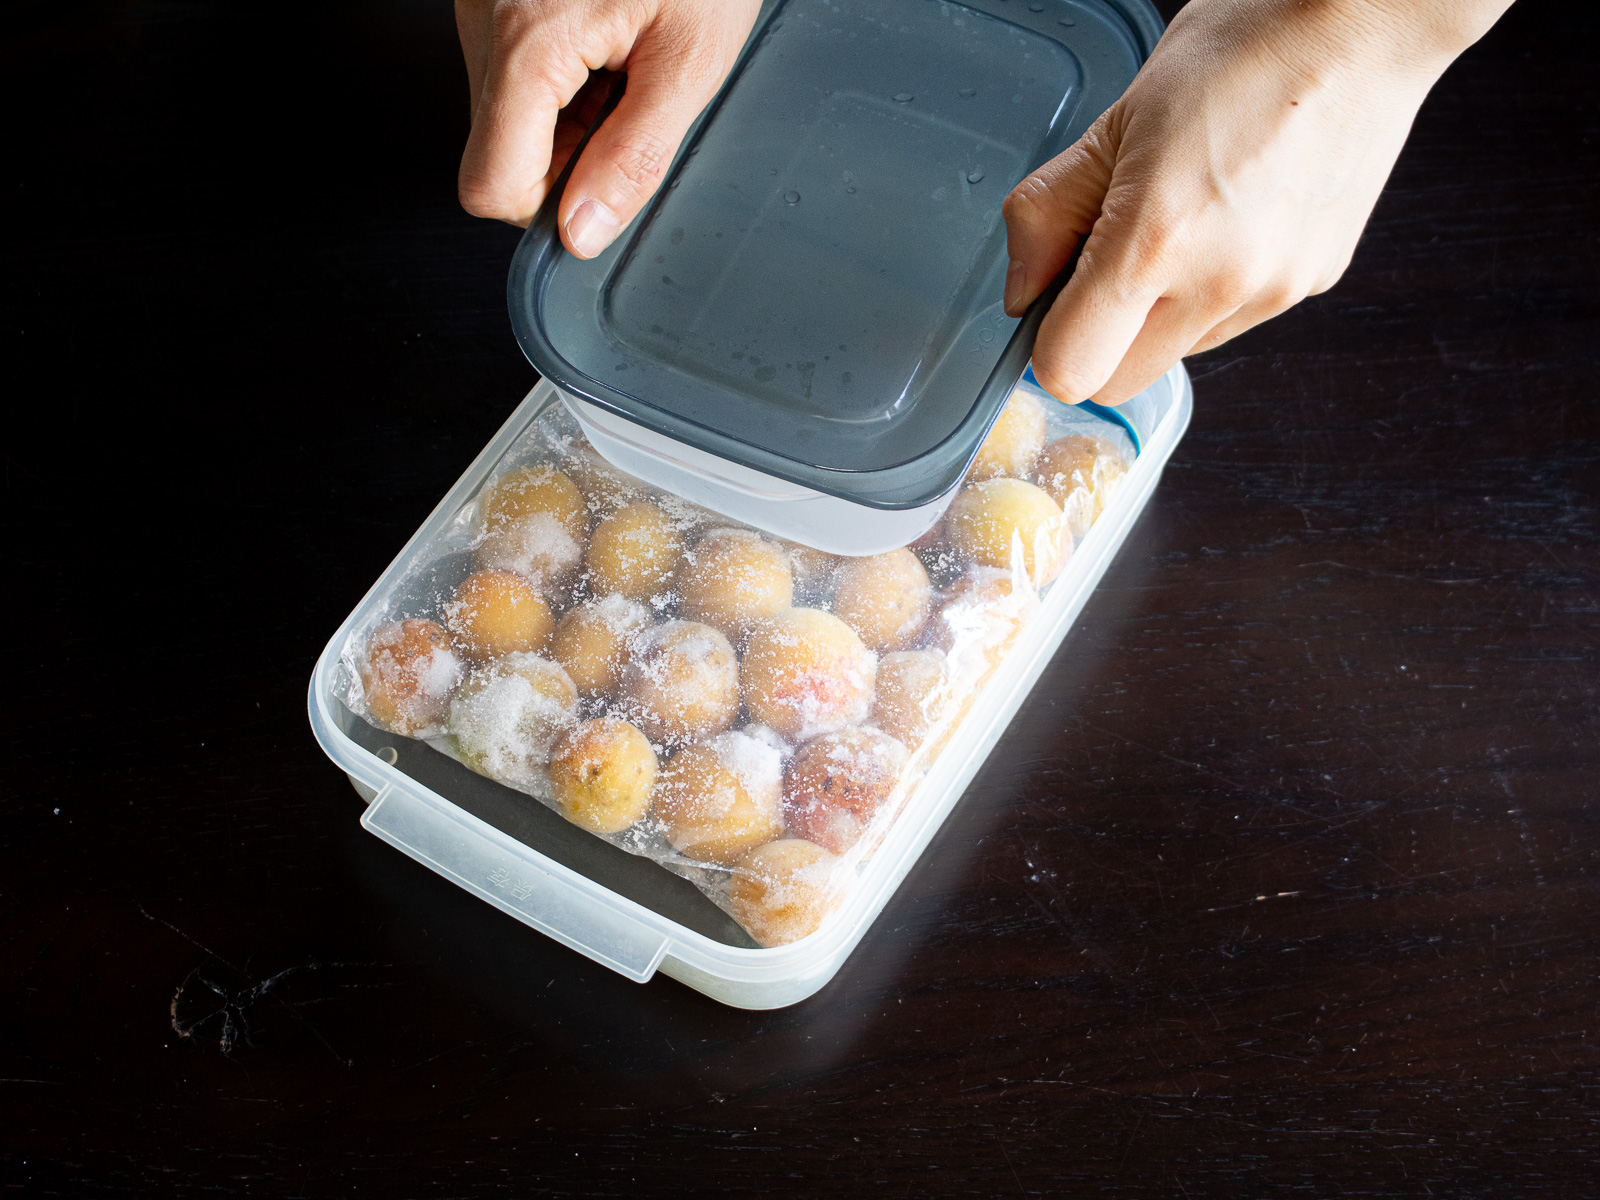
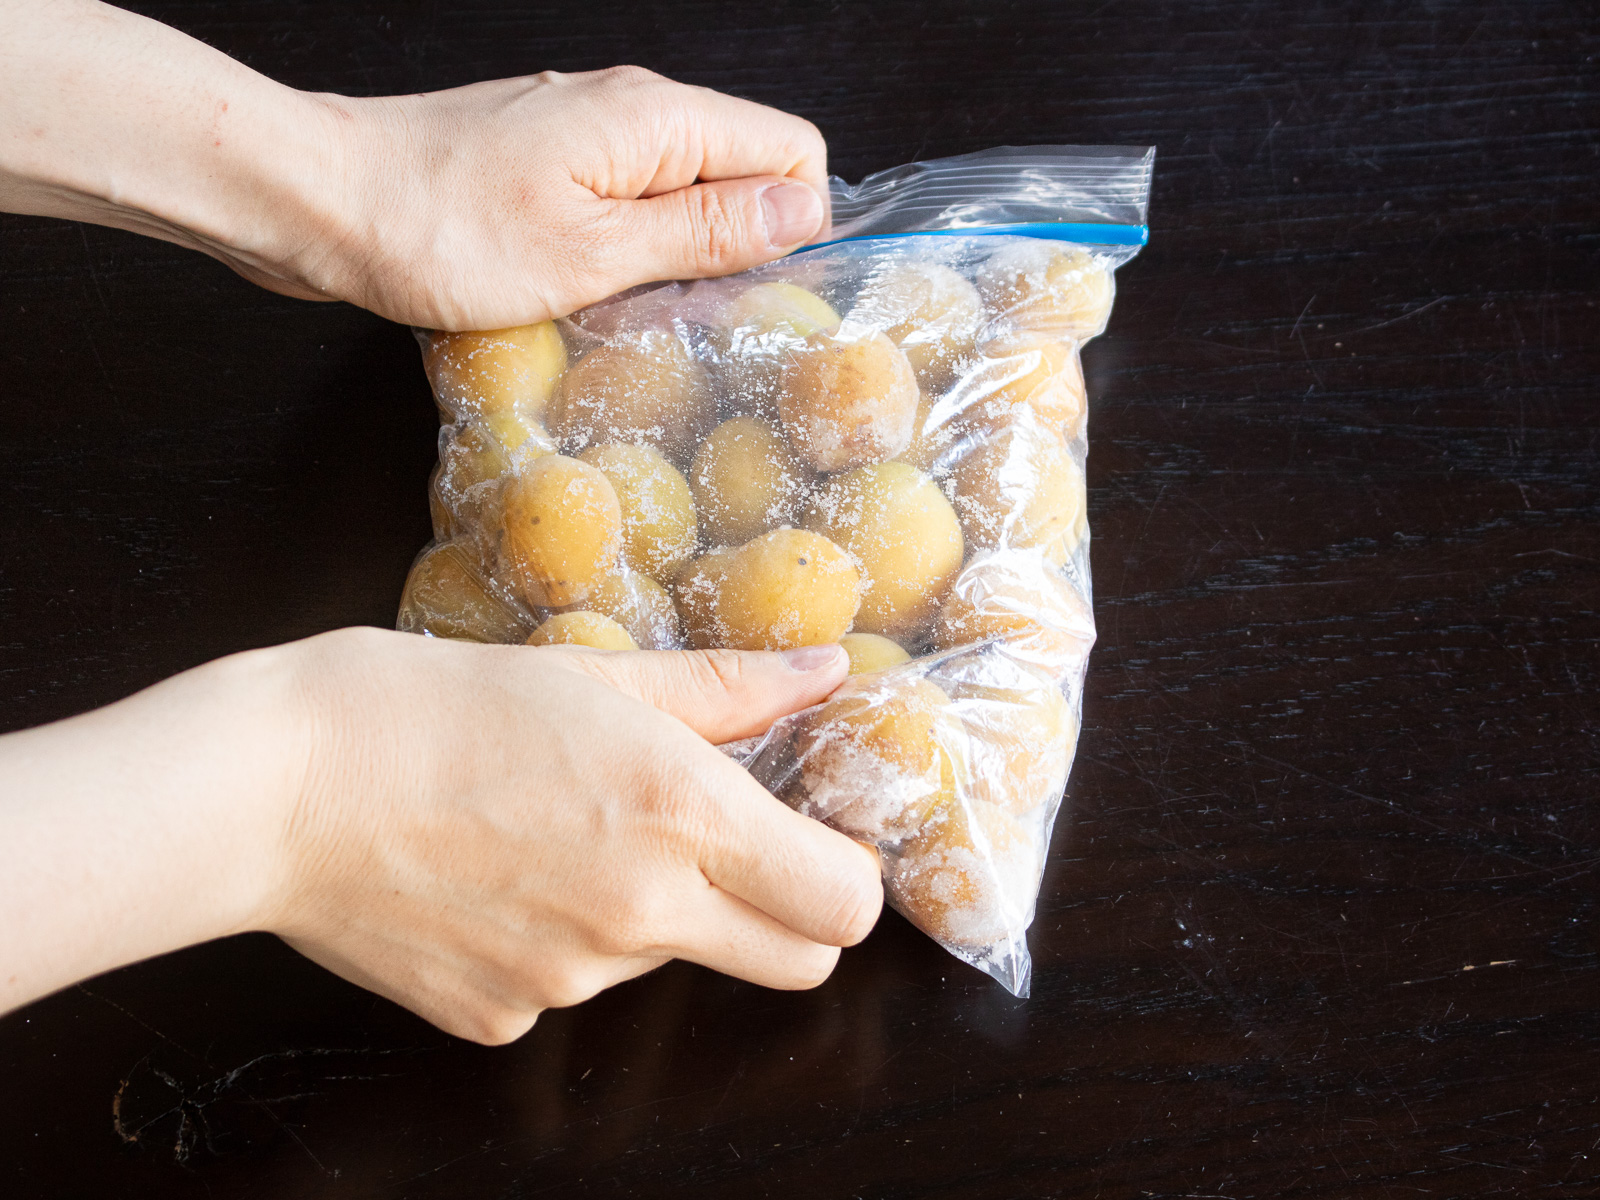
- Weight
- Place the bag seal-side up inside a container.
- Set another container filled with water on top as a weight — aim for 1–2 times the weight of the ume. A container that fits neatly inside works best, so the pressure reaches every plum evenly.
- Store in the refrigerator.
- Flip the bag once a day until the pickling liquid fully rises.
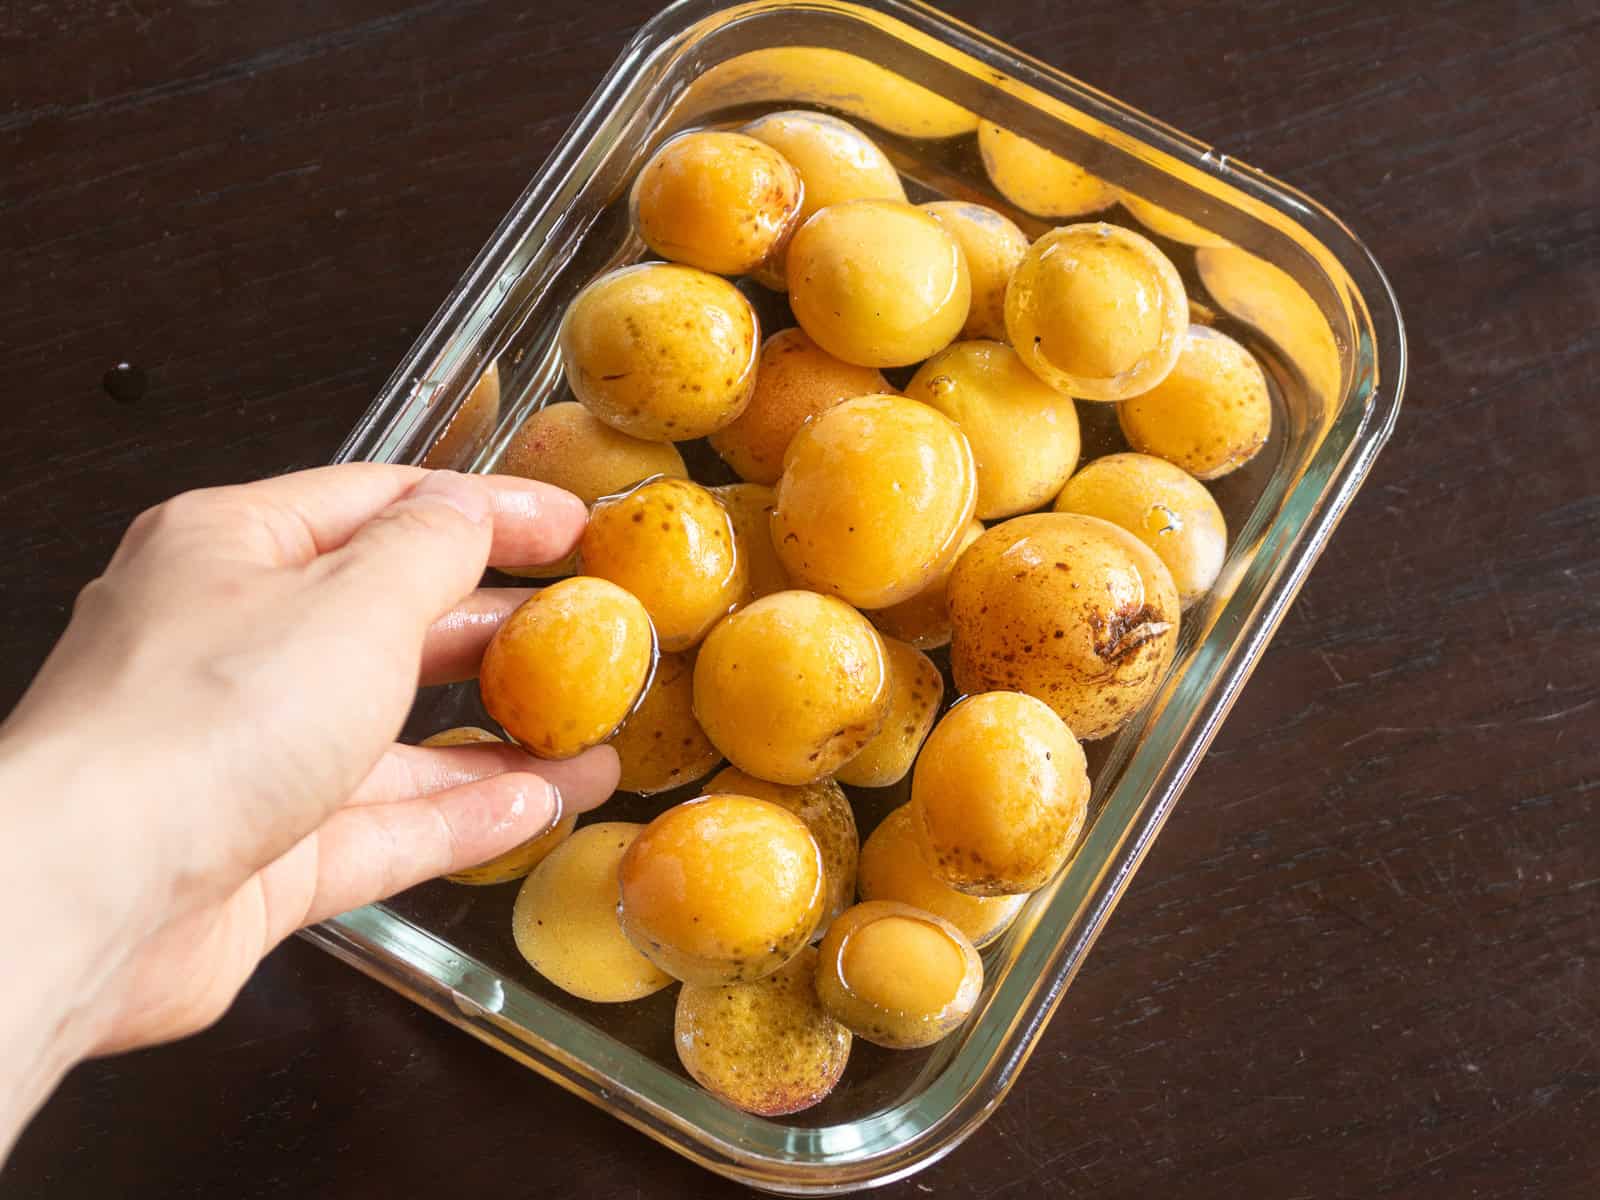
- Wait
- Once the liquid has fully risen, reduce the weight by half.
- Continue pickling until midsummer — ideally late July to early August, when heat and sunlight are at their peak.
🌿 At least one month of pickling lets the salt work its way through the flesh and the skins to firm up. Patience here makes all the difference.
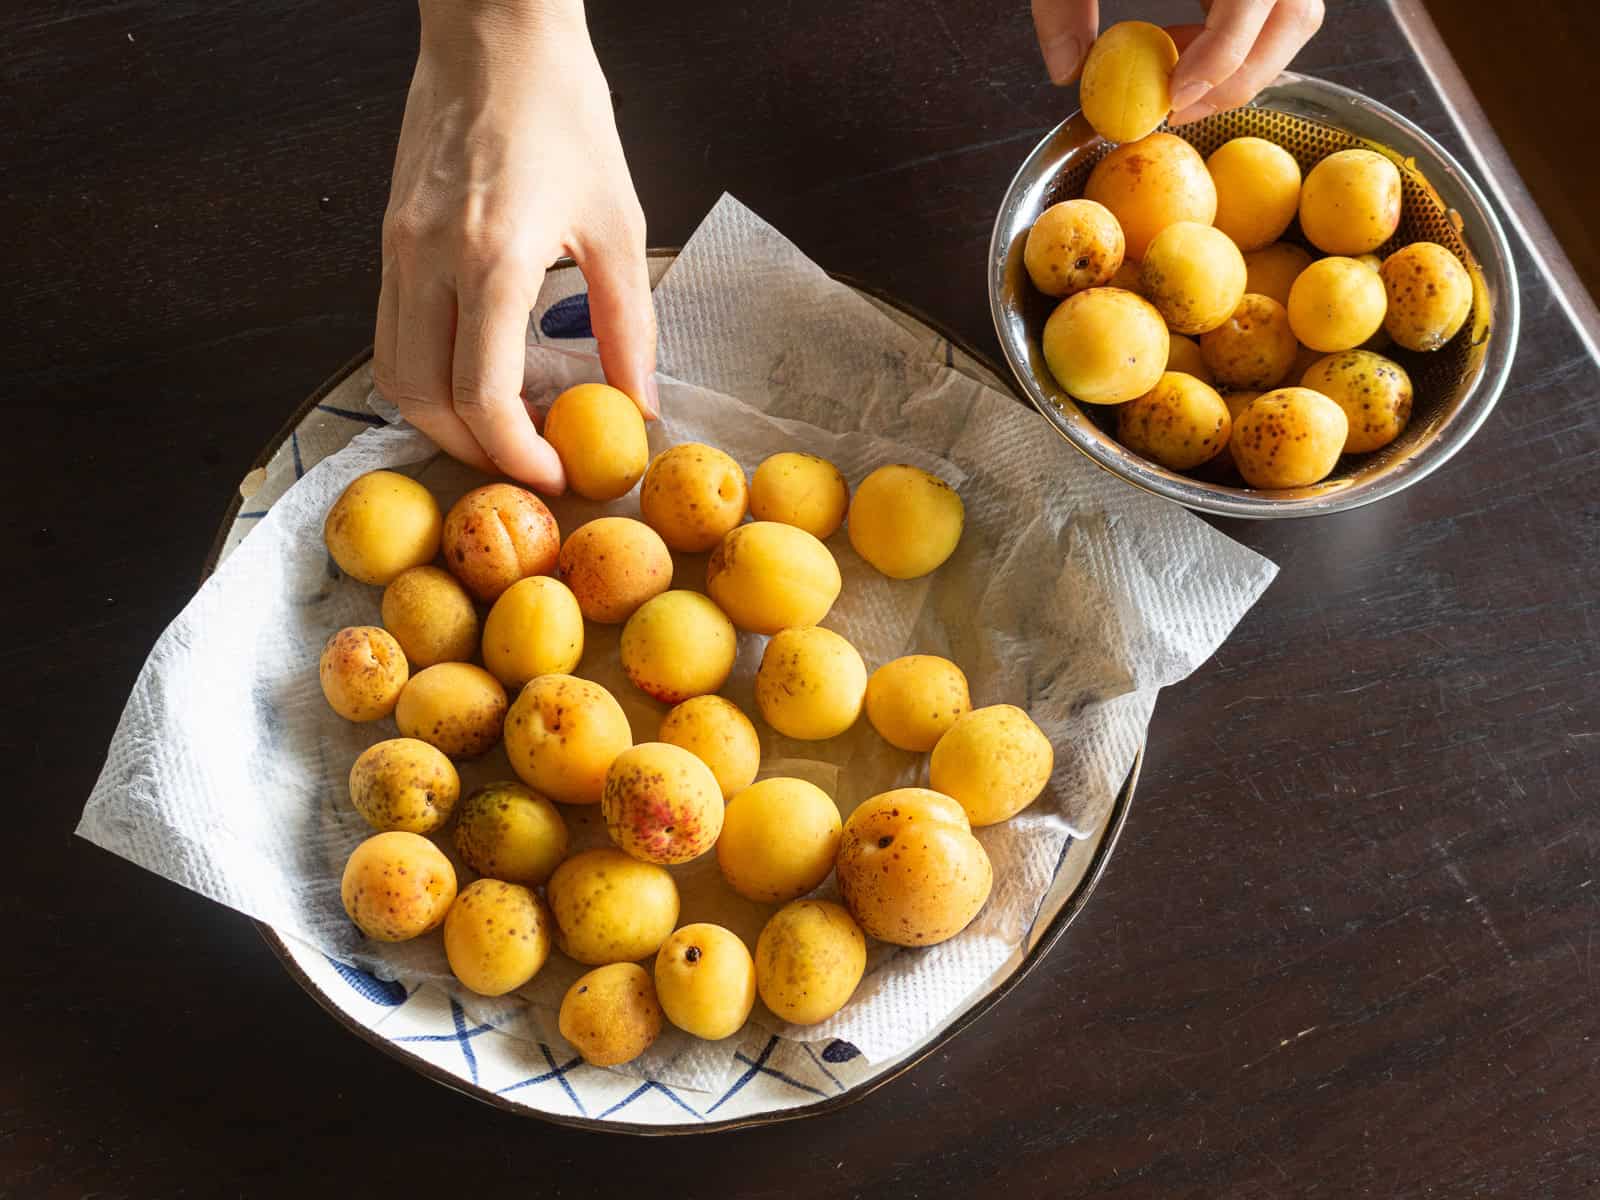
- Arrange
- Pick a run of at least three clear, sunny days.
- Arrange the ume in a single layer on a rack or net, making sure they don't touch each other.
🌿 Choose a spot with good airflow and direct sunlight.
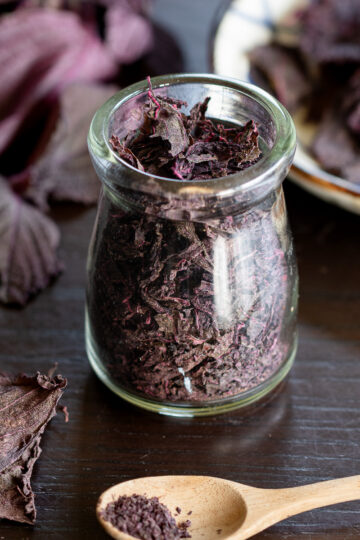
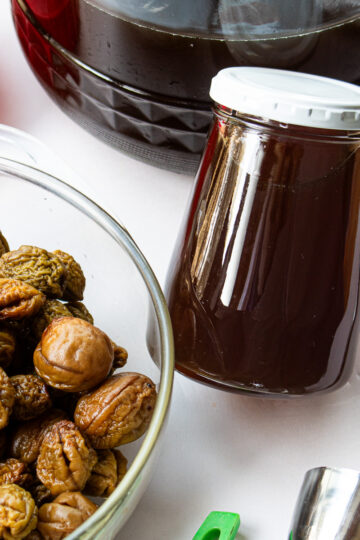
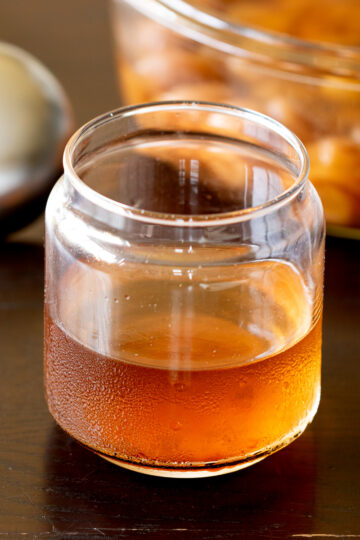
🌿 Pour the remaining liquid — white ume plum vinegar — into a clean jar and refrigerate. See recipes using white ume plum vinegar.
- Dry
- Bring the ume indoors on the first and second nights.
- On the third night, leave them outside under the eaves to catch the night dew — this gives the skins a softer, more supple finish.
🌿 Flip each plum once a day to dry all sides evenly.

The best time is in the morning, just before bringing them outside — the skins are less likely to stick to the rack and tear.
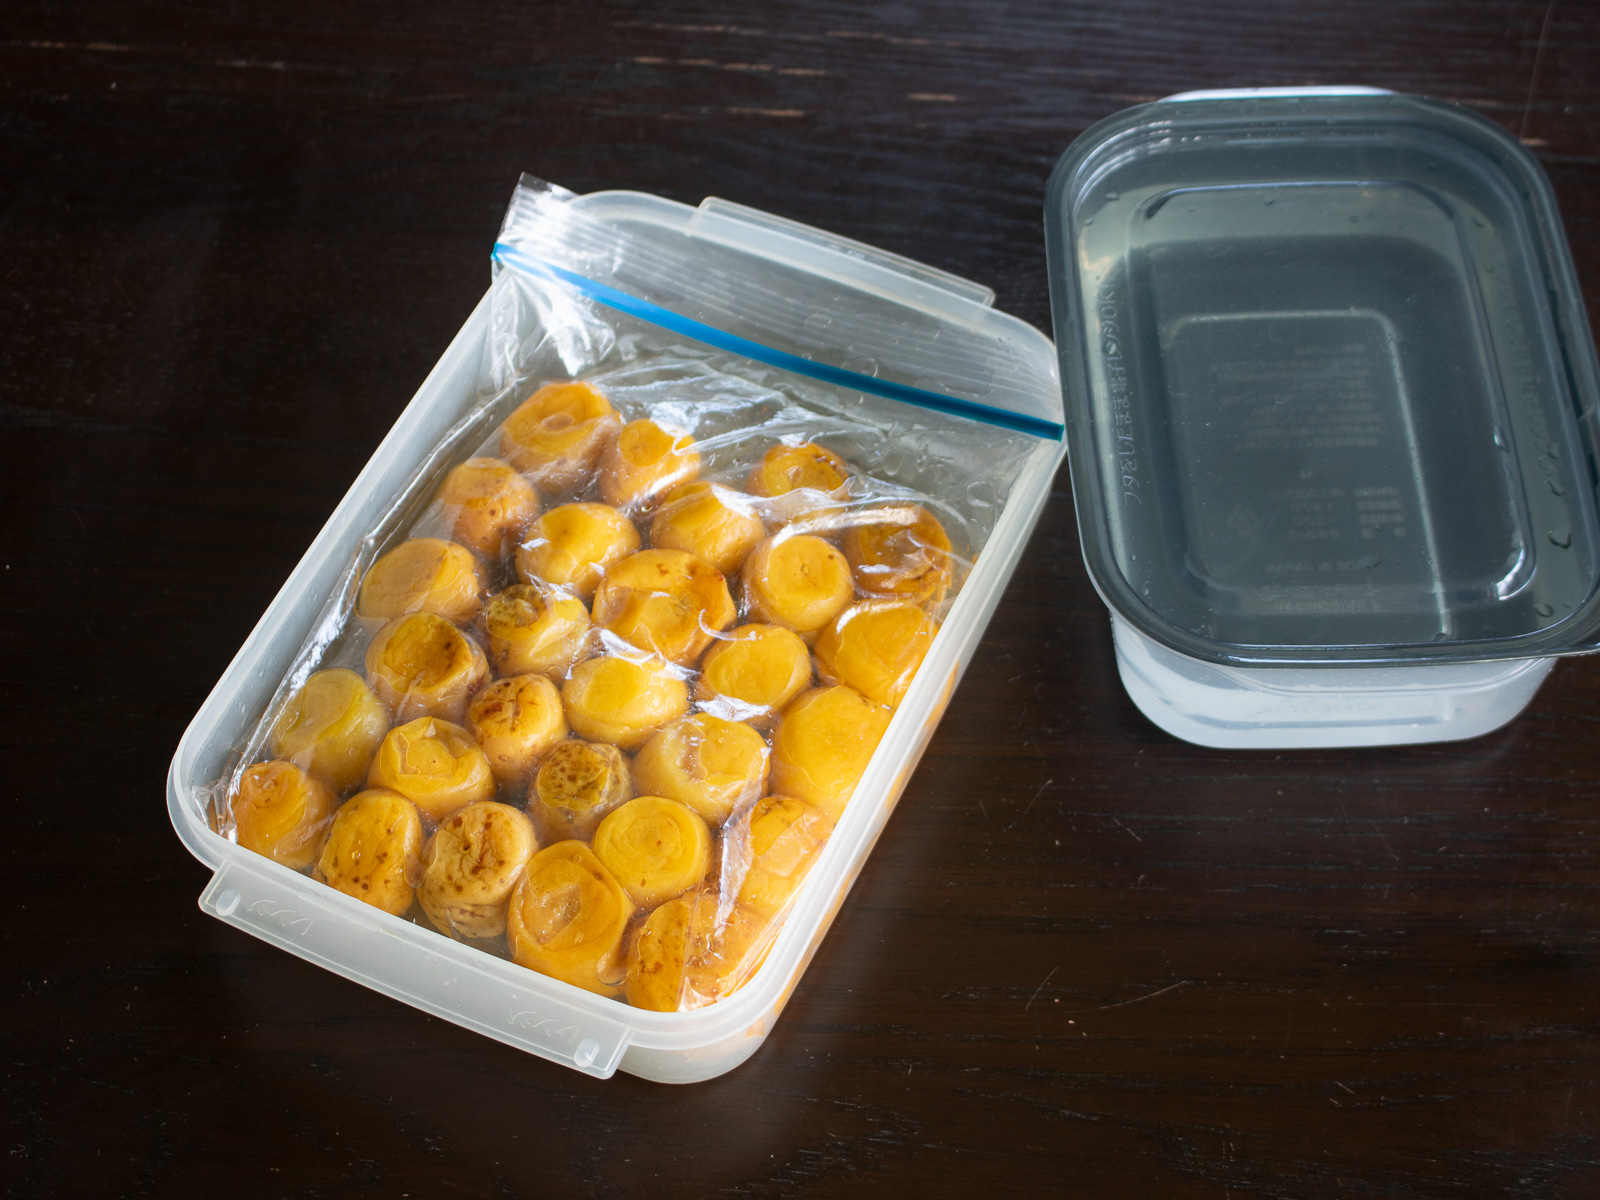
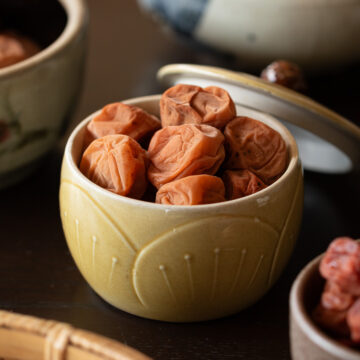
- Store
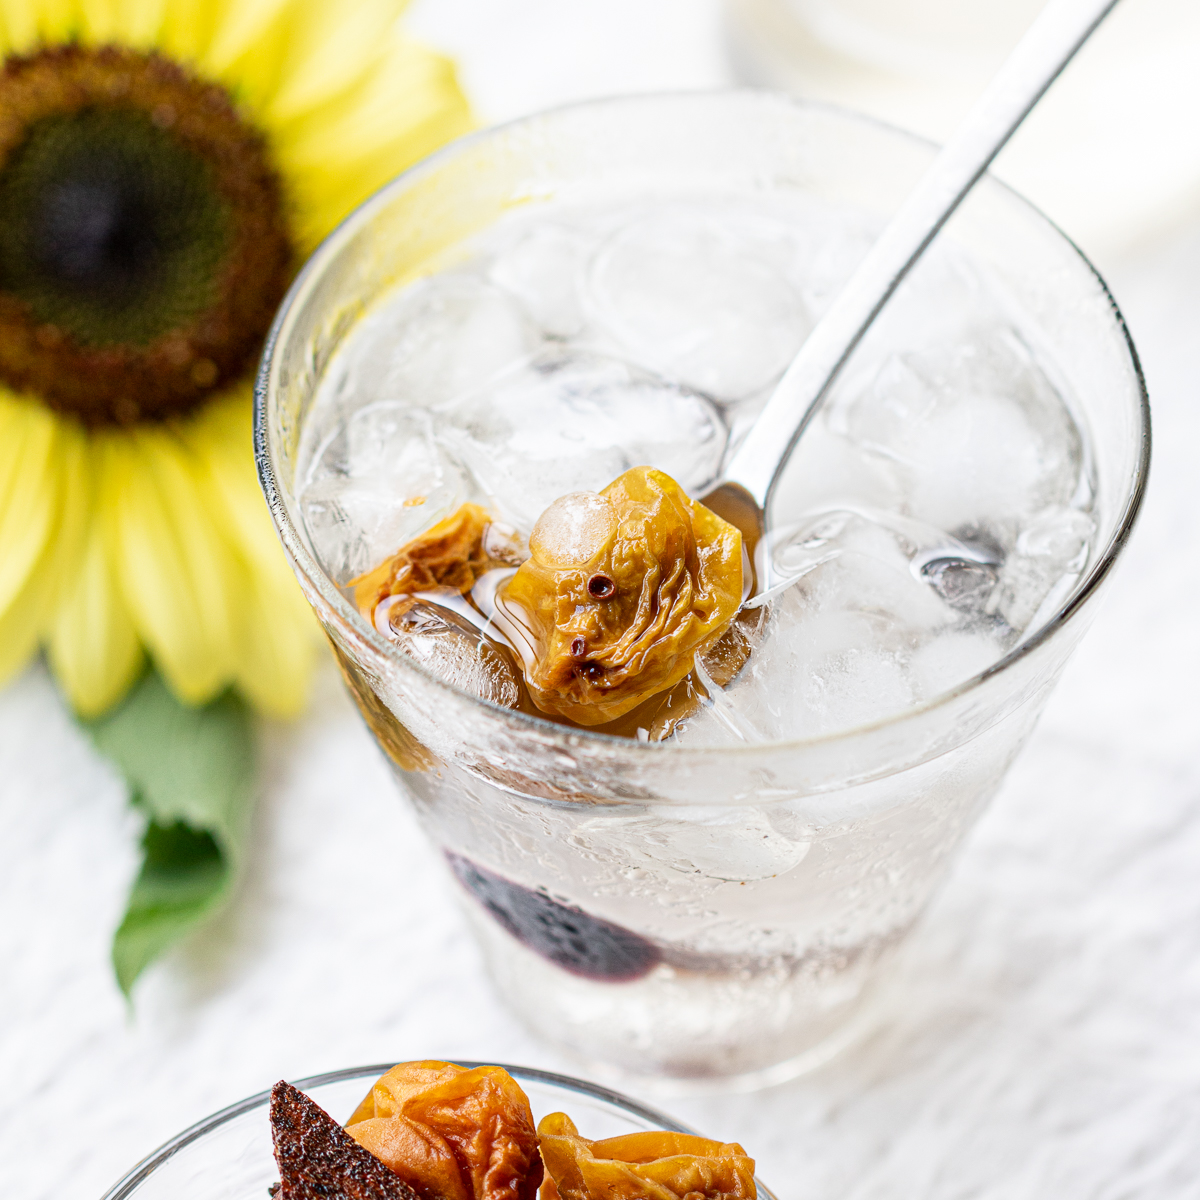
- On the morning of day four, transfer the finished low-sodium umeboshi to a clean container and refrigerate.
- They're ready to eat right away, but a month of resting rounds out the saltiness nicely.
🌿 Ceramic or glass containers are best.

🥣 Equipment Notes
- Use acid-resistant containers — ceramic or glass are ideal. Avoid metal.
- Any metal tools that come into contact with the ume should be washed immediately after use.
📌 Storage Tips
Because the salt content is lower, low-sodium umeboshi are best kept in the refrigerator — a small trade-off for a softer, more delicate flavor.
- Store in a ceramic or glass container in the refrigerator. Avoid metal lids or containers.
- Plan to use them within six months to a year.
- White ume plum vinegar from this batch should also be refrigerated. If the liquid reaches the lid, a layer of plastic wrap can help protect it.
📓 Kitchen Notes|What a Difference the Liquid Makes
■ The Experiment
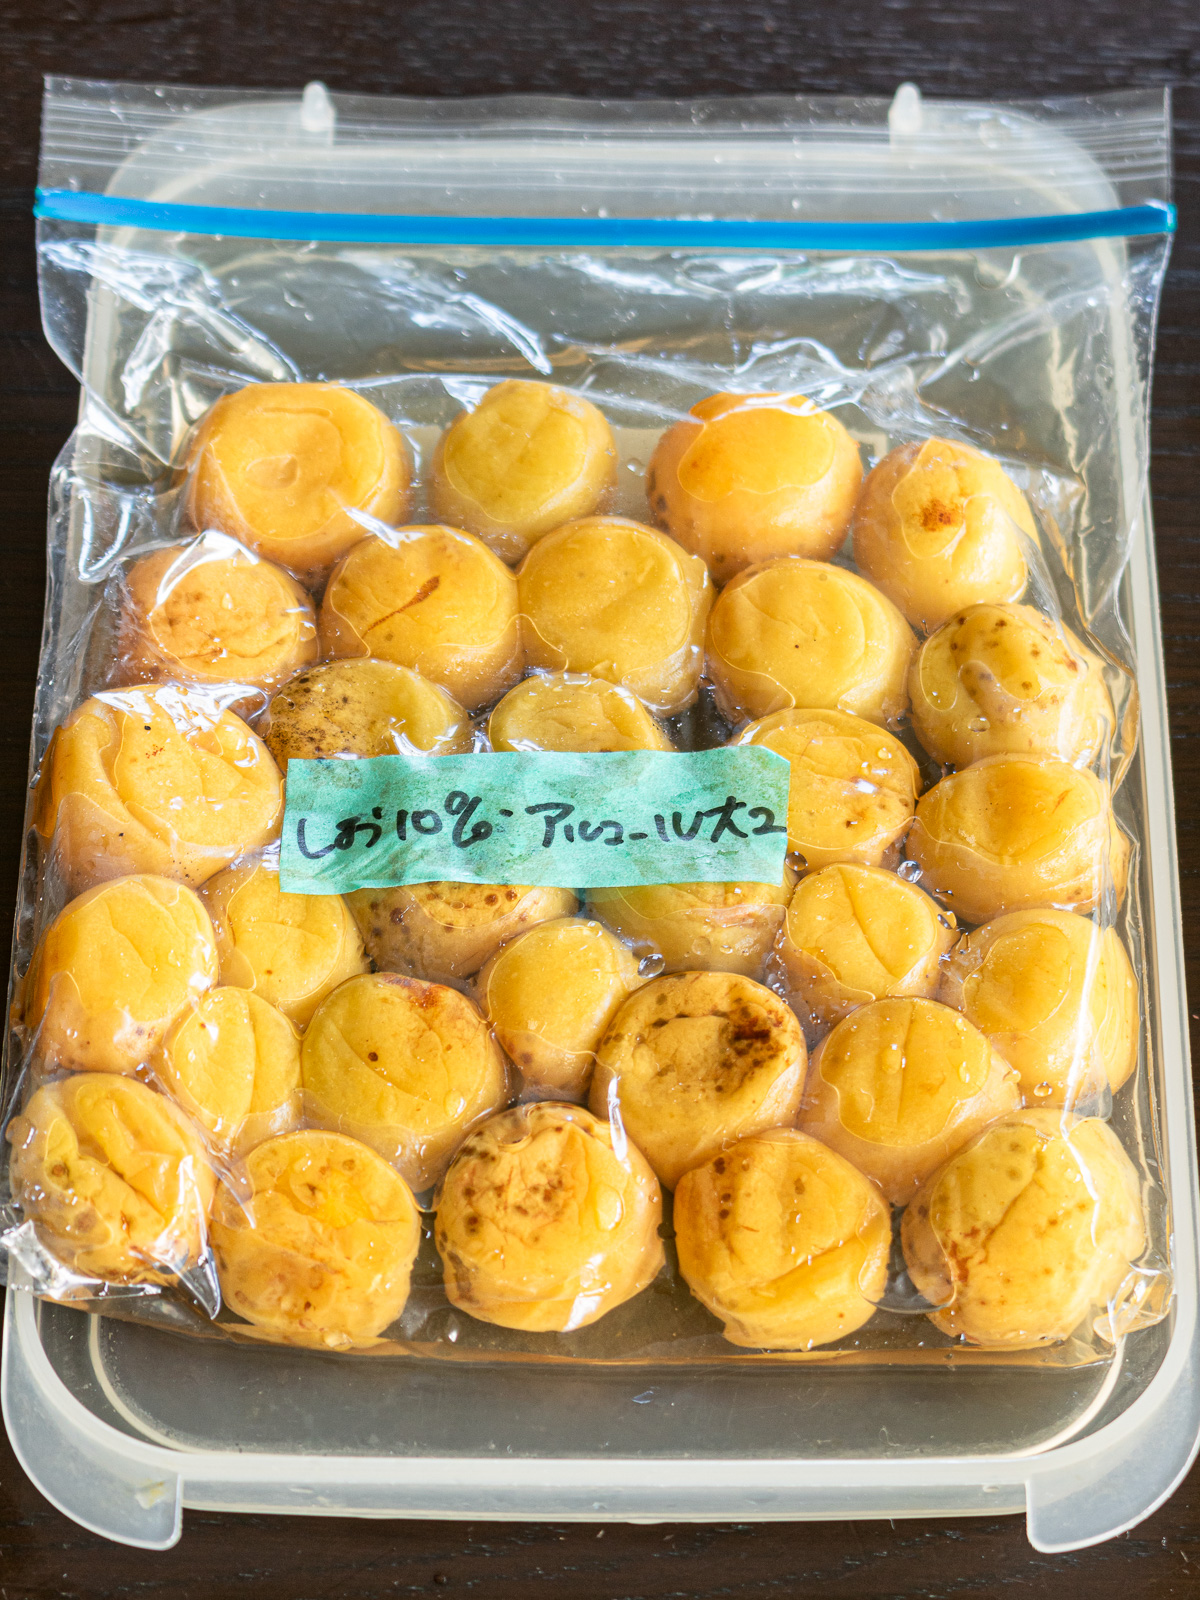
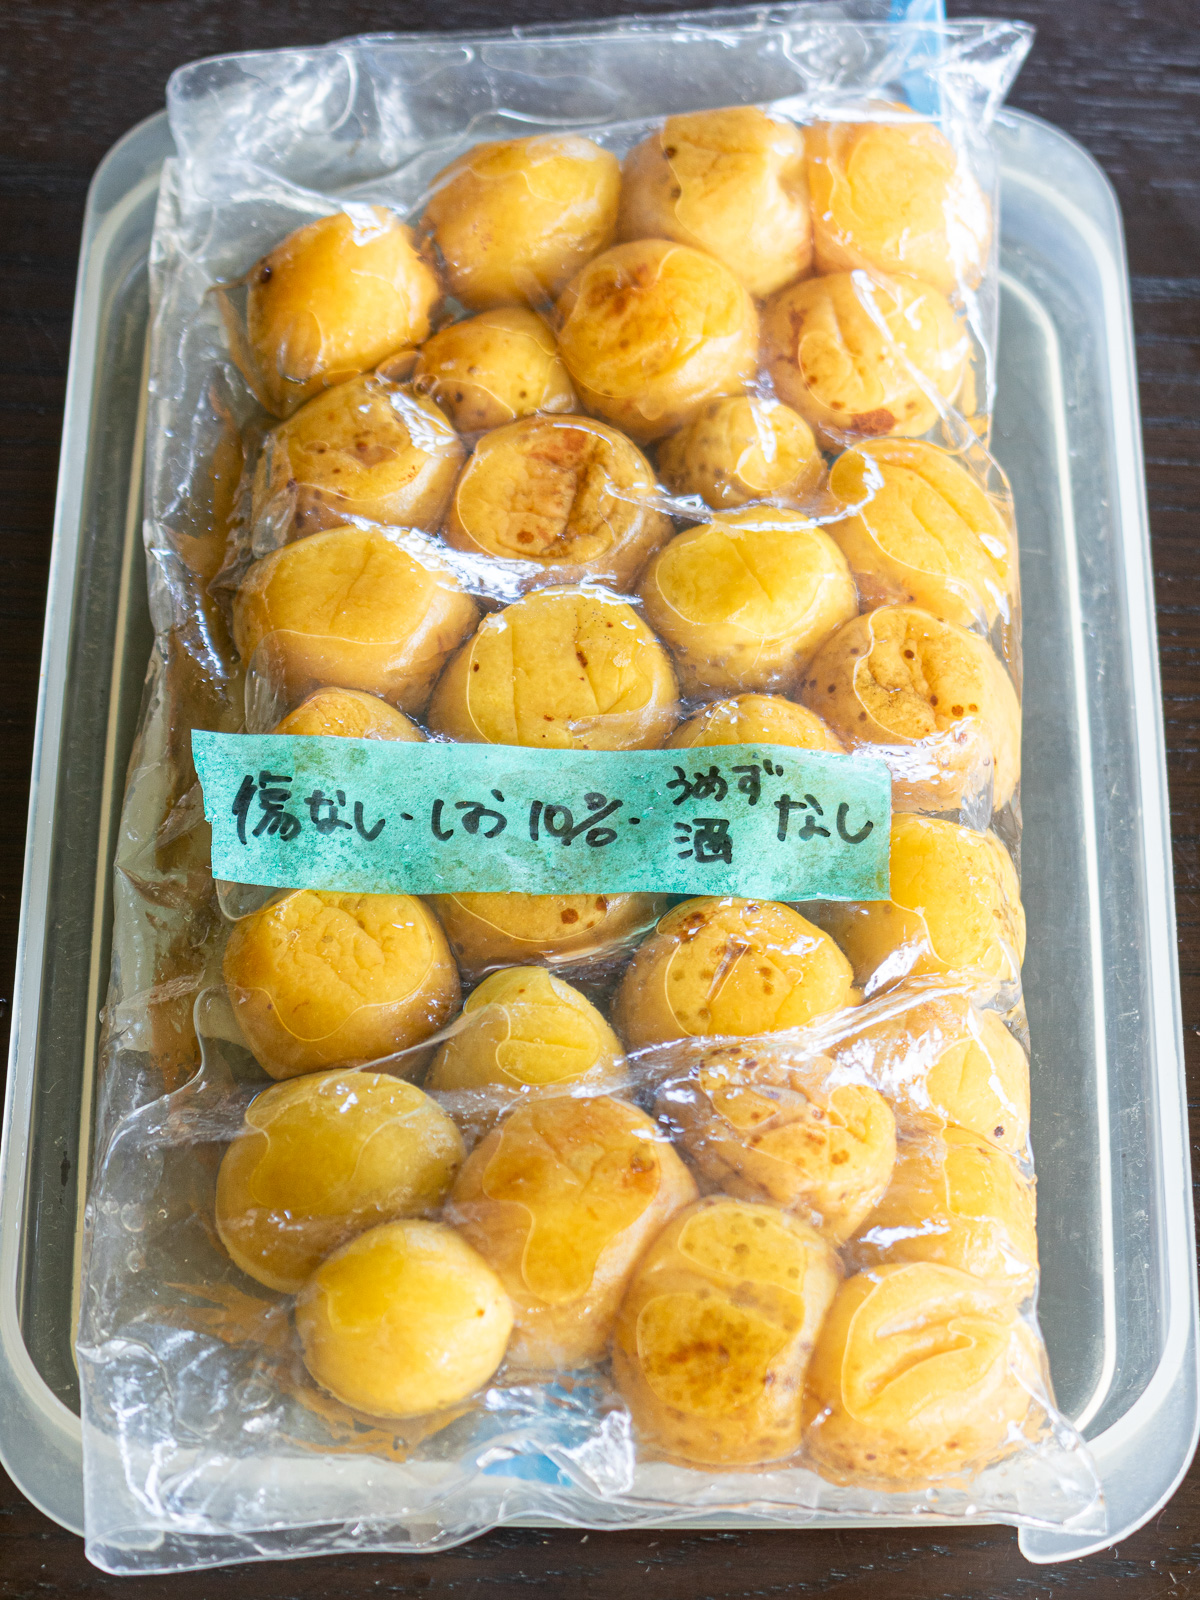
This year I pickled four separate batches side by side to compare the results:
- White ume plum vinegar — 2 tbsp
- Shochu — 2 tbsp
- White ume plum vinegar — 1 tbsp
- No liquid — salt only
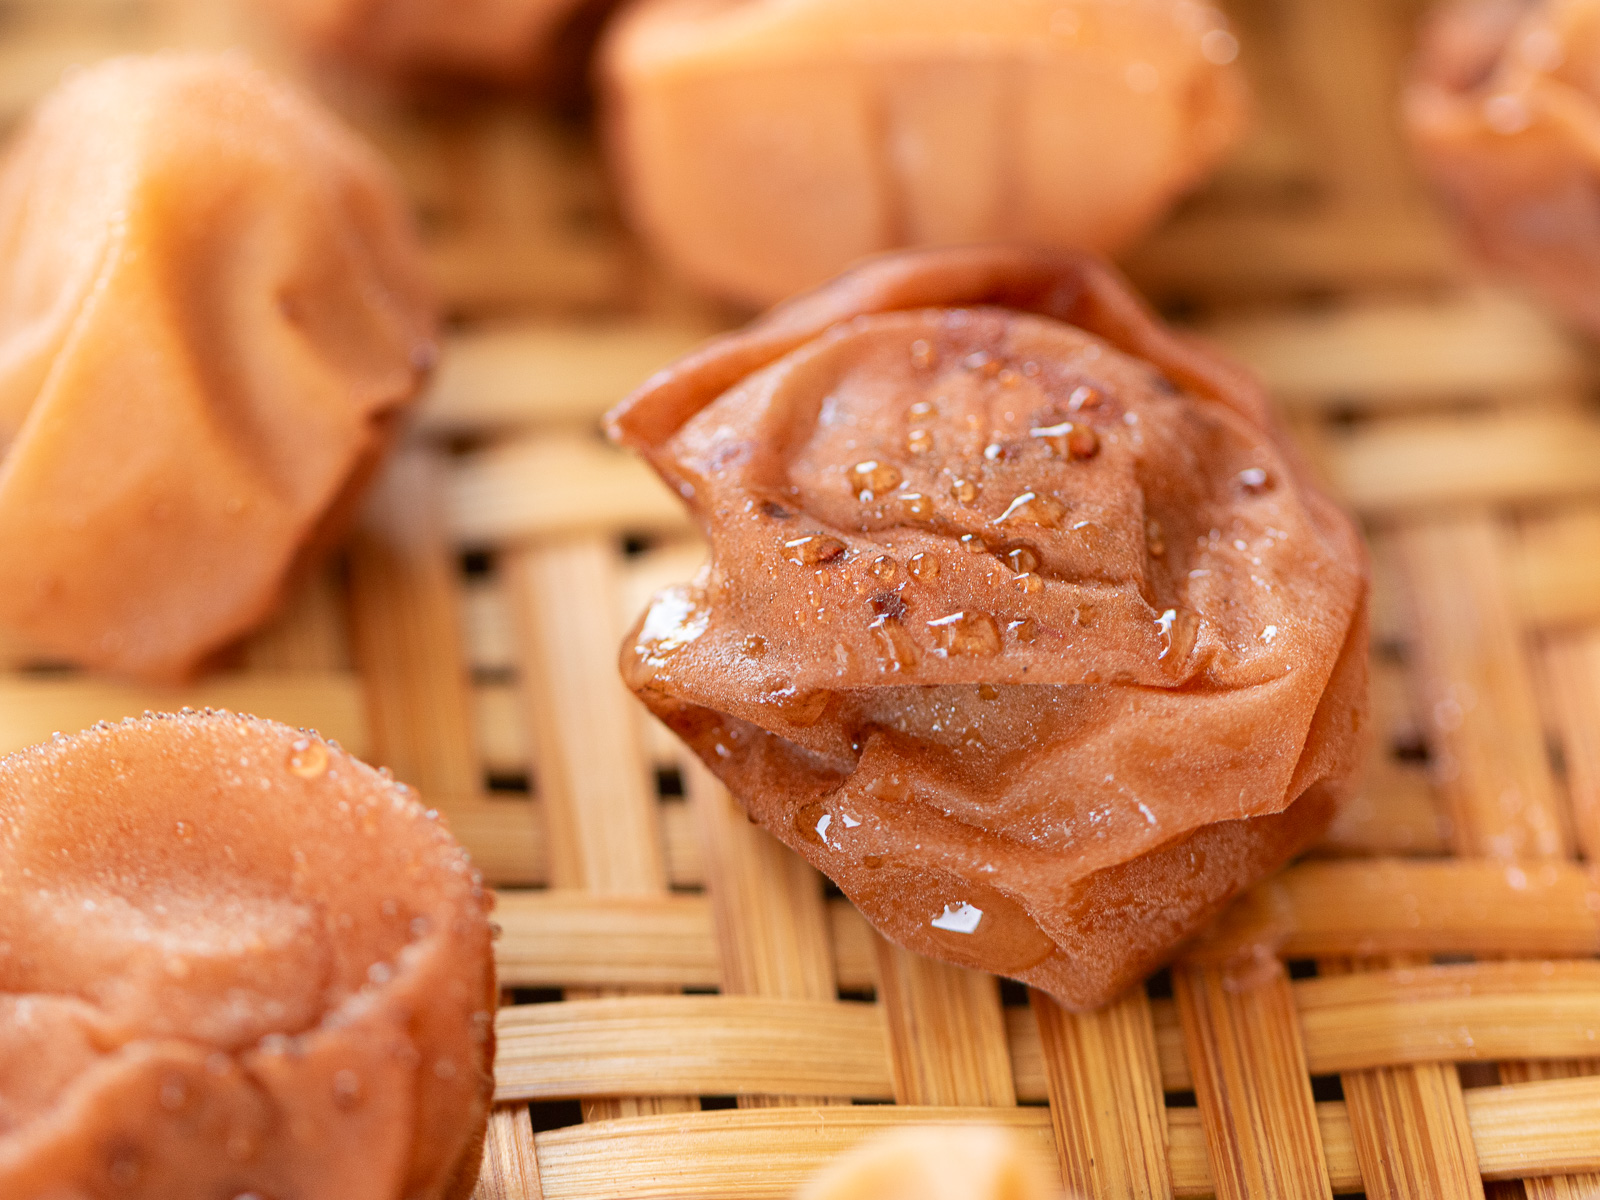
■ Softness
Ranked from softest to firmest after drying:
- White ume plum vinegar, 2 tbsp ← softest
- Shochu, 2 tbsp
- White ume plum vinegar, 1 tbsp
- No liquid ← firmest
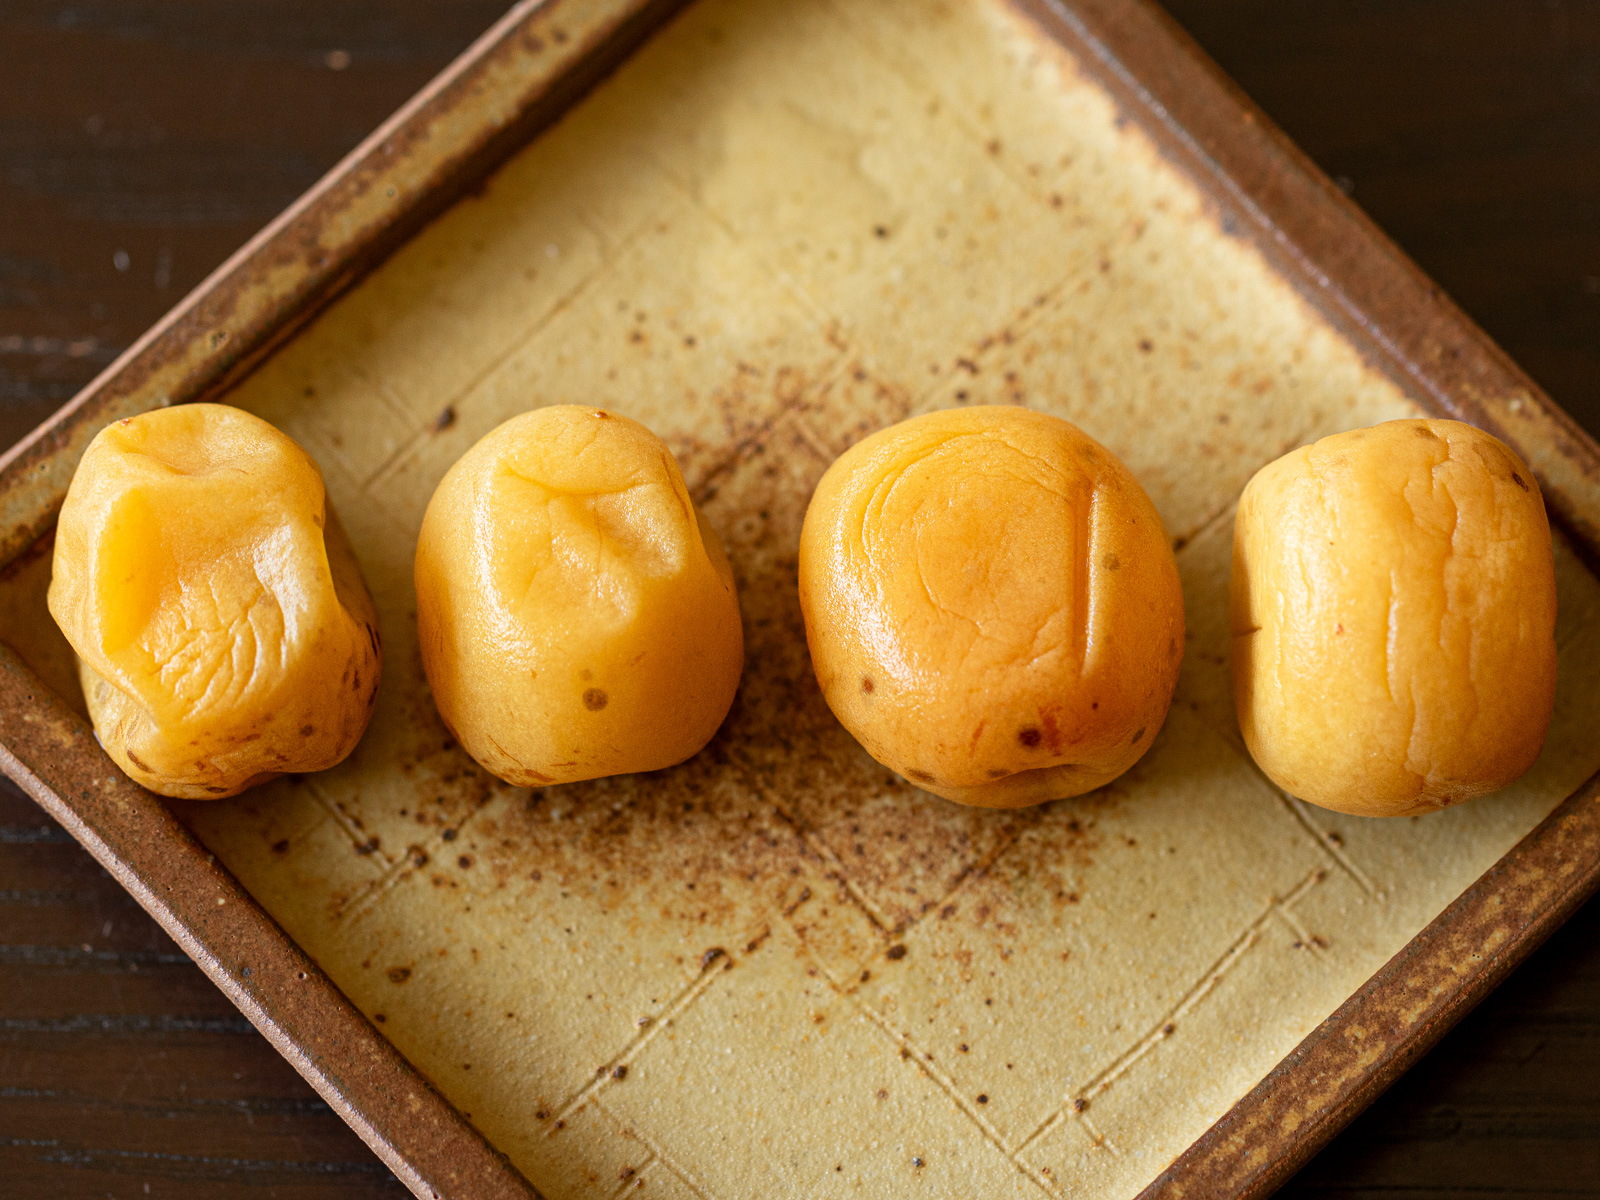
Before drying (softest to firmest →)
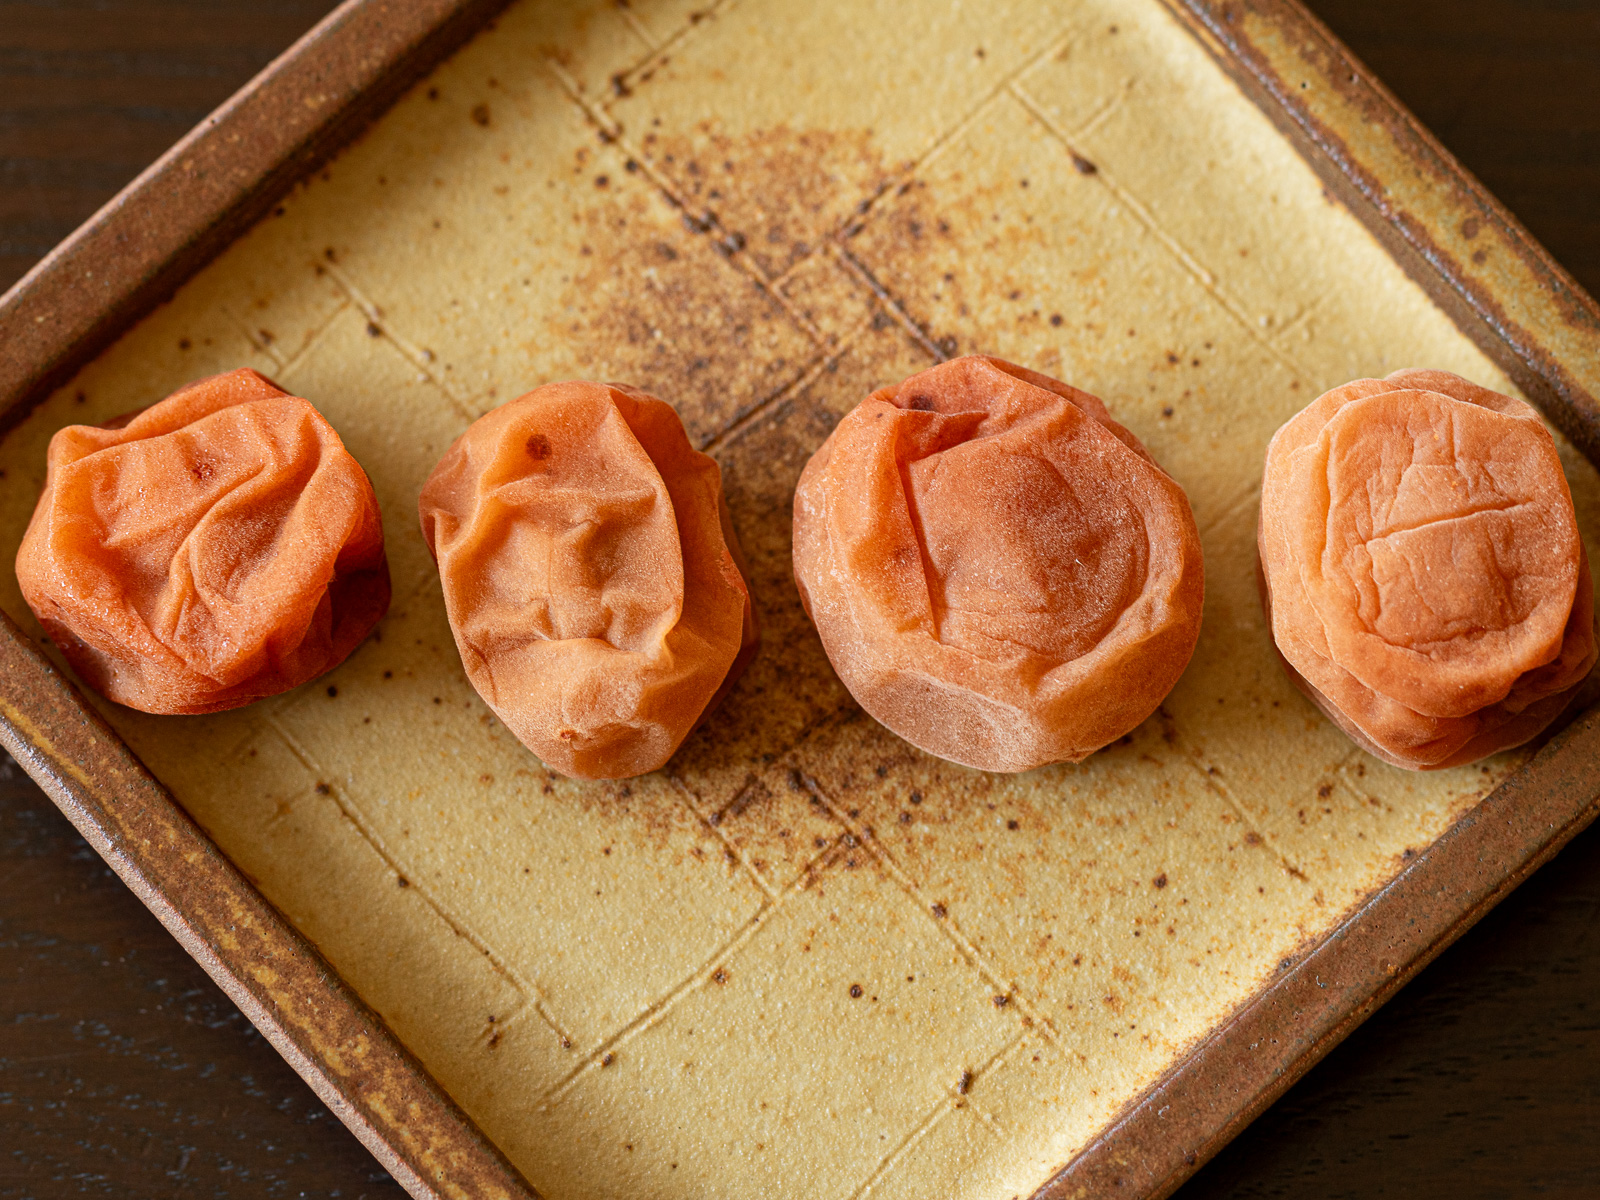
After drying (softest to firmest →)
■ What I noticed
White ume plum vinegar helped the salt penetrate faster, and produced the softest result of the four.
Without any liquid, the pickling liquid was slow to rise even with a weight, and the plums stayed firm for a long time.
Ripeness plays a role too, but the presence or absence of liquid made a significant difference to the final texture.
■ If you skip the liquid
Without shochu or white ume plum vinegar, the pickling process takes considerably longer:
- Increasing the weight helps, but only to a limited extent
- After two months, the plums may still feel firm
If you choose to go this route, be prepared for a long wait — keep a close eye on them in the refrigerator and don't rush.

■ The slow transformation of low-sodium umeboshi
Salt takes time to work its way through to the center of each plum.
At least one month in the refrigerator is recommended — even if the pickling liquid rises quickly, that doesn't mean the plums are ready. Keep this in mind when planning your ume season.
As for timing the drying: If you're in a hurry, you don't have to wait for the whole batch to be ready — start drying the softer plums first, and work through the rest as they come along.
Watching each plum slowly change week by week is one of the quiet pleasures of the whole process.
🌿 In short: Using a liquid — white ume plum vinegar or shochu — makes a real difference to how smoothly the pickling goes. With low-sodium umeboshi especially, time and patience are part of the recipe.
📚 Q&A
Yes. Cut away any damaged or discolored areas well into the clean flesh.
The tradeoff: trimmed ume are more fragile during both pickling and drying, and the flesh breaks down more easily.
On the plus side, they tend to release liquid faster. It really comes down to how you're feeling that year, and how much time you have.
Going below 10% increases the risk of mold even in the refrigerator. If you'd like to reduce the salt further, adding a small amount of sugar is one way to help with preservation.
For low-sodium umeboshi, I start pickling early in the season and aim to dry them during midsummer — late July to early August.
The reason is practical: I don't want the refrigerator occupied by umeboshi any longer than necessary.
Higher-salt batches, on the other hand, I leave until autumn and dry them in the softer autumn light. The skins hold up better and the finished plums come out fuller and softer.
Cloudy liquid is usually nothing to worry about — it tends to happen with damaged ume or very ripe fruit.
The flavor is generally fine. If it bothers you, strain the liquid through a clean cloth before storing.
A container filled with water works well and distributes the weight evenly. A bag of sugar or a plate also works. If you're pickling multiple bags at once, stacking them on top of each other is another option.

If you feel like whispering a thought, asking a question, or simply saying hello — the comment section is always open 📮
🫙 More Ume Recipes
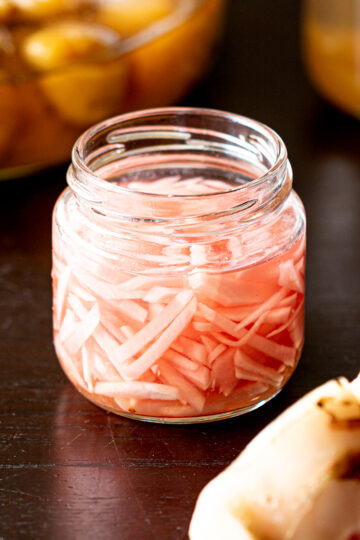
Recipes using white ume plum vinegar
The liquid left over from pickling — white ume plum vinegar — is one of the best byproducts of homemade umeboshi. Don't let it go to waste:
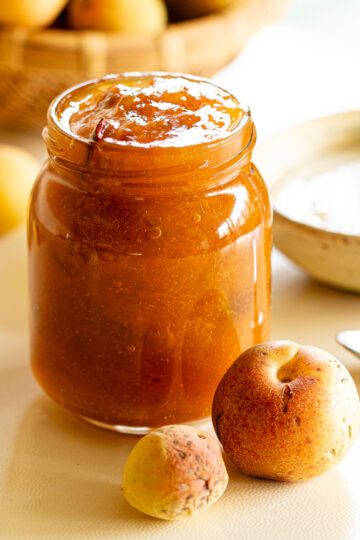
Other ume preserves
From simple ume syrup to recipes using leftover ume:
Recipes using umeboshi
A few vegan recipes for when appetite is low:

✏️ Recipe Card
How to Make Low-Sodium Umeboshi (Japanese Pickled Plums)
Equipment
- Large bowl - for washing the ume
- Plate or colander - for drying
- kitchen towel
- Knife
- Bamboo rack or net
- Ziploc bag (medium size)
- Container - to hold the bag, catch any leaks, and act as a weight
Ingredients
- 500 g ripe ume plums
- 50 g coarse salt (10% of ume weight)
- 2 tablespoon shochu (or vodka, or white ume plum vinegar)
Instructions
Preparing the ume
- Wash: Gently wash the ripe ume in water to remove any surface dirt.500 g ripe ume plums
- Dry: Transfer to a plate or colander and let dry completely. Pat dry with a kitchen towel to speed things up.
- Trim: Cut away any damaged or discolored spots with a knife. Remove the stem ends using a bamboo skewer or the tip of a knife.
- Coat: Place the ume in a Ziploc bag. Add the shochu (or white ume plum vinegar), then the salt.50 g coarse salt2 tablespoon shochu
- Mix: Loosely seal the bag and gently roll the ume around from the outside until the salt clings to every plum in a damp, even coat.
- Weight: Place the bag seal-side up inside a container. Set another container filled with water on top as a weight — aim for 1–2 times the weight of the ume.
- Refrigerate: Store in the refrigerator. Flip the bag once a day until the pickling liquid fully rises.
- Wait: Once the liquid has fully risen, reduce the weight by half. Continue pickling until midsummer — ideally late July to early August, when heat and sunlight are at their peak.
Drying the umeboshi
- Arrange: Pick a run of at least three clear, sunny days. Arrange the ume in a single layer on a rack or net, making sure they don't touch each other.
- Dry: Bring the ume indoors on the first and second nights. On the third night, leave them outside under the eaves to catch the night dew — this gives the skins a softer, more supple finish.
- Store: On the morning of day four, transfer the finished low-sodium umeboshi to a clean container and refrigerate. They can be eaten right away, but a month of resting rounds out the saltiness nicely.
Notes
- Spread them out in a single layer on a plate or colander, leaving as much space as possible between each plum.
- Leave in a cool, dark, well-ventilated spot for a few days.
- Turn them once a day if you can, so they don't sit in moisture.

If this recipe made its way into your kitchen, and you'd like to share that moment, feel free to tag @veginveganvegun or use #vegin_vegan_vegun.
Your quiet stories inspire me deeply 🕊️
☕ Closing
Making low-sodium umeboshi taught me more about salt than any other kitchen project.
Less of it means slower transformation, more careful watching, and more patience. But the finished plums — softer, more delicate — feel like a reward for that attention.
If you've already made the standard umeboshi, this is a natural next step. And if this is your first time — the standard recipe is a good place to start.
Either way, there's always something new to learn from the ume 🍃


Comments
No Comments