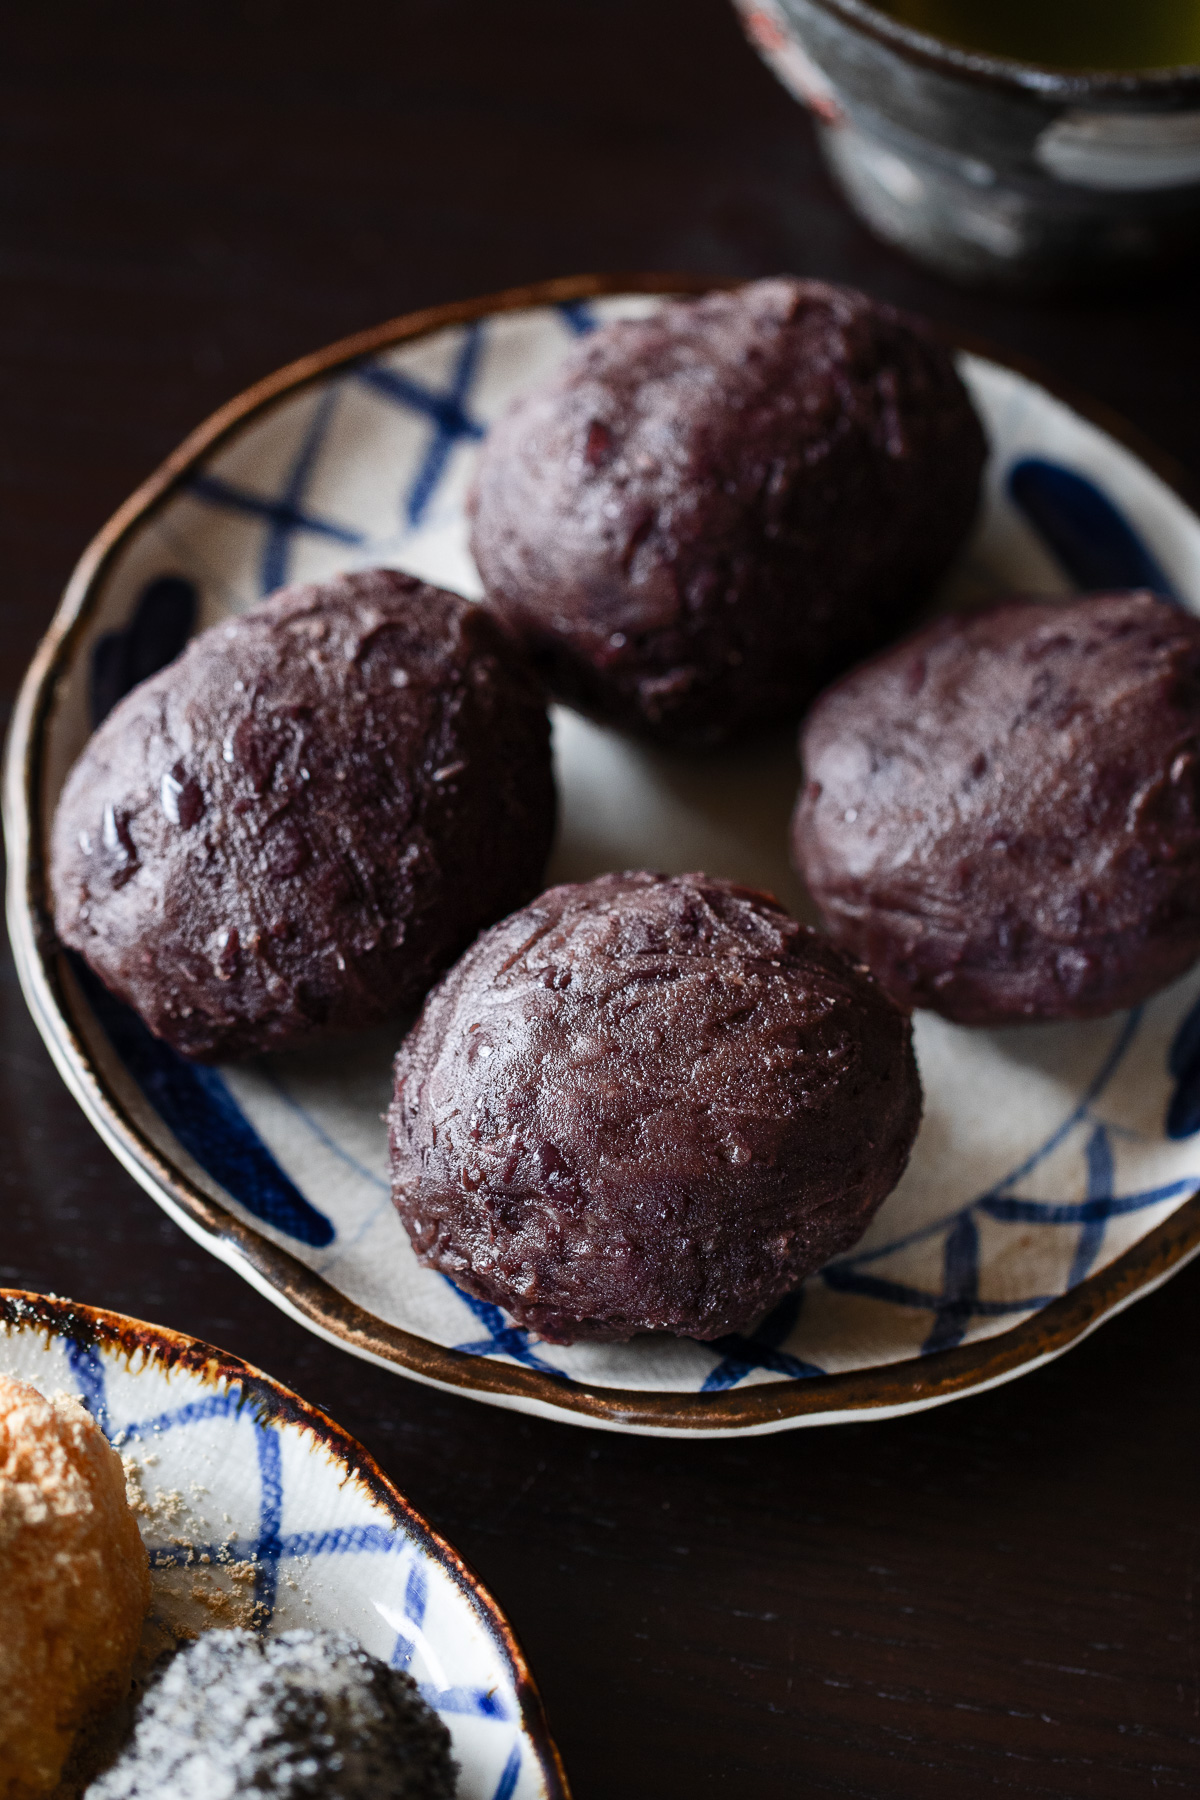
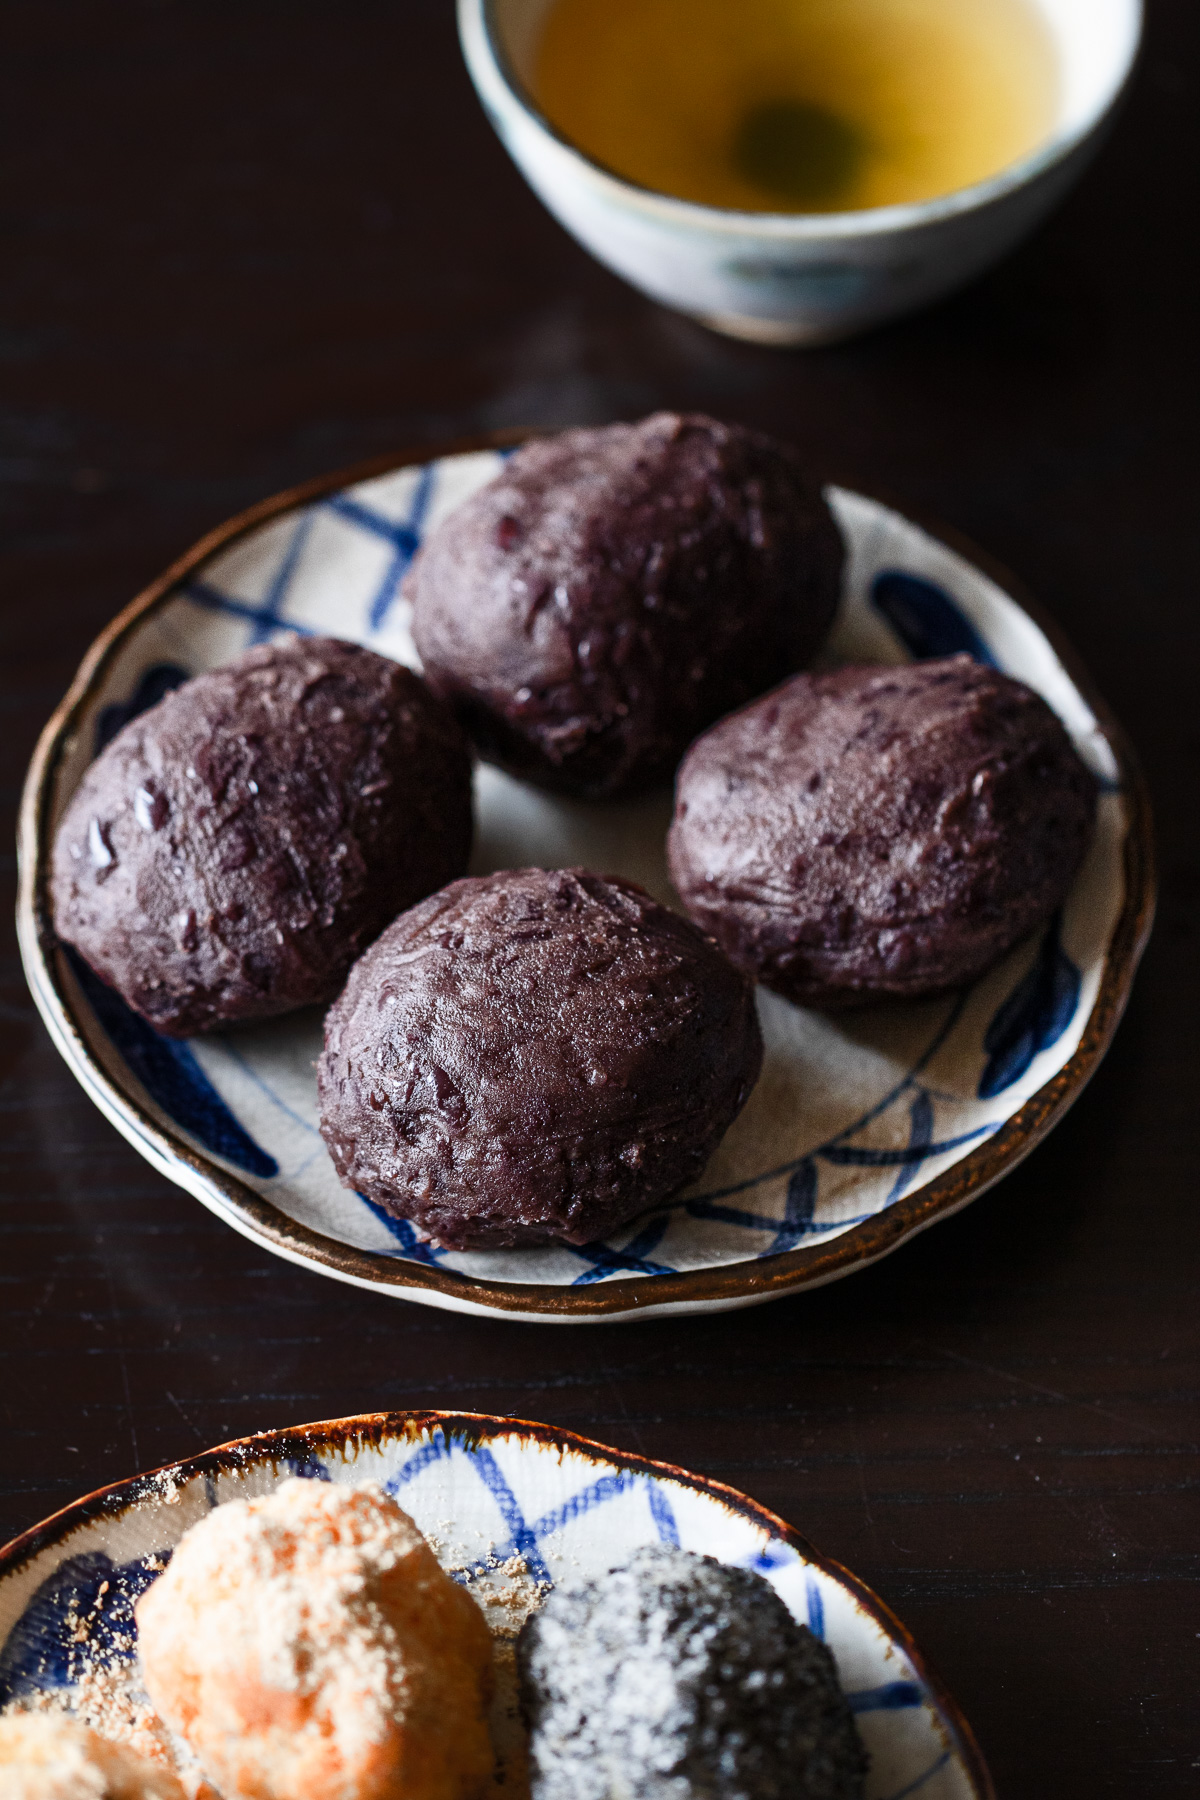
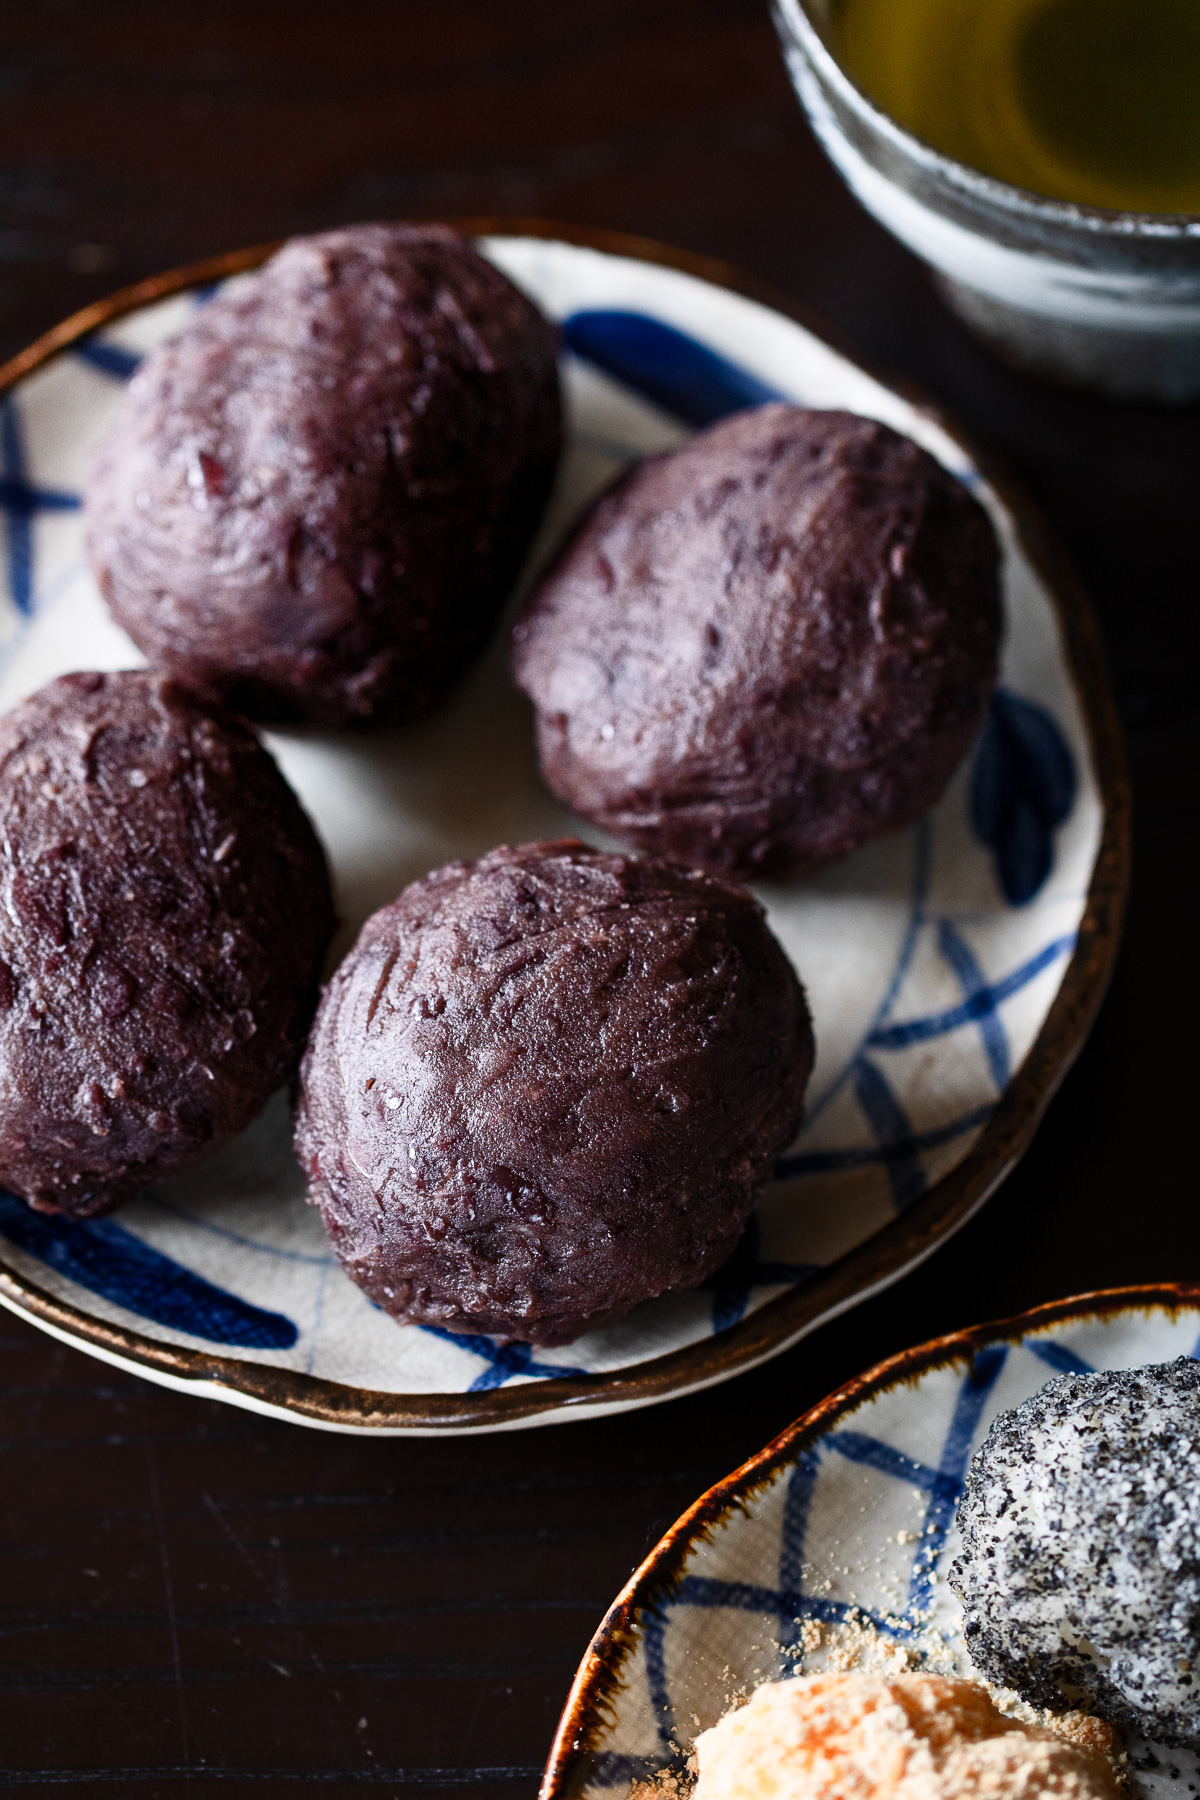
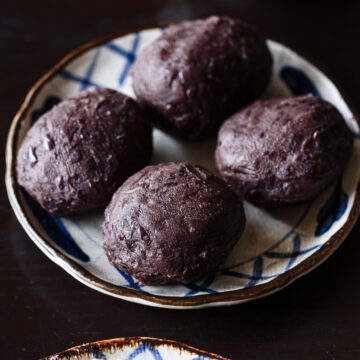
A classic Japanese sweet, ohagi (おはぎ) — sticky rice shaped into small ovals, wrapped in a generous coat of homemade red bean paste.
This recipe follows the traditional method I learned from my mother, with a few modern touches to make it more accessible.
A taste of Japanese comfort food, right from your own kitchen.
Jump to:
🕰️ About My Ohagi
In my childhood, when the equinox came around, a neighbor grandma would bring over a large plate of botamochi (ohagi made for the spring equinox), each one far too big for my small hands.
They were thickly coated in smooth, sweet anko, with a glossy finish I could never quite recreate at home.
I liked that sweetness, but always with a bowl of miso soup on the side, going back and forth between the two with each bite.
As big and sweet as her generous heart. That was the Ohagi I knew.
As I grew older, I started making ohagi on my own — smaller, more lightly sweetened, with a bit of texture left in the anko. Something I could enjoy without reaching for miso soup the way I used to.
Now I find myself making them again for someone's birthdays, for the equinox, or just when they come to mind.
The taste brings me back to those days, to a time when I didn’t think about where I was going or where I was at all.
I hope this taste finds its way to you — and maybe, in time, becomes a memory of your own.
🍂 What Is Ohagi?
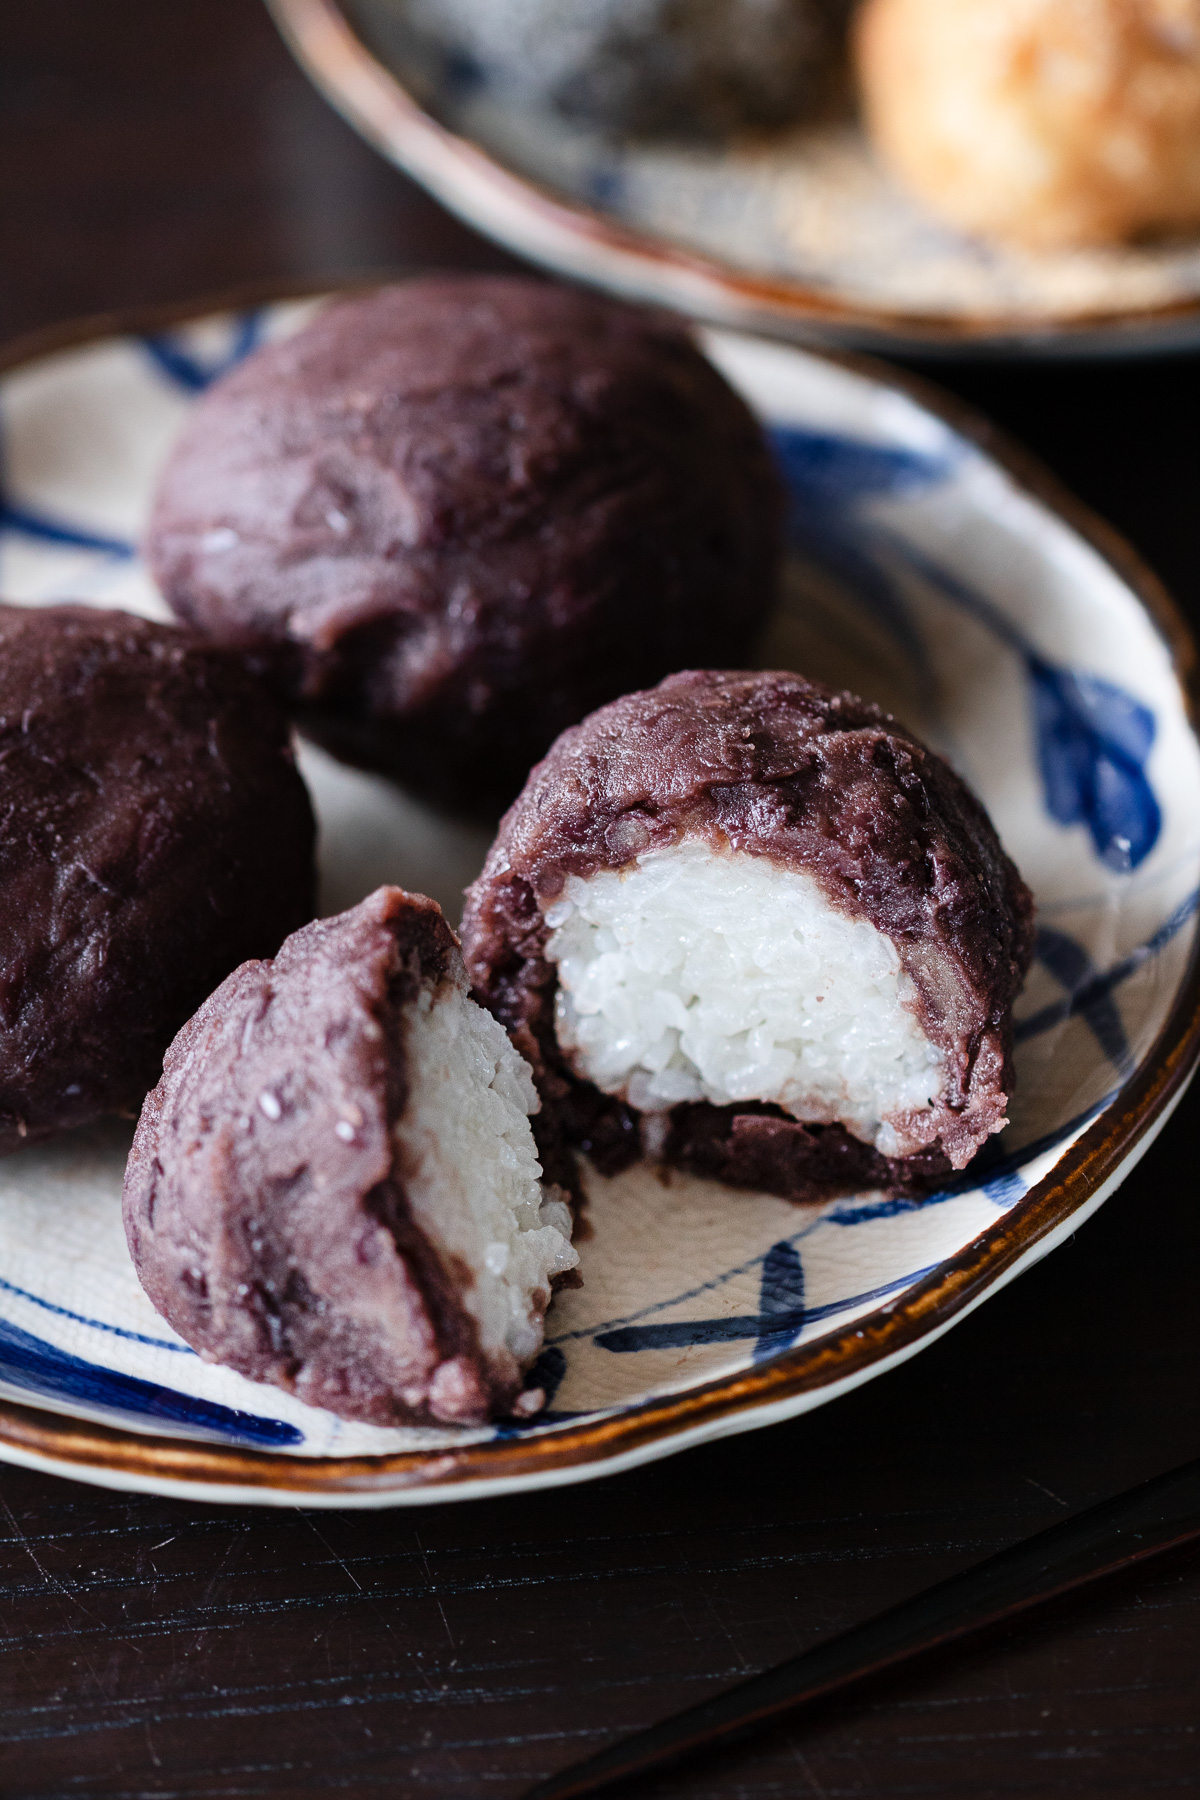
Ohagi is a traditional Japanese sweet made of lightly pounded sticky rice, shaped into small oval mounds and coated in sweet red bean paste — anko. Simple, humble, and deeply nostalgic for many Japanese people.
It's a seasonal treat traditionally made for ohigan (お彼岸) — the Buddhist equinox holidays observed in both spring and autumn. During this time, ohagi is offered at household altars and shared among family, a tradition that continues today.
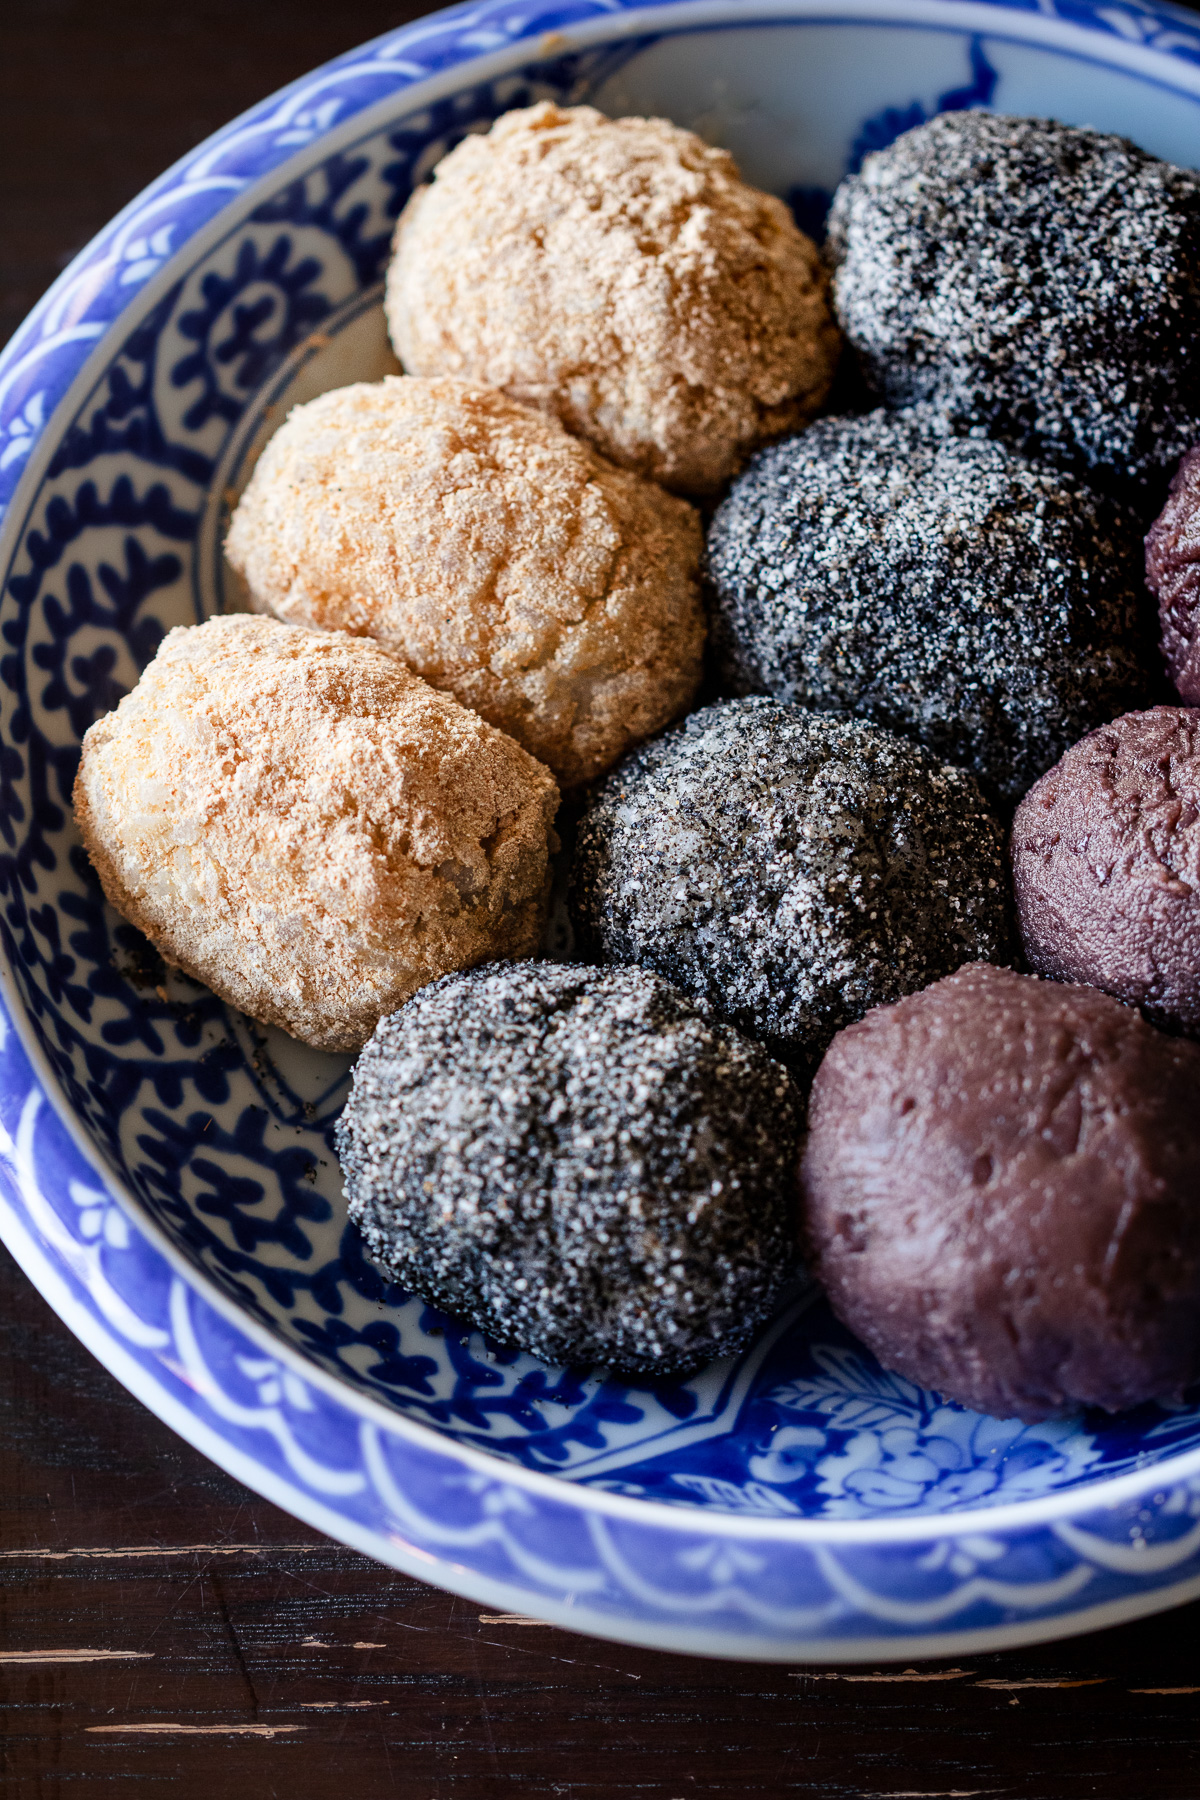
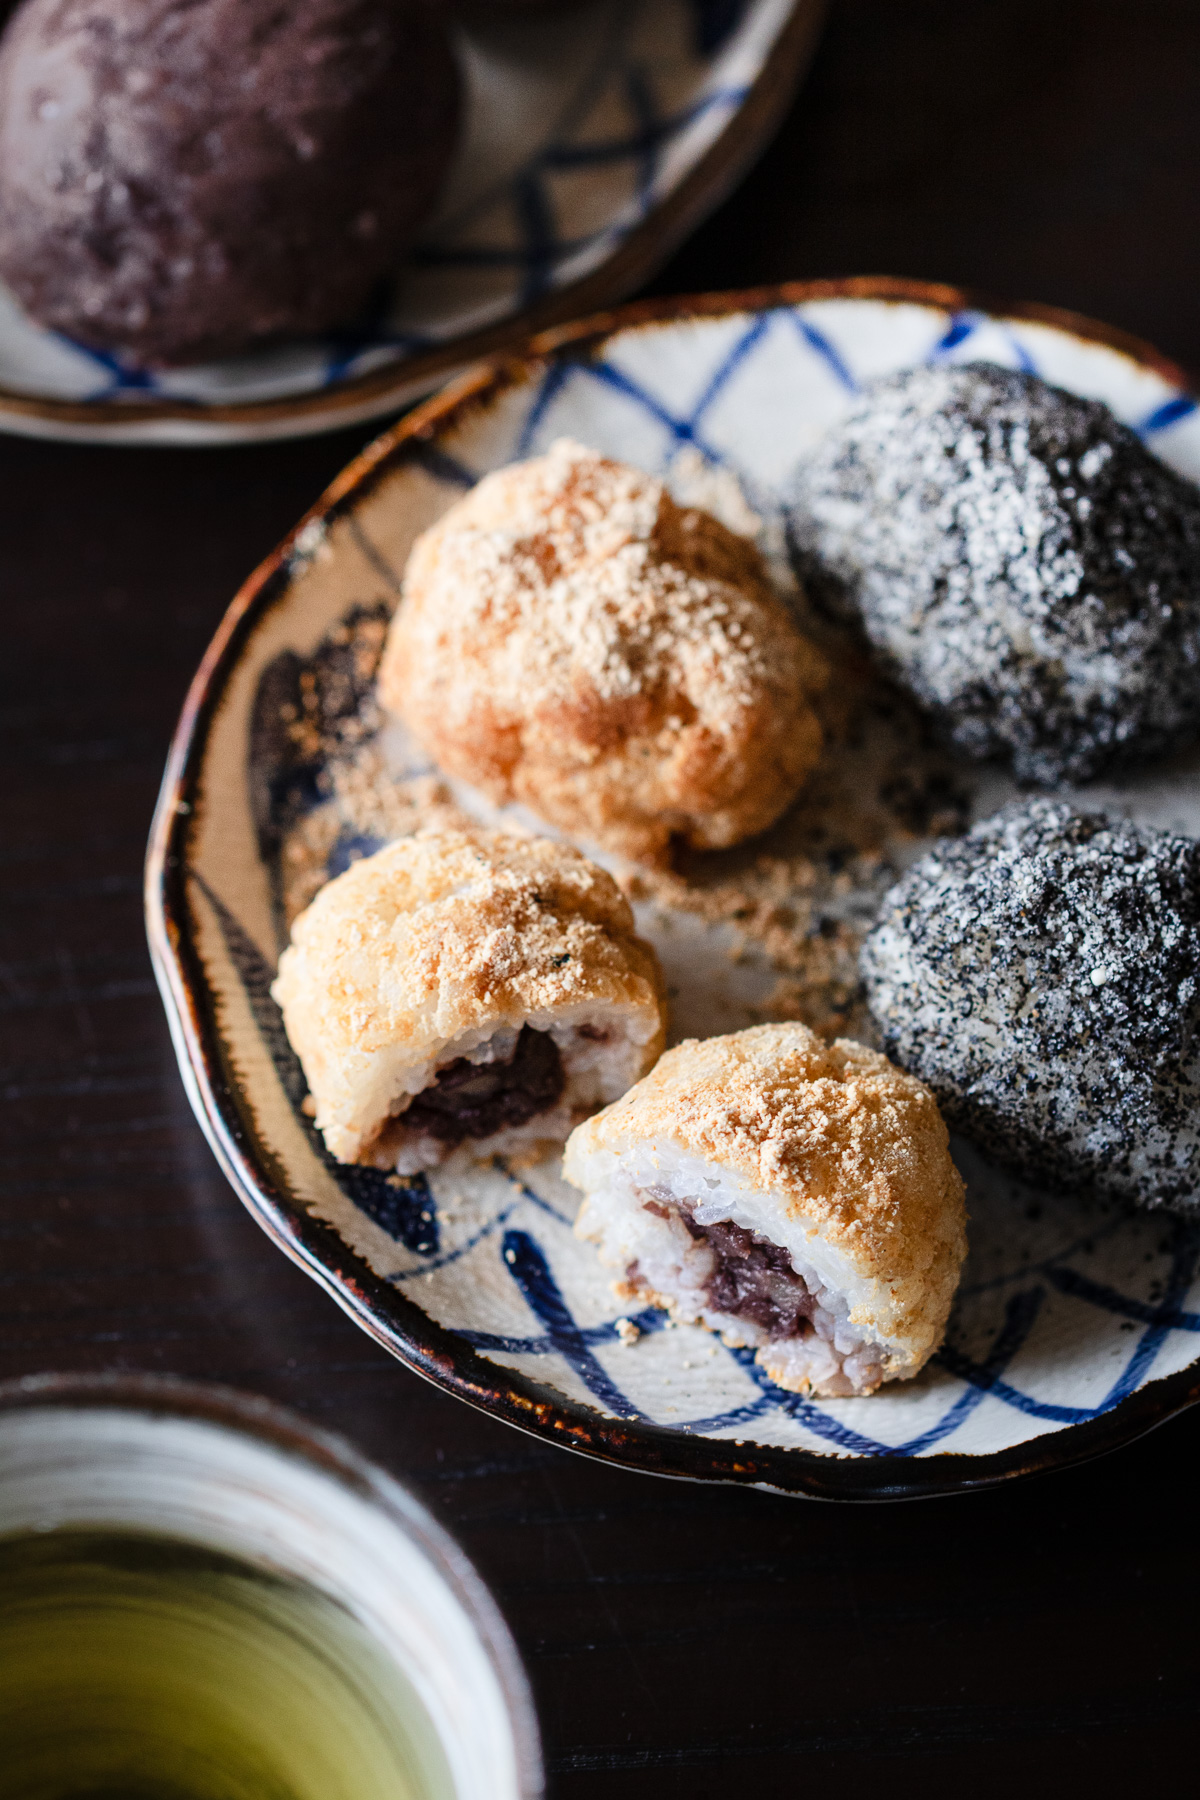
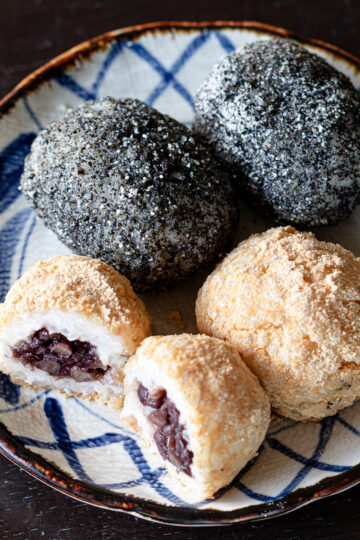
The classic version is coated in anko, but ohagi can also be rolled in kinako (roasted soybean flour) or black sesame — each with its own flavor and a look that hints at autumn. (👉 Kinako & Black Sesame Ohagi )
📕 Ohagi vs Botamochi
Ohagi (おはぎ) and botamochi (ぼたもち) are essentially the same thing — same ingredients, same method. The difference is in the season and the name.
Made for the autumn equinox, they're called ohagi, named after the bush clover (hagi) that blooms in autumn.
Made for the spring equinox, the same sweet becomes botamochi, named after the tree peony (botan) of spring.
There are subtle traditional differences too — botamochi tends to be slightly larger and made with smooth koshi-an, while ohagi is smaller, shaped into an oval, and coated in textured tsubu-an. But in practice, the lines are blurry, and many families make them the same way year-round.
🧺 Why You'll Love This Recipe
- Less sweet than most — made with homemade red bean paste (tsubu-an) using less sugar than traditional recipes, so the flavor of the adzuki beans actually comes through
- A 1:1 rice blend — most recipes use 100% glutinous rice; this blend stays softer longer and feels lighter to eat
- The hangoroshi technique — partially mashing the rice gives ohagi its characteristic rustic texture, and this recipe walks you through exactly how to do it
- A family recipe — made the same way my grandmother taught my mother, and my mother taught me
🫘 Ingredients
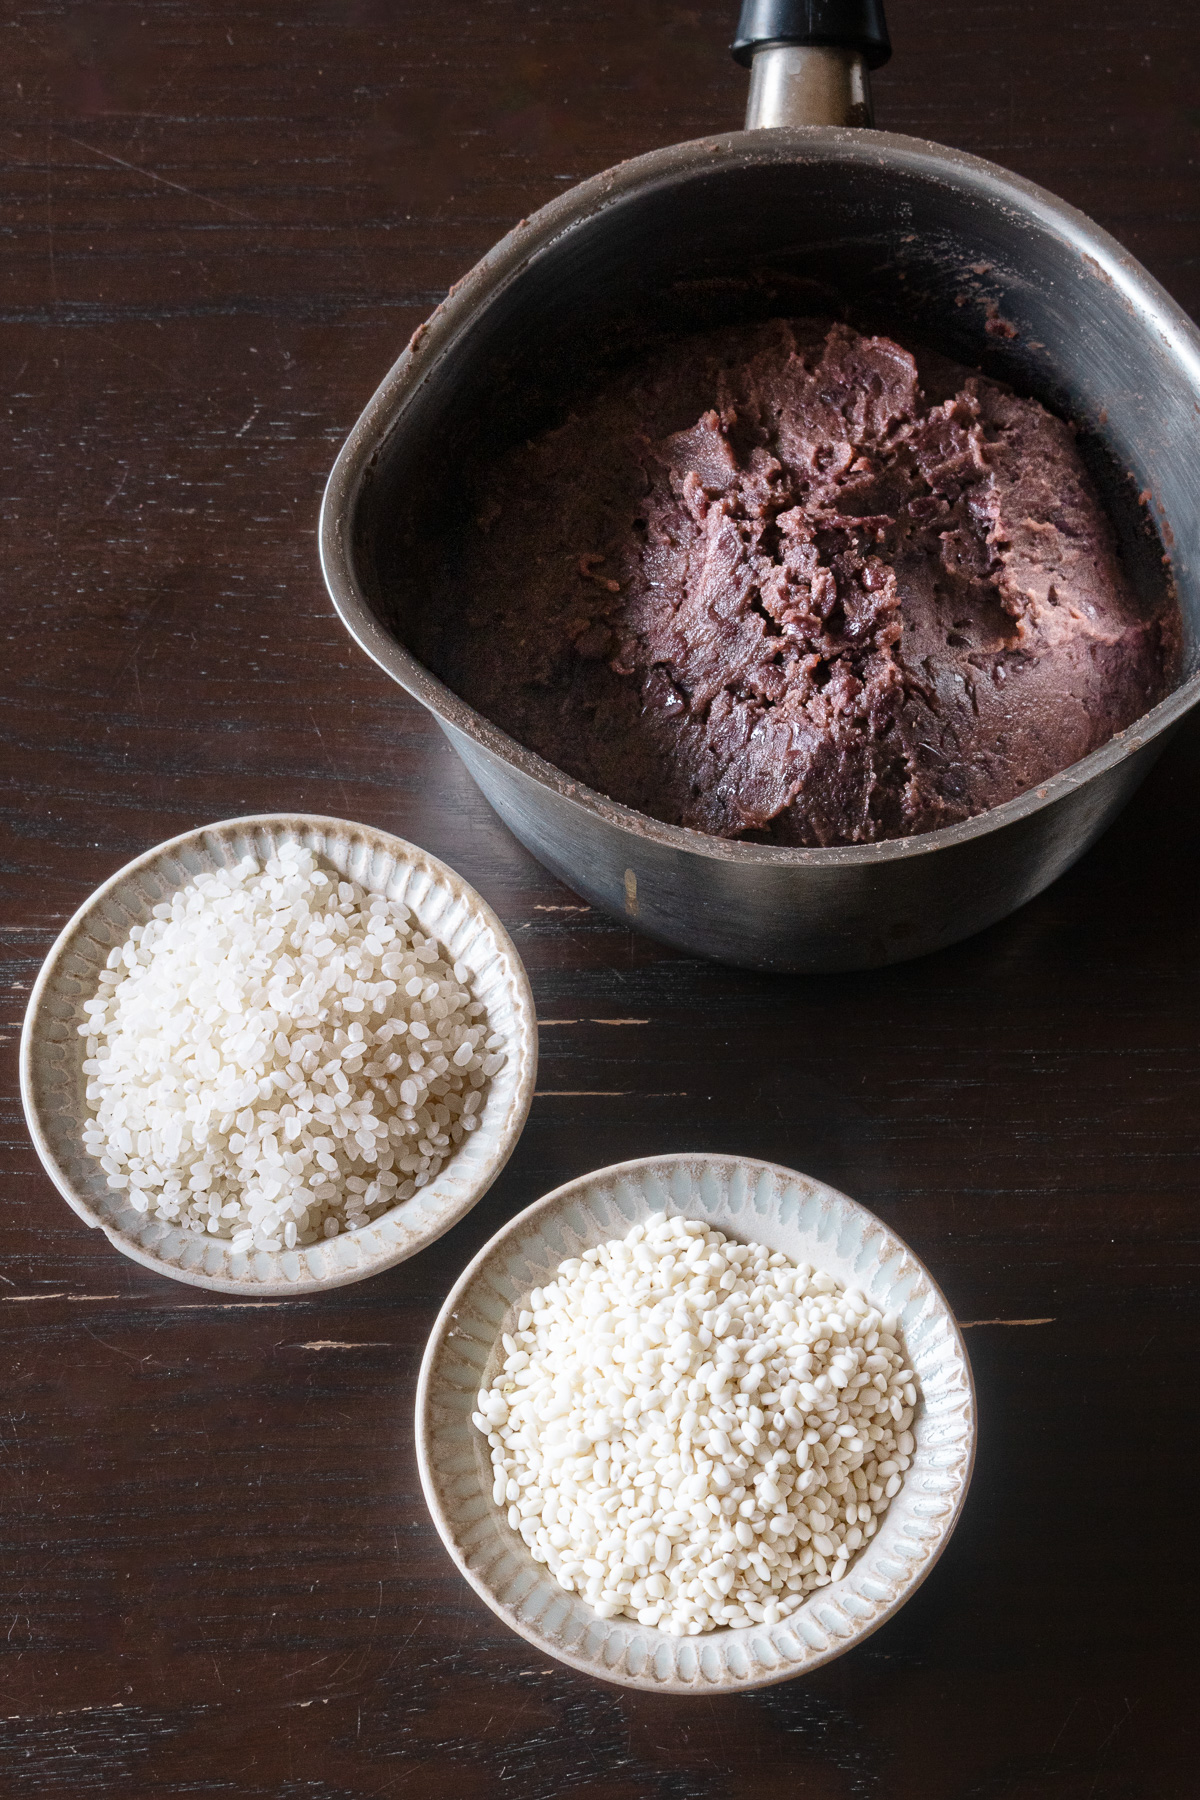
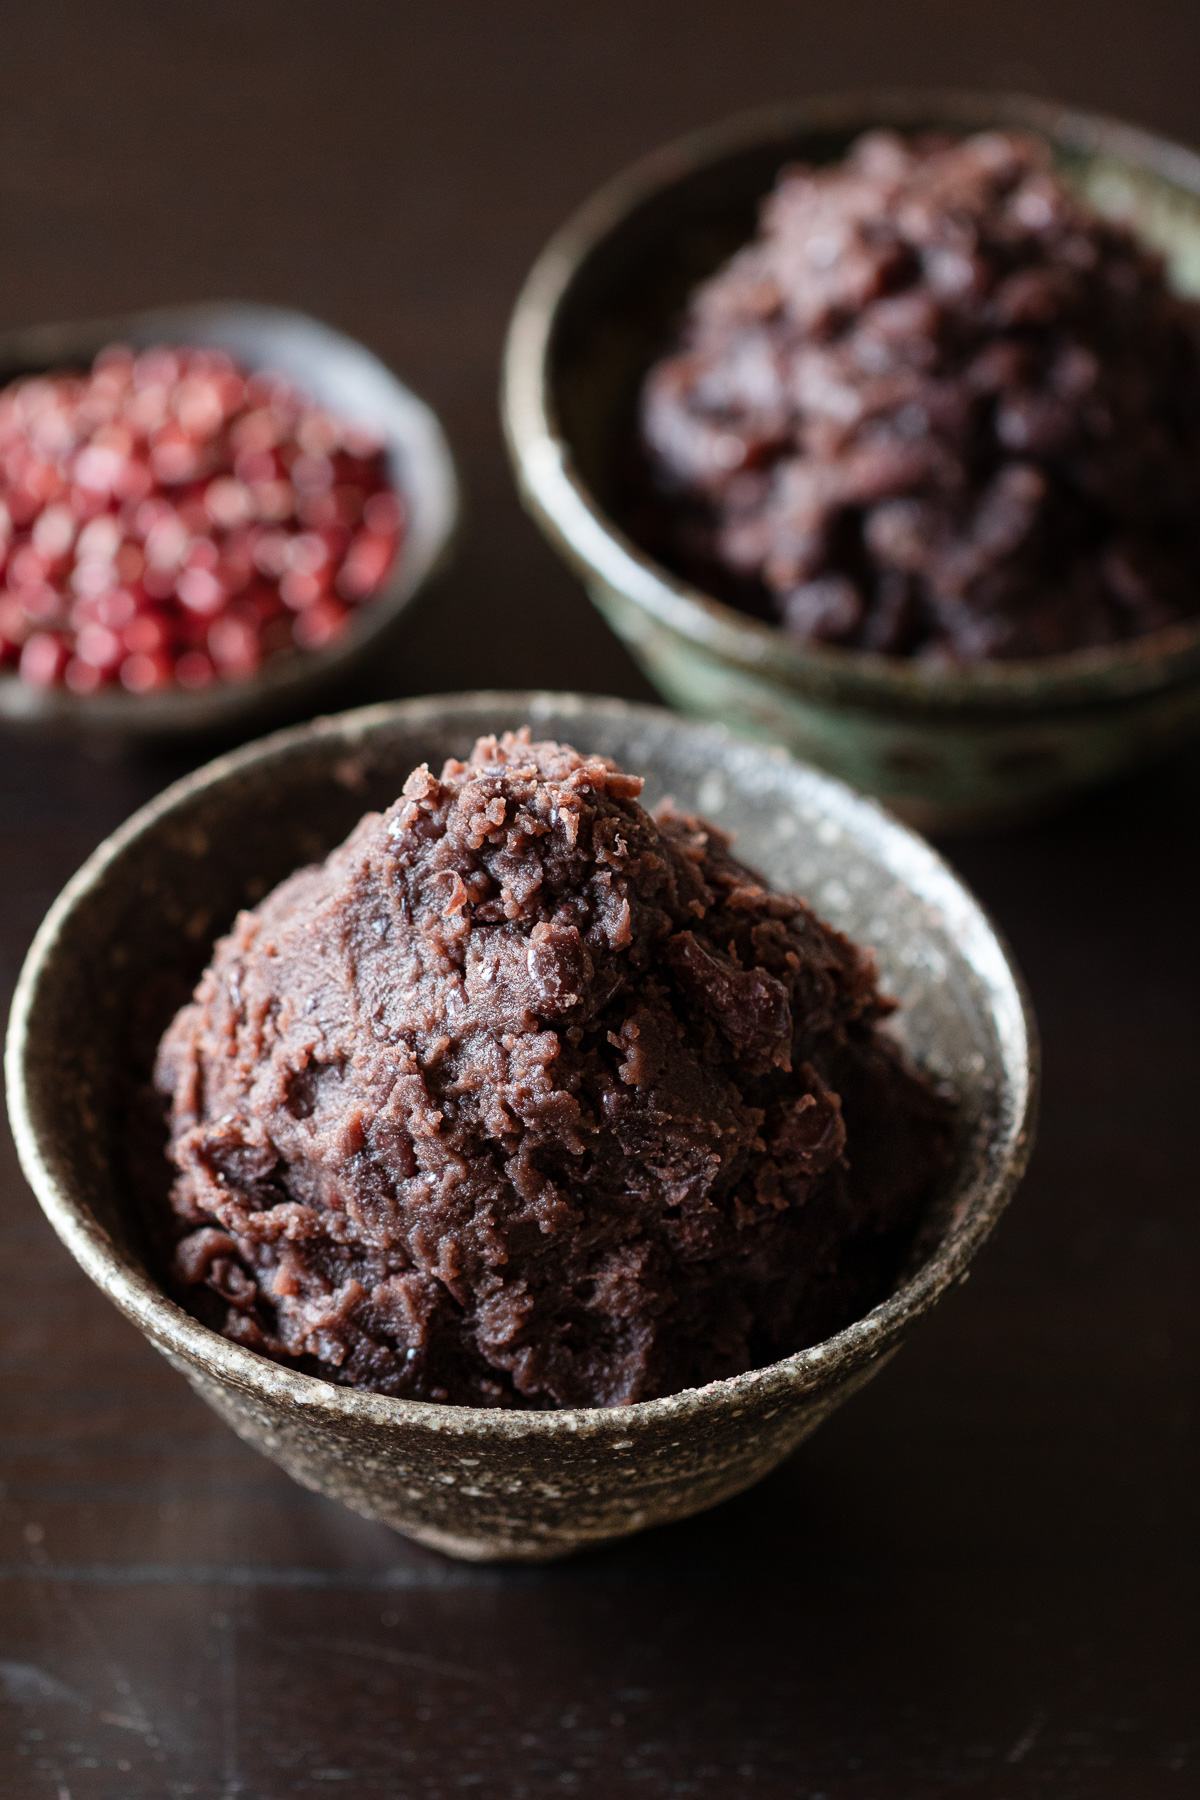
● Tsubu-an (chunky red bean paste) — This recipe uses homemade tsubu-an made with gently cooked adzuki beans and a modest amount of sugar. The beans are cooked until very tender, the paste comes out somewhere between tsubu-an (chunky, with some beans intact) and koshi-an (smooth and fully strained) — smooth in texture but with some beans still partially intact. The full recipe is here: How to Make Anko (Tsubu-an).
For ohagi, the consistency of the anko matters. It should be firm enough to hold its shape when scooped — it won't spread on its own. Think of the consistency of room-temperature cream cheese: it holds a mound, but can be spread with the back of a spoon. If it's too soft or runny, it will be difficult to wrap around the rice.
Store-bought anko works too. If it feels a little wet or loose, transfer it to a saucepan and simmer over low heat, stirring constantly, until some of the moisture has cooked off. Let it cool completely before using. Anko catches and burns easily, so keep stirring throughout.
● Rice — Equal parts glutinous rice (mochi rice) and regular Japanese short-grain rice, cooked together and then partially mashed — a technique called hangoroshi, which literally means "half-killed." Rather than pounding the rice completely smooth, you crush roughly half the grains, leaving the rest intact. This gives ohagi its characteristic rustic texture: part chewy, part soft, never gummy. The blend also helps the ohagi stay soft longer than a version made with 100% glutinous rice.
Full quantities are in the recipe card below 👇
🥣 Equipment
Having everything ready beforehand helps the process flow more smoothly.
- Rice cooker
- Flat plate or bowl
- Pestle or rolling pin — for mashing the rice
- Small bowl of water — for dampening your hands
- Spoon
- Plastic wrap — the traditional method uses a tightly wrung damp cloth, but plastic wrap is easier to work with
- Plate or tray — for resting the finished ohagi
📖 Instructions
Start by getting your rice ready — everything else comes together quickly from there.
- Prepare the rice
- Rinse the rice, then cook using your usual method and water ratio.
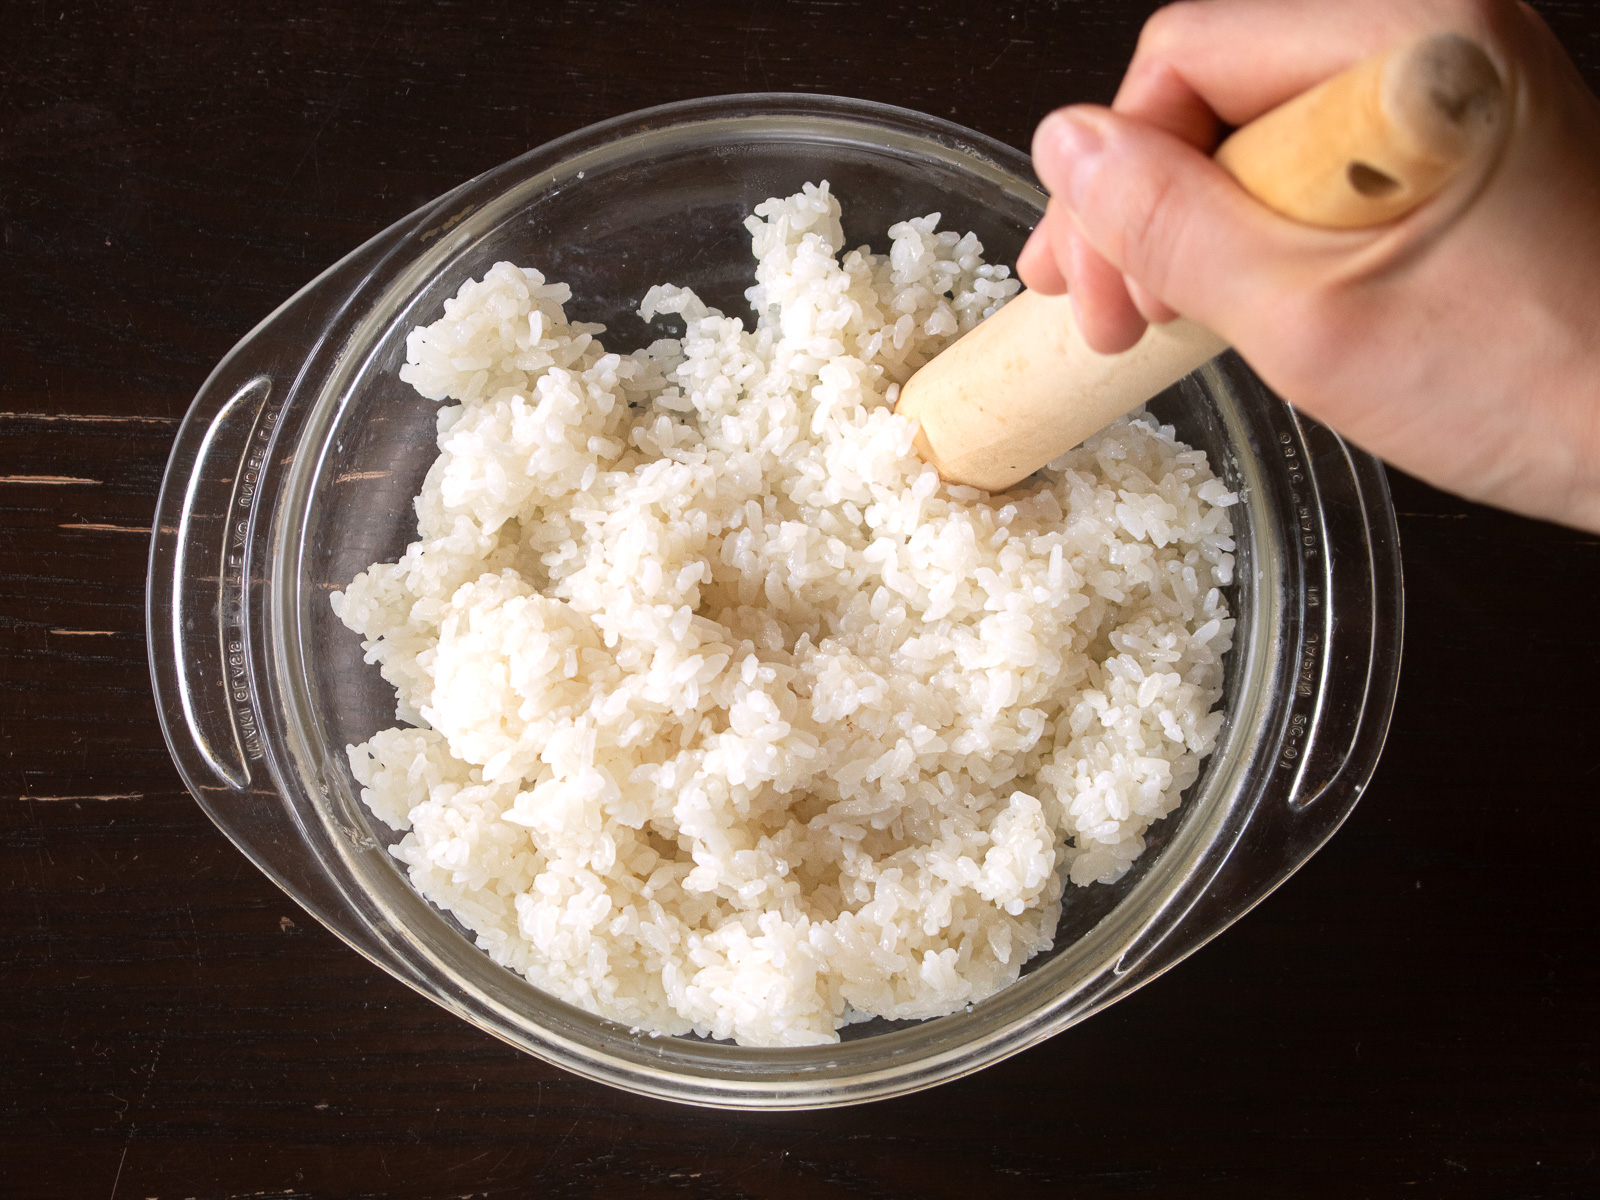
- Once cooked, transfer to a flat plate or bowl and use a pestle or rolling pin to gently crush about half the grains — this is called hangoroshi.
- Shape the rice
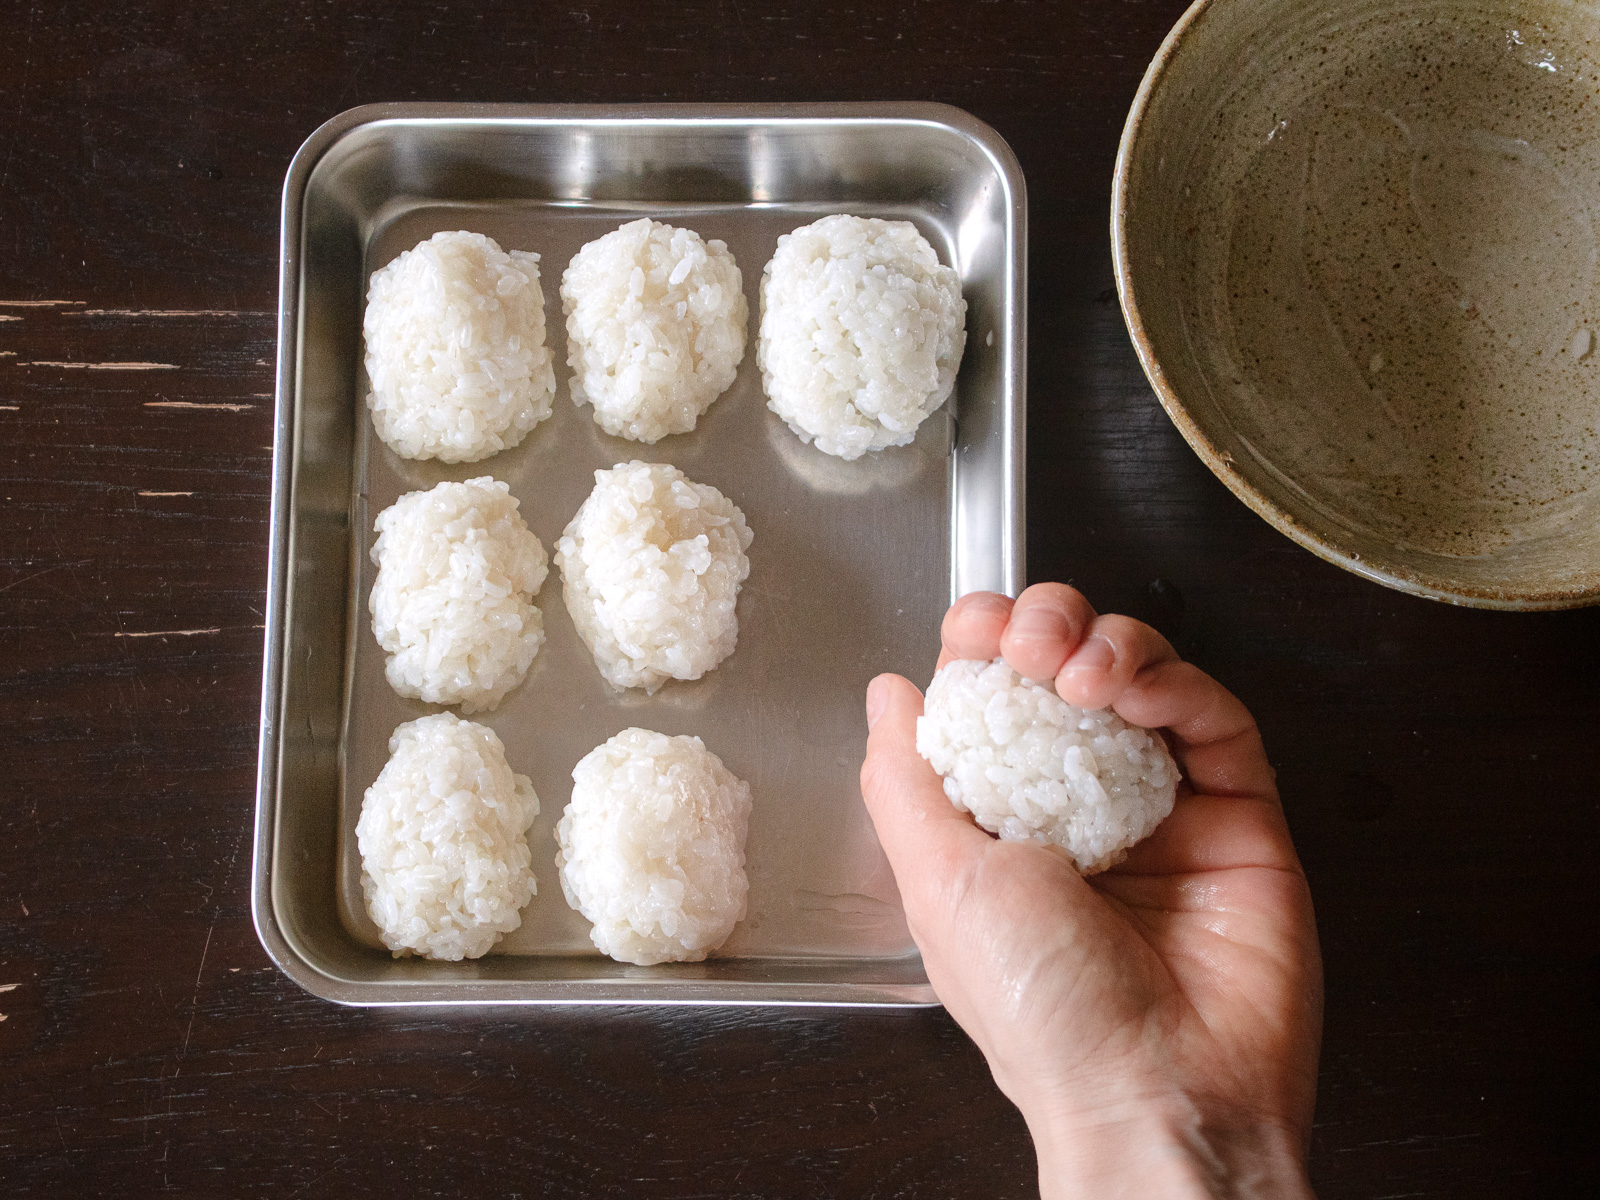
- Dampen your hands lightly and portion out roughly 35–40g of rice per piece — about what fits comfortably in one hand
- Shape each portion into a small oval
🌿 POINT: Shape the rice while it’s still warm — it becomes harder to mold as it cools.
- Wrap in anko ❶
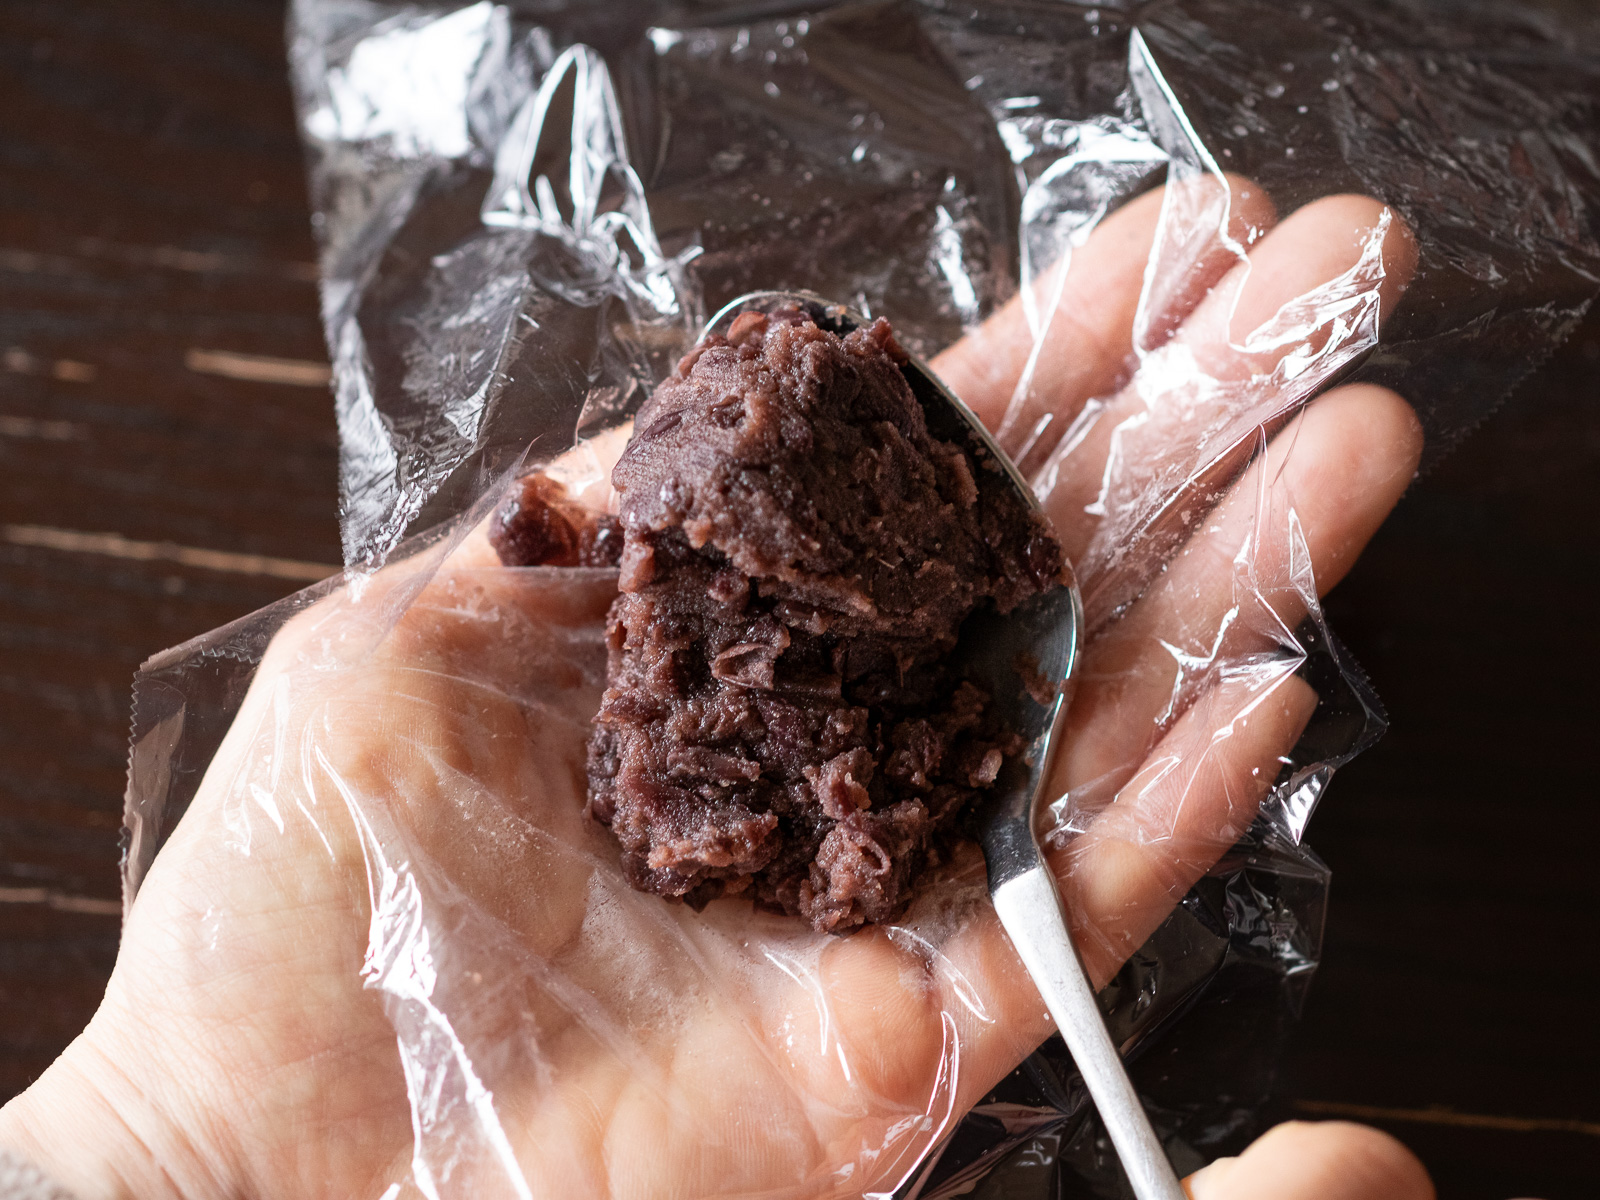
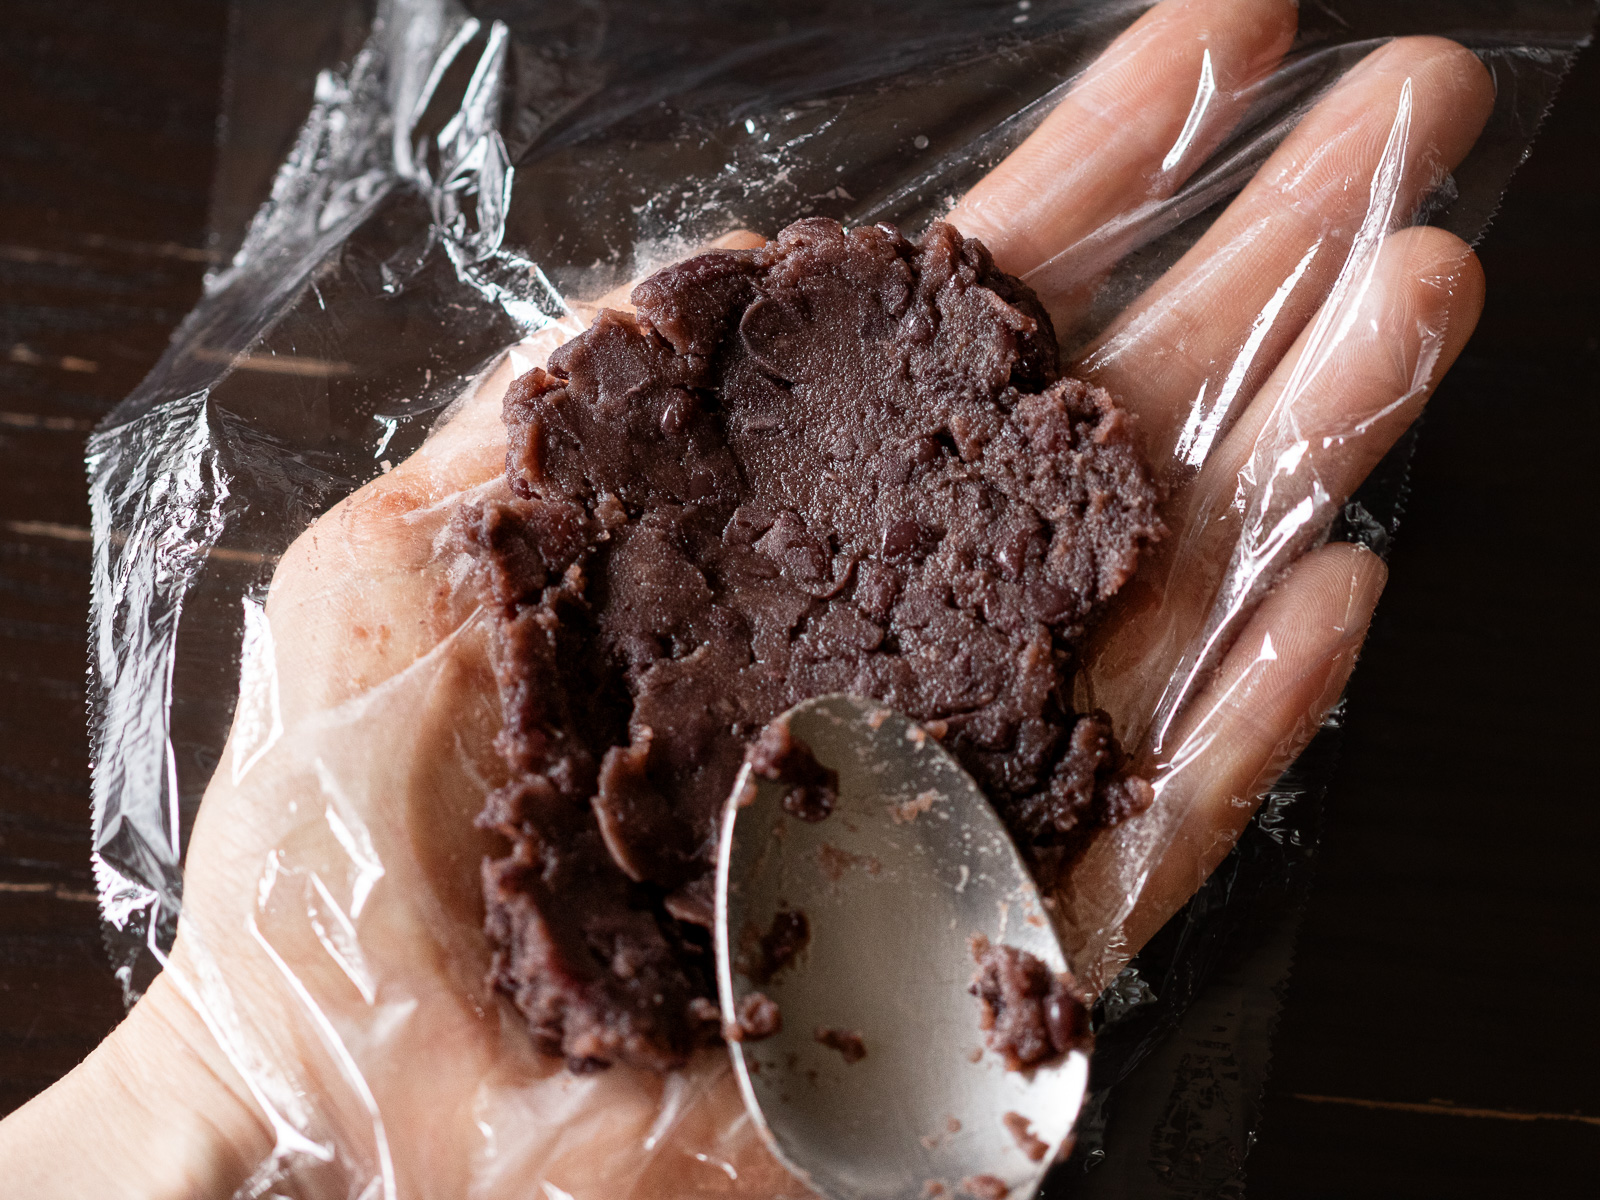
- Lay a sheet of plastic wrap flat and spoon a heaping tablespoon of anko onto the center
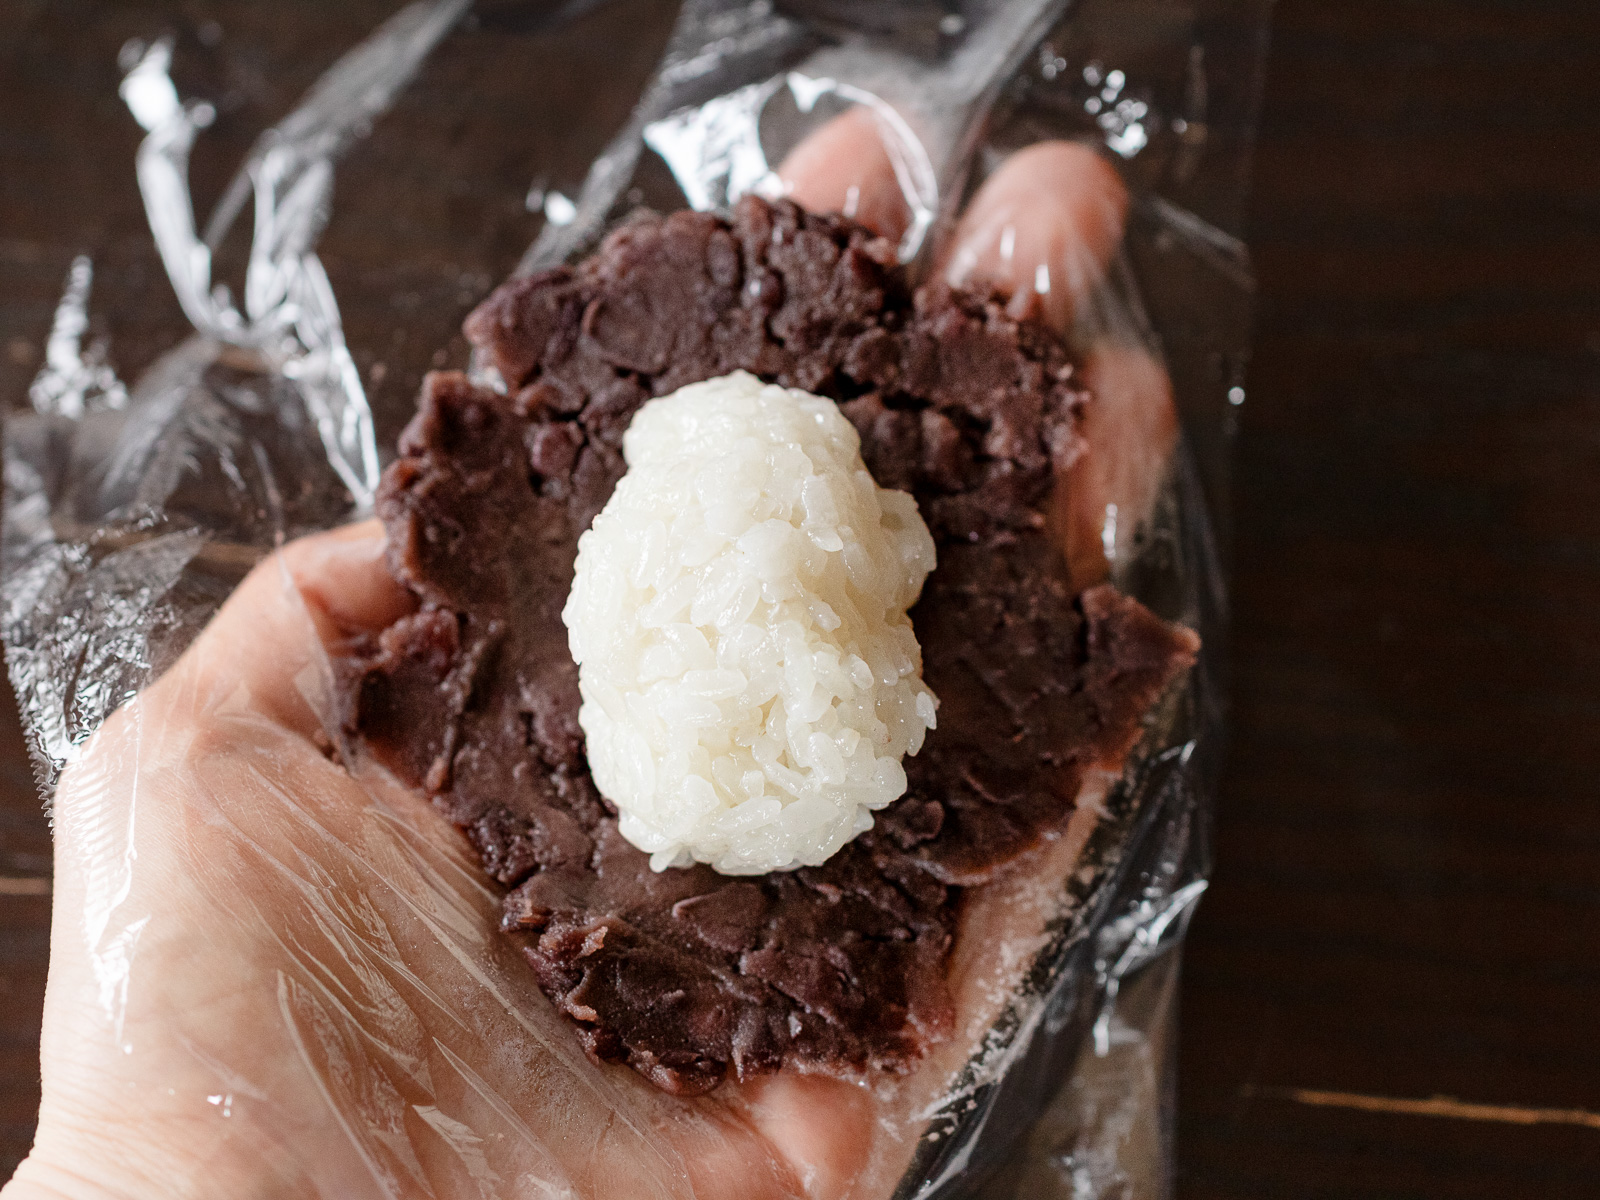
- Use the back of the spoon to spread it into a round, then place a rice ball in the middle
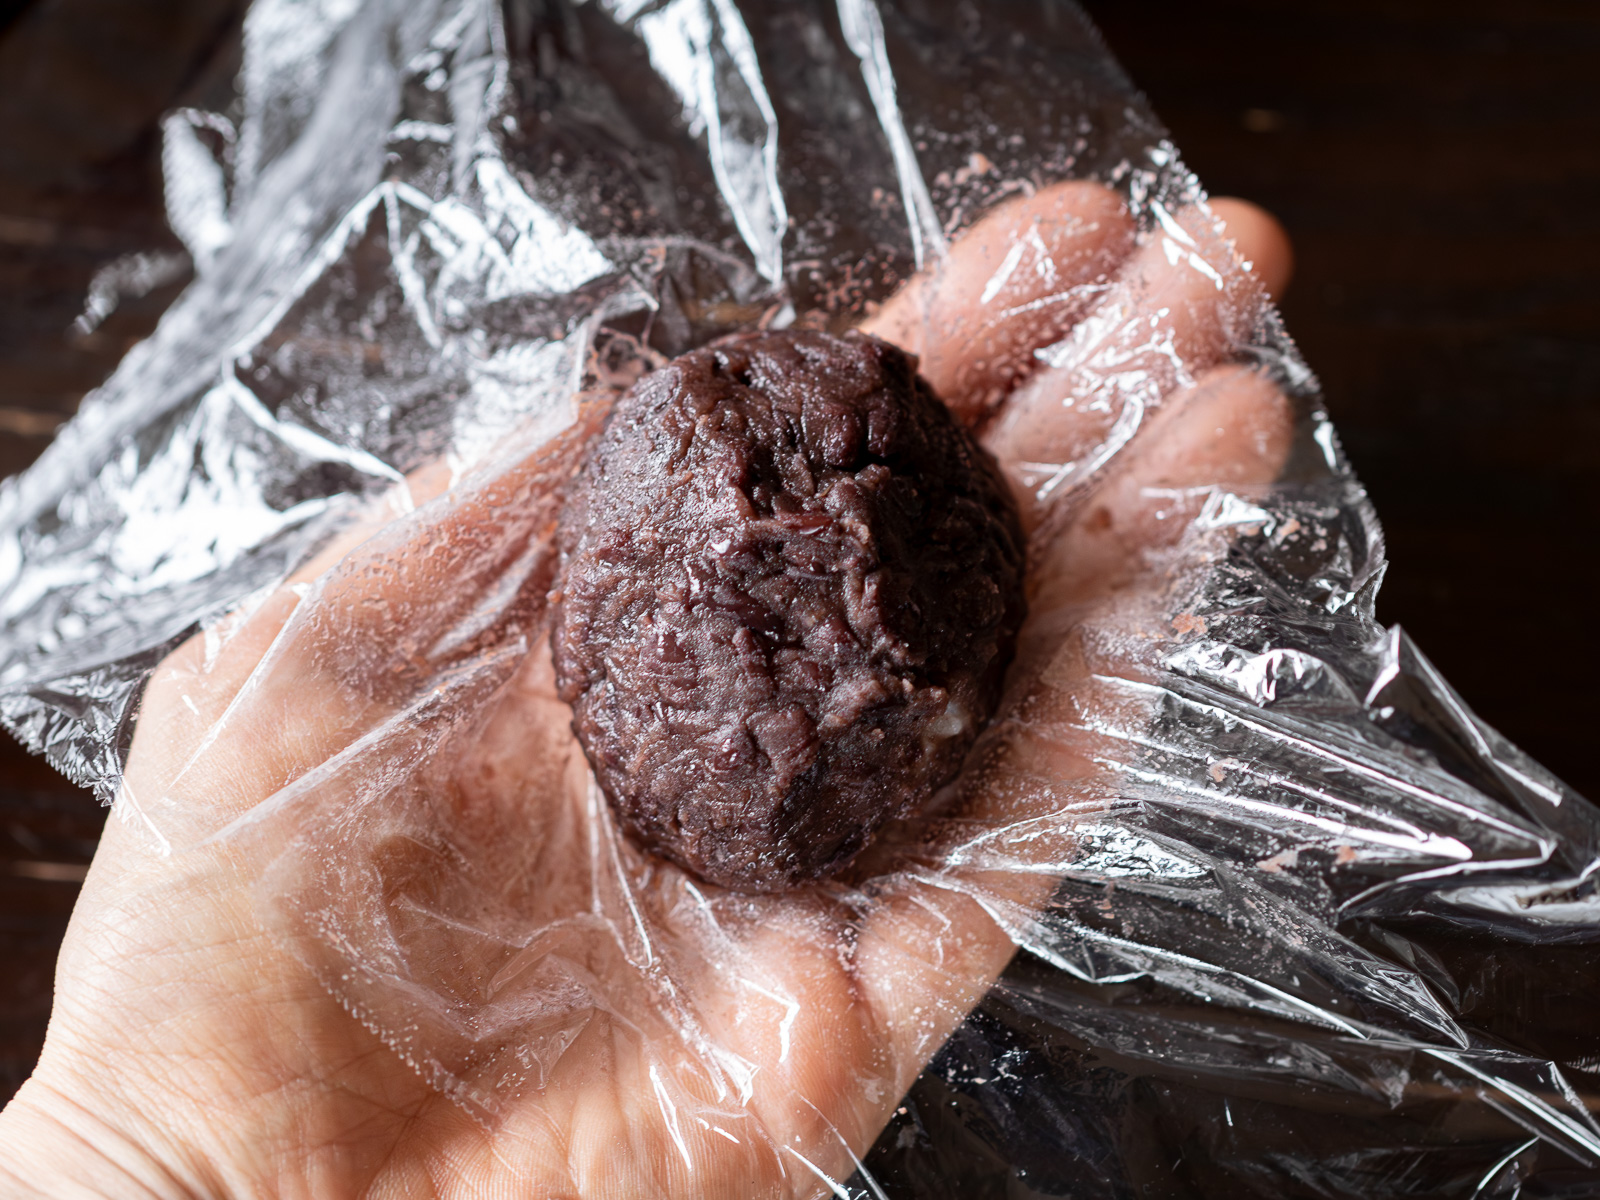
- Wrap in anko ❷
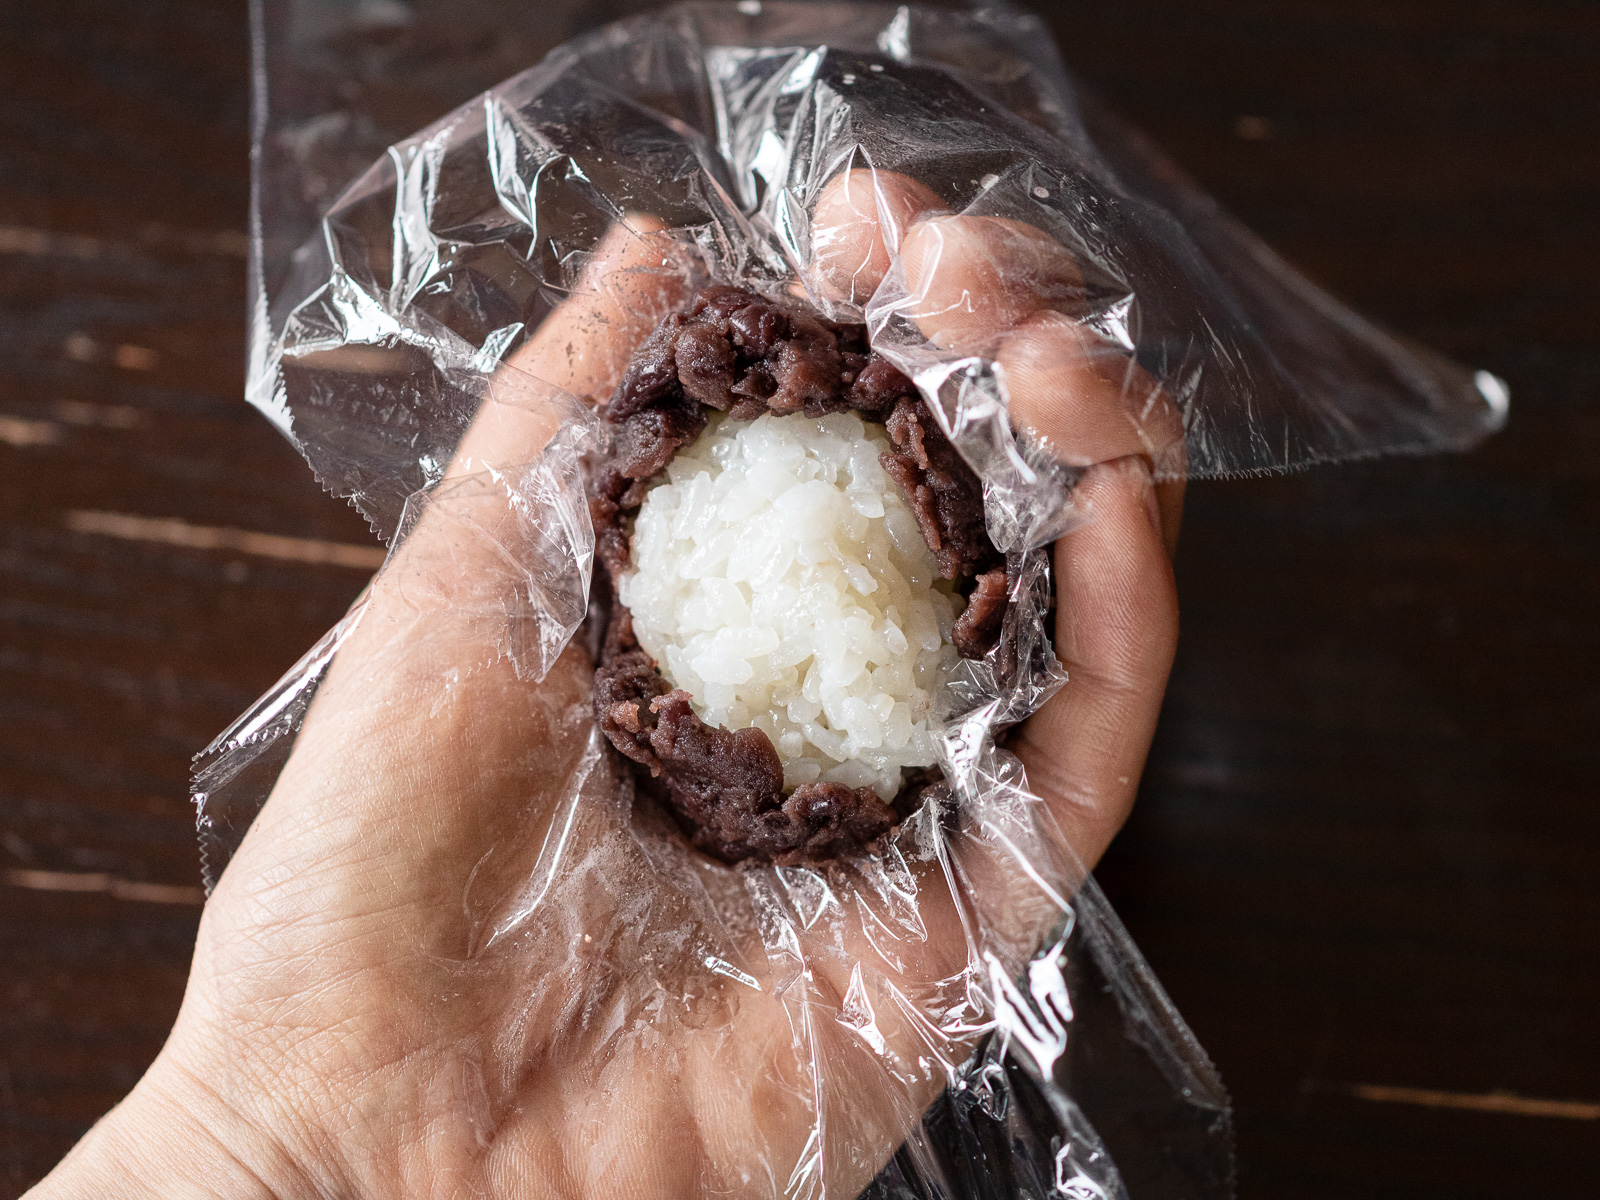
- Shape your hand into a gentle cup so the anko begins to wrap around the rice.
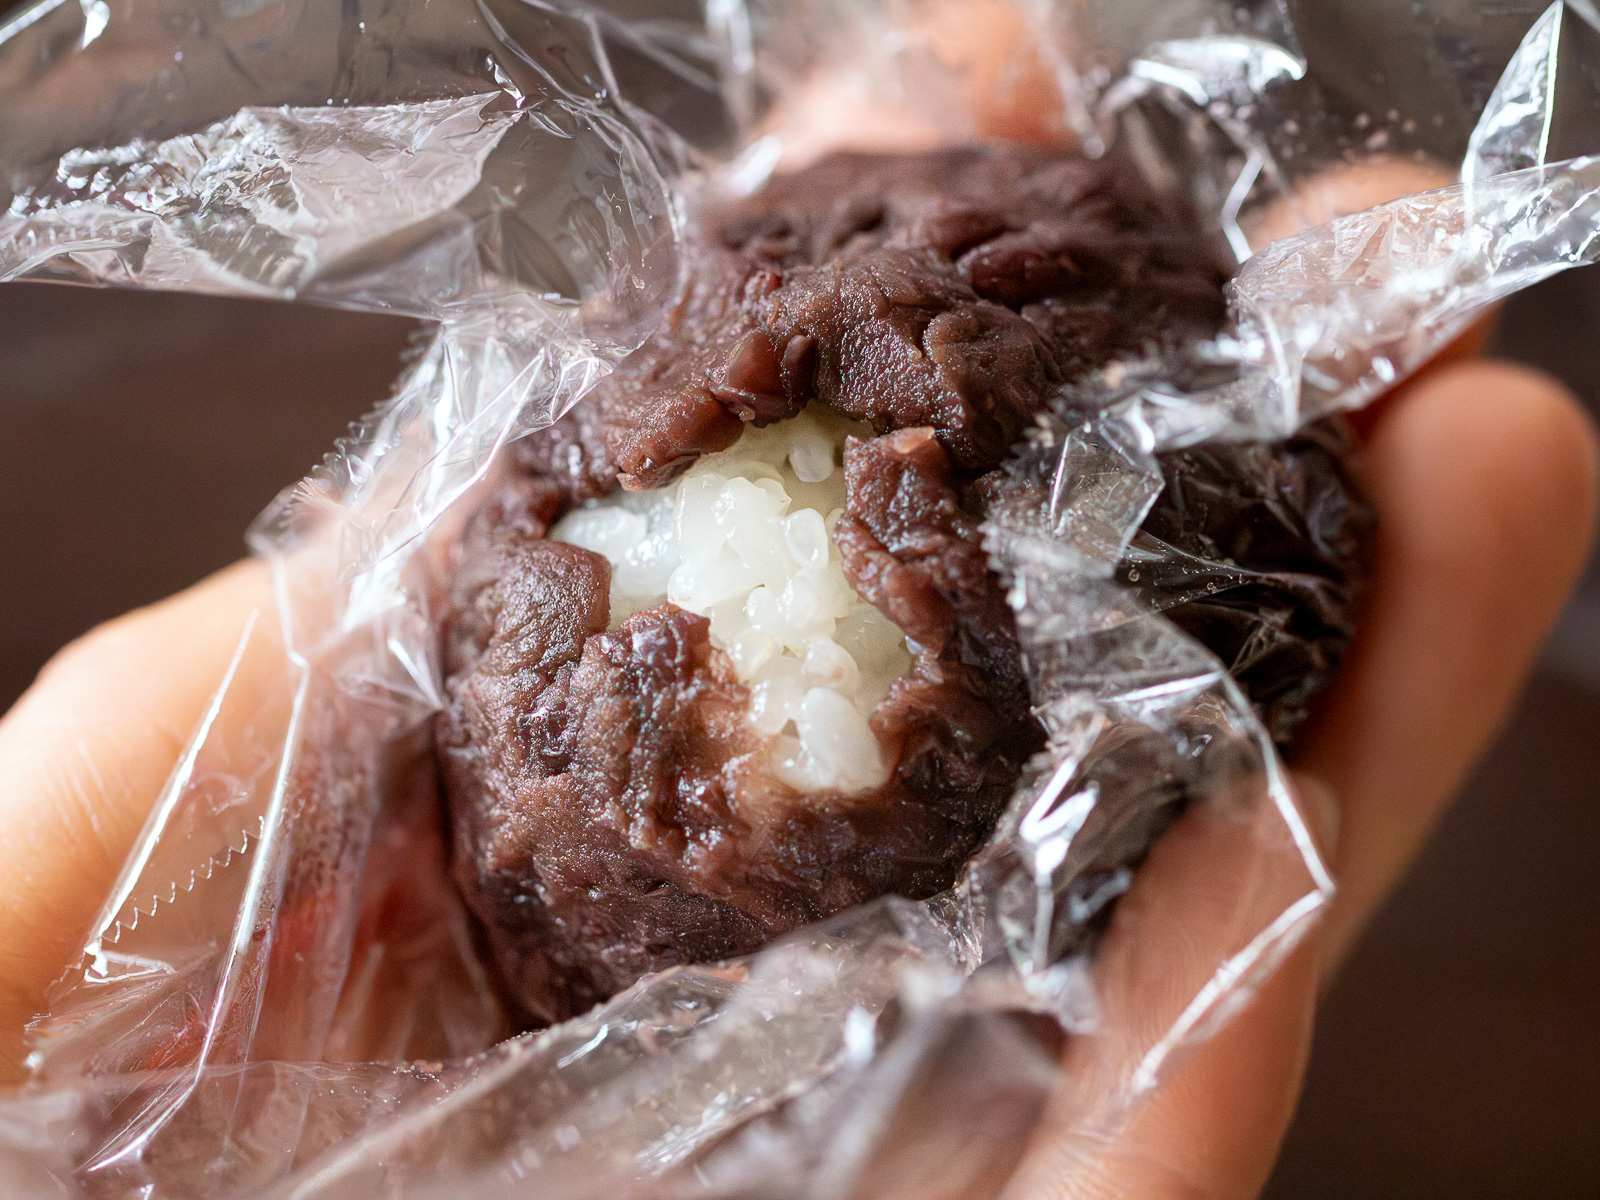
- Ease the anko evenly over the surface until the rice is fully covered
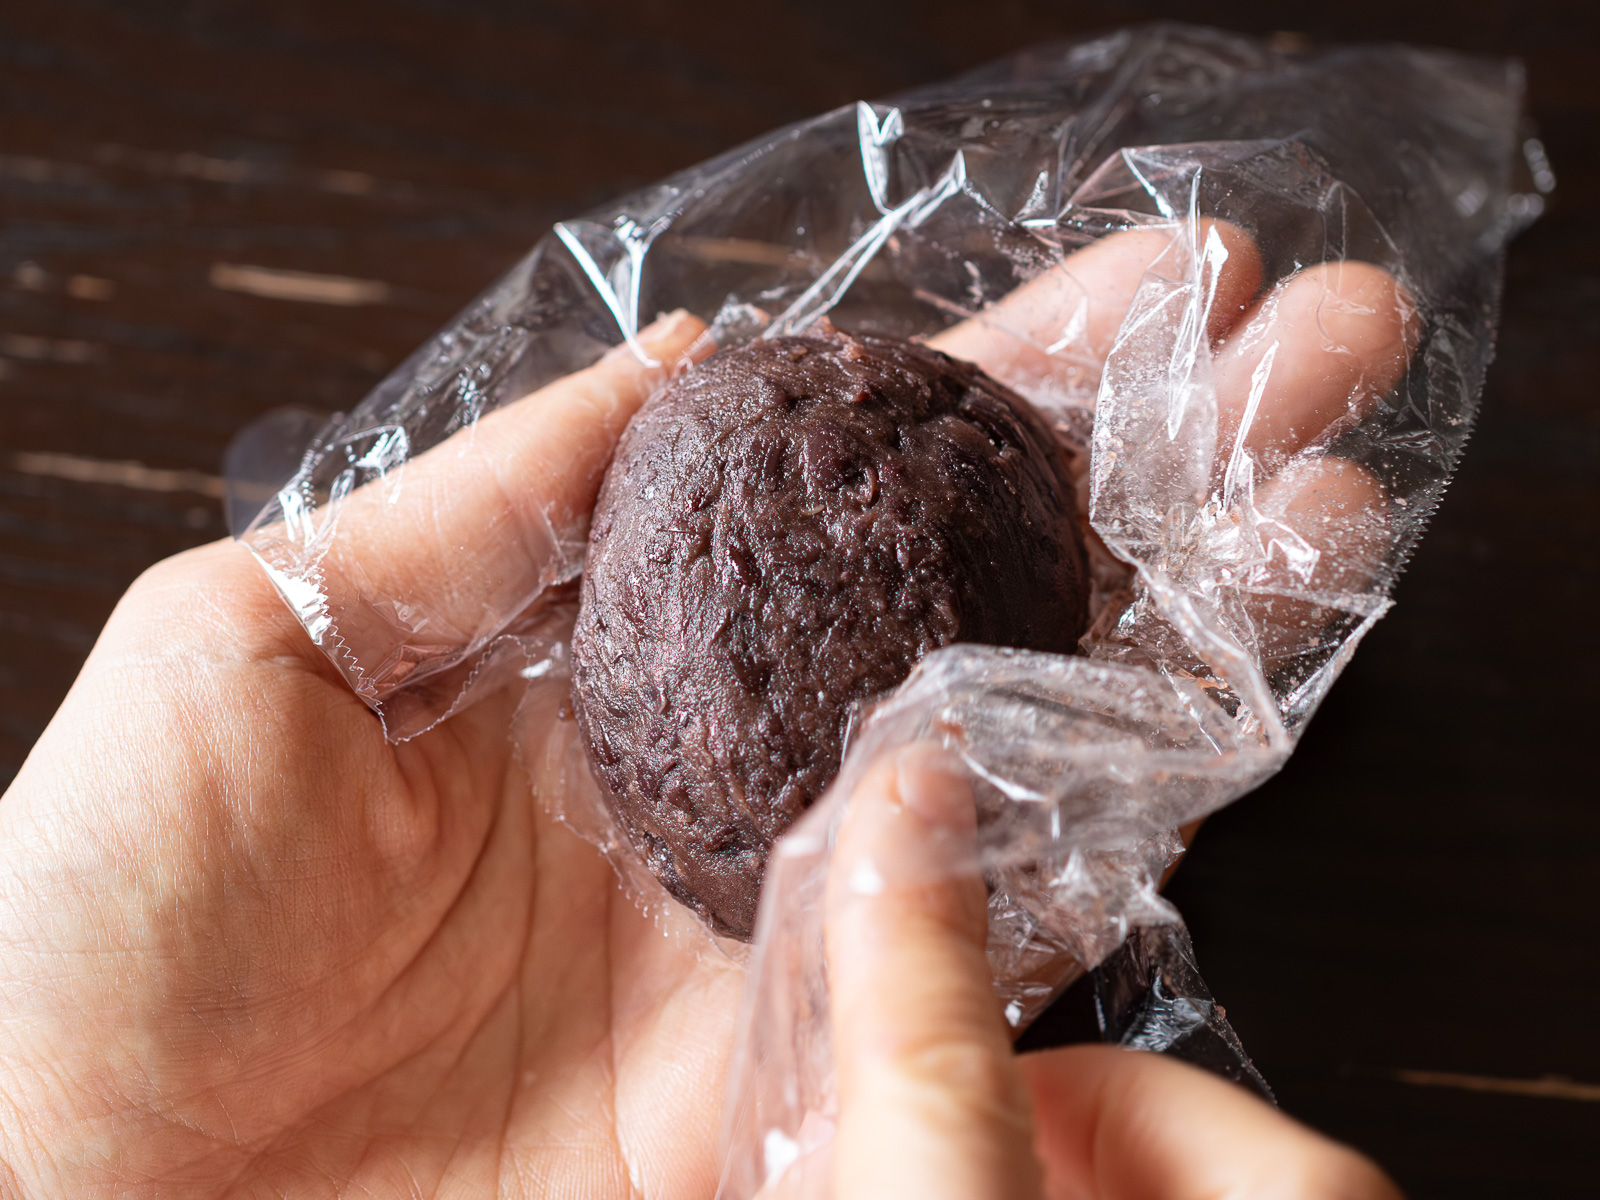
- Smooth and finish
- Gently smooth the surface through the plastic wrap with your fingers
🌿 Traditionally, the surface is smoothed directly with a dampened index finger, giving it a soft, glossy finish.

I prefer a slightly uneven surface, so I smooth it gently through the plastic wrap instead — it keeps a more handmade feel.
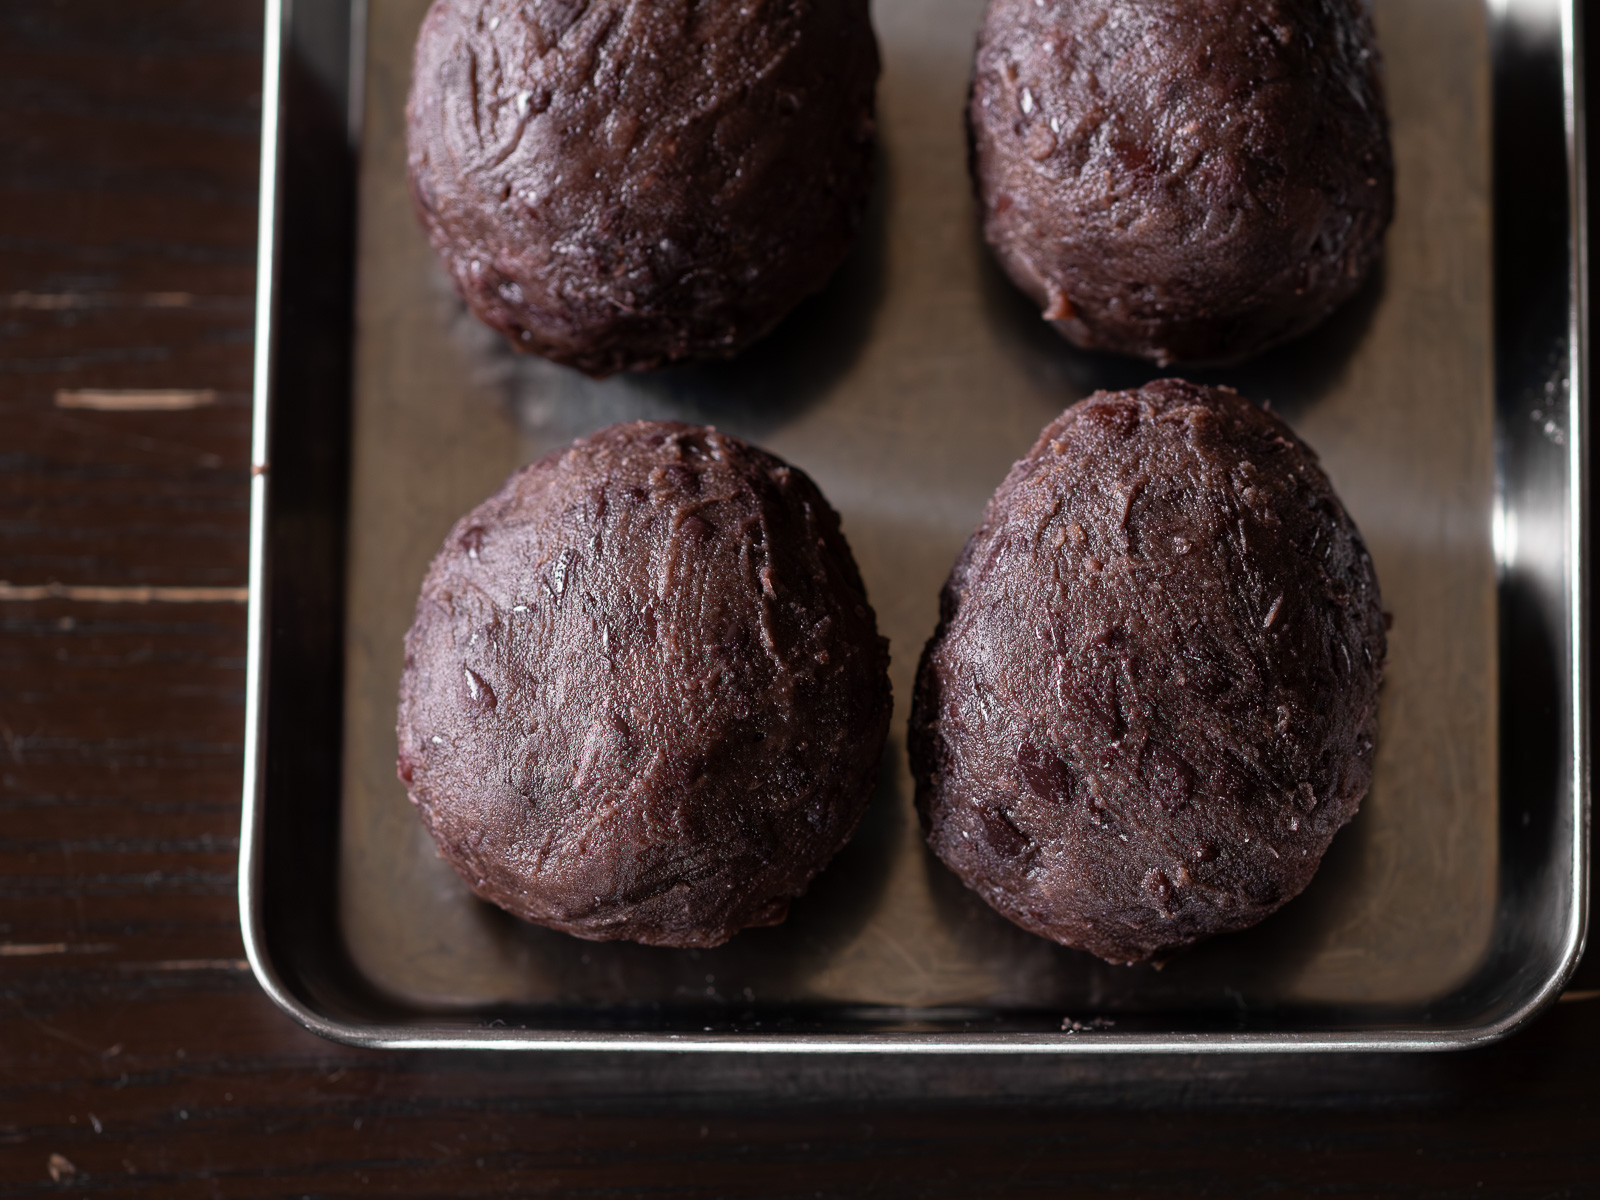
- Repeat
- Repeat with the remaining rice and anko
🫙 Storage
Ohagi is best eaten the day it's made. If you're not serving them right away, cover with plastic wrap to prevent them from drying out.
They can be refrigerated, but the rice will firm up in the cold — so if you do refrigerate them, try to eat them the same day.
If they’ve firmed up, you can bring back some softness by warming them briefly — about 10–20 seconds in the microwave, or until just softened. Keep in mind that the anko heats up faster than the rice, so be careful when eating.
📘 Tips for Keeping Ohagi Soft
➤ Shape the rice while it's still warm
After the hangoroshi, shape the rice into ovals right away. Warm rice molds easily and holds together well — as it cools, it becomes firmer and harder to shape. Once shaped, move quickly to wrap each piece in anko before the surface dries.
➤ Use a 1:1 ratio of glutinous to regular rice
Using equal parts glutinous rice and regular short-grain rice gives you the chewiness of mochi without feeling too heavy. It also stays softer for longer — 100% glutinous rice tends to firm up and become dense as it cools, so the blend makes a real difference if you're not eating them straight away.
🥢 Variations
Anko-coated ohagi is the classic, but kinako and black sesame are just as traditional — and a tray with all three makes for a beautiful spread.
For kinako or black sesame ohagi, mix the powder with a little sugar and spread it on a flat plate. Roll the shaped rice in the mixture until evenly coated.
You can also tuck a small ball of anko inside before shaping — it melts into the rice as you eat, leaving a little surprise to discover. (👉 Kinako & Black Sesame Ohagi )
📚 FAQ
Yes, you can. The texture will be chewier and a little denser — some people prefer it that way. Just keep in mind that 100% glutinous rice firms up more quickly as it cools, so it's best eaten soon after making.
Yes, store-bought anko works well. If it feels a little wet or loose, transfer it to a saucepan and simmer over low heat, stirring constantly, until some of the moisture has cooked off. Let it cool completely before using.
Yes. Microwave them for 10–20 seconds, still wrapped in plastic wrap. The anko heats up faster than the rice, so be sure to check before eating.
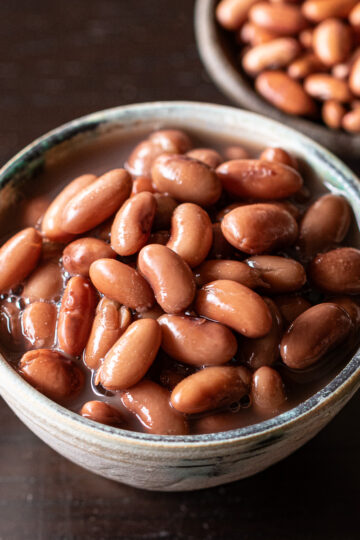
🌿 More Adzuki Bean Recipes
If you have cooked adzuki beans left over, here are some other ways to use them:
🥮 More Recipes Using Anko
Got leftover tsubu-an? Here are some ideas:

If you feel like whispering a thought, asking a question, or simply saying hello — the comment section is always open 📮
✏️ Recipe Card
Ohagi (Japanese Sweet Rice Balls with Red Bean Paste)
Equipment
- rice cooker
- Large bowl or flat plate
- Pestle or rolling pin - for mashing the rice
- Small bowl of water - for dampening your hands
- Spoon
- Plastic wrap, or a tightly wrung damp cloth
- Plate or tray - for resting the finished ohagi
Ingredients
- 90 ml glutinous rice (mochi rice)
- 90 ml regular Japanese short-grain rice
- about 200 ml water (rice to water ratio 1:1.1 by volume — or follow the water line on your rice cooker)
- anko (½ batch homemade anko, or approx. 250g store-bought)
Instructions
Prepare the Rice
- Rinse the glutinous and regular rice together, then cook as you normally would.90 ml glutinous rice90 ml regular Japanese short-grain riceabout 200 ml water
- Once cooked, transfer to a flat plate or bowl and use a pestle or rolling pin to gently crush about half the grains — this is called hangoroshi.
- Dampen your hands lightly and portion out roughly 35–40g of rice per piece — about what fits comfortably in one hand. Shape each portion into a small oval.
Wrap
- Lay a sheet of plastic wrap flat and spoon a heaping tablespoon of anko onto the center.anko
- Use the back of the spoon to spread anko into a round, then place a rice ball in the middle.
- Shape your hand into a cup so the anko begins to wrap around the rice.
- Ease the anko evenly over the surface until the rice is fully covered.
- Smooth the surface through the plastic wrap with your fingers.
- Repeat with the remaining rice and anko.
Notes
- If using store-bought anko: If it feels wet or loose, transfer to a saucepan and simmer over low heat, stirring constantly, until some of the moisture has cooked off. Let it cool completely before using. Anko can burn easily, so keep stirring throughout.
- Note on measuring rice: In Japan, rice is traditionally measured in go (合). One go = 180ml, measured using the cup that comes with a Japanese rice cooker. This recipe uses ½ go (90ml) of each rice.

If this recipe made its way into your kitchen, and you'd like to share that moment, feel free to tag @veginveganvegun or use #vegin_vegan_vegun.
Your quiet stories inspire me deeply 🕊️

Comments
No Comments