A step-by-step guide to making hoshigaki at home (Japanese dried persimmons/干し柿) —covering mold prevention, drying stages, and storage, based on how I make and taste them day by day.
Jump to:
🍁 From the Autumn Kitchen | About Hoshigaki
This year, our astringent persimmon tree only gave us two fruits.
And somehow, even the sweet persimmons weren’t pleasant to eat raw.
So I decided to dry them.
Traditionally, astringent persimmons are used for hoshigaki.
Sweet persimmons tend to hold more moisture, so the sweetness doesn’t build up as much. They’re not usually the first choice.
Still, I was curious.
I hung them up with very little fuss.
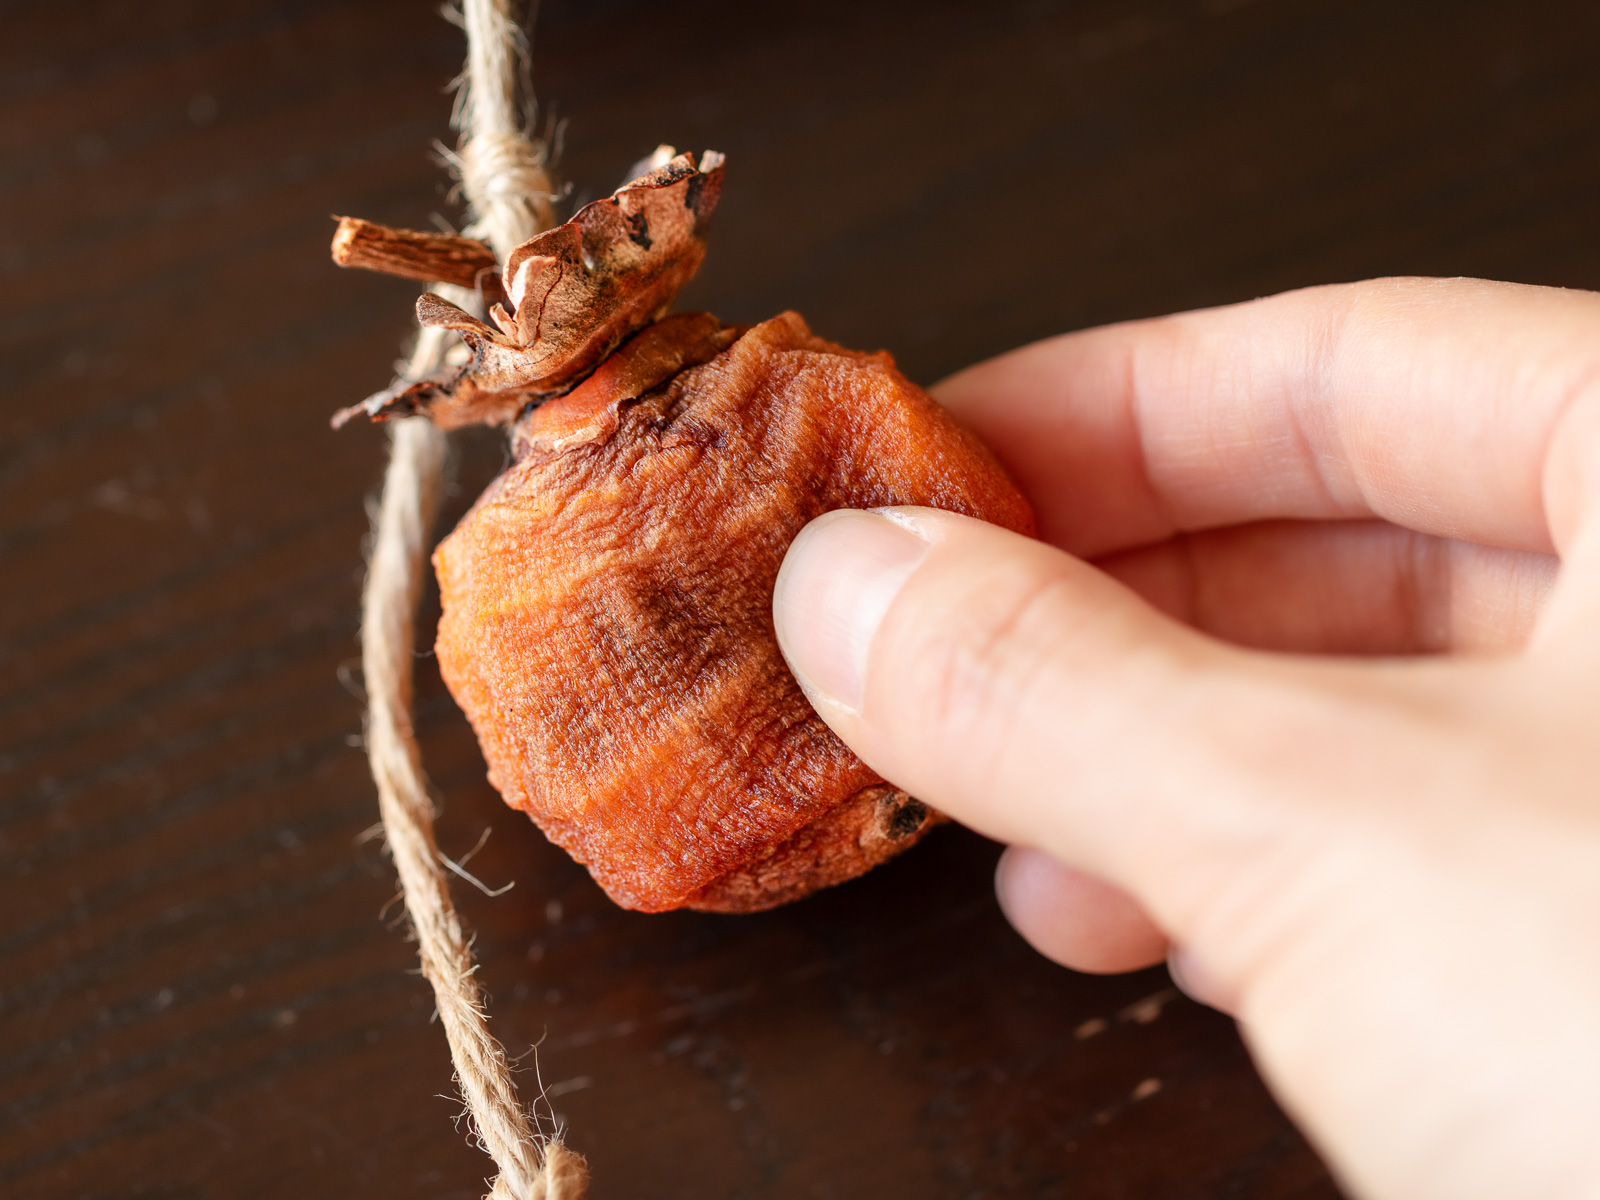
A couple of weeks later, I pinched one to check.
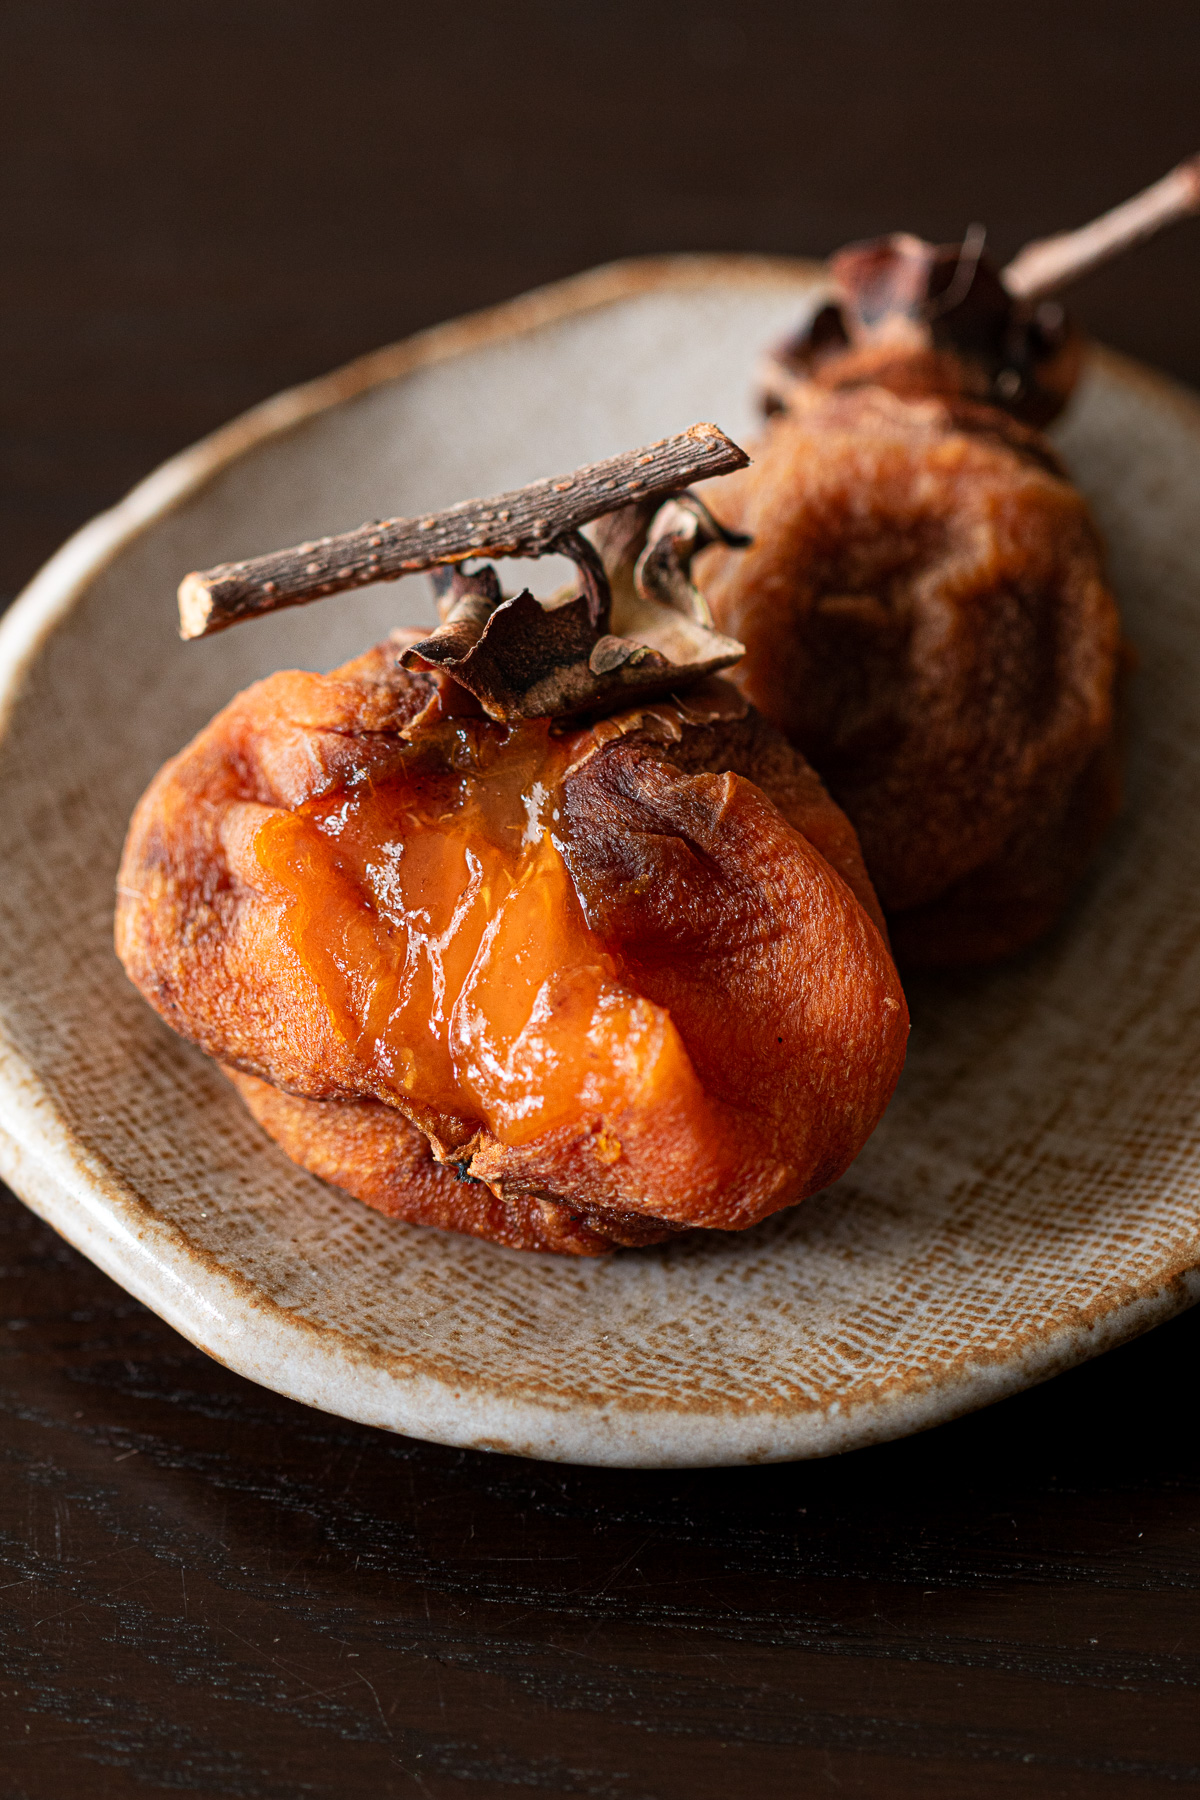
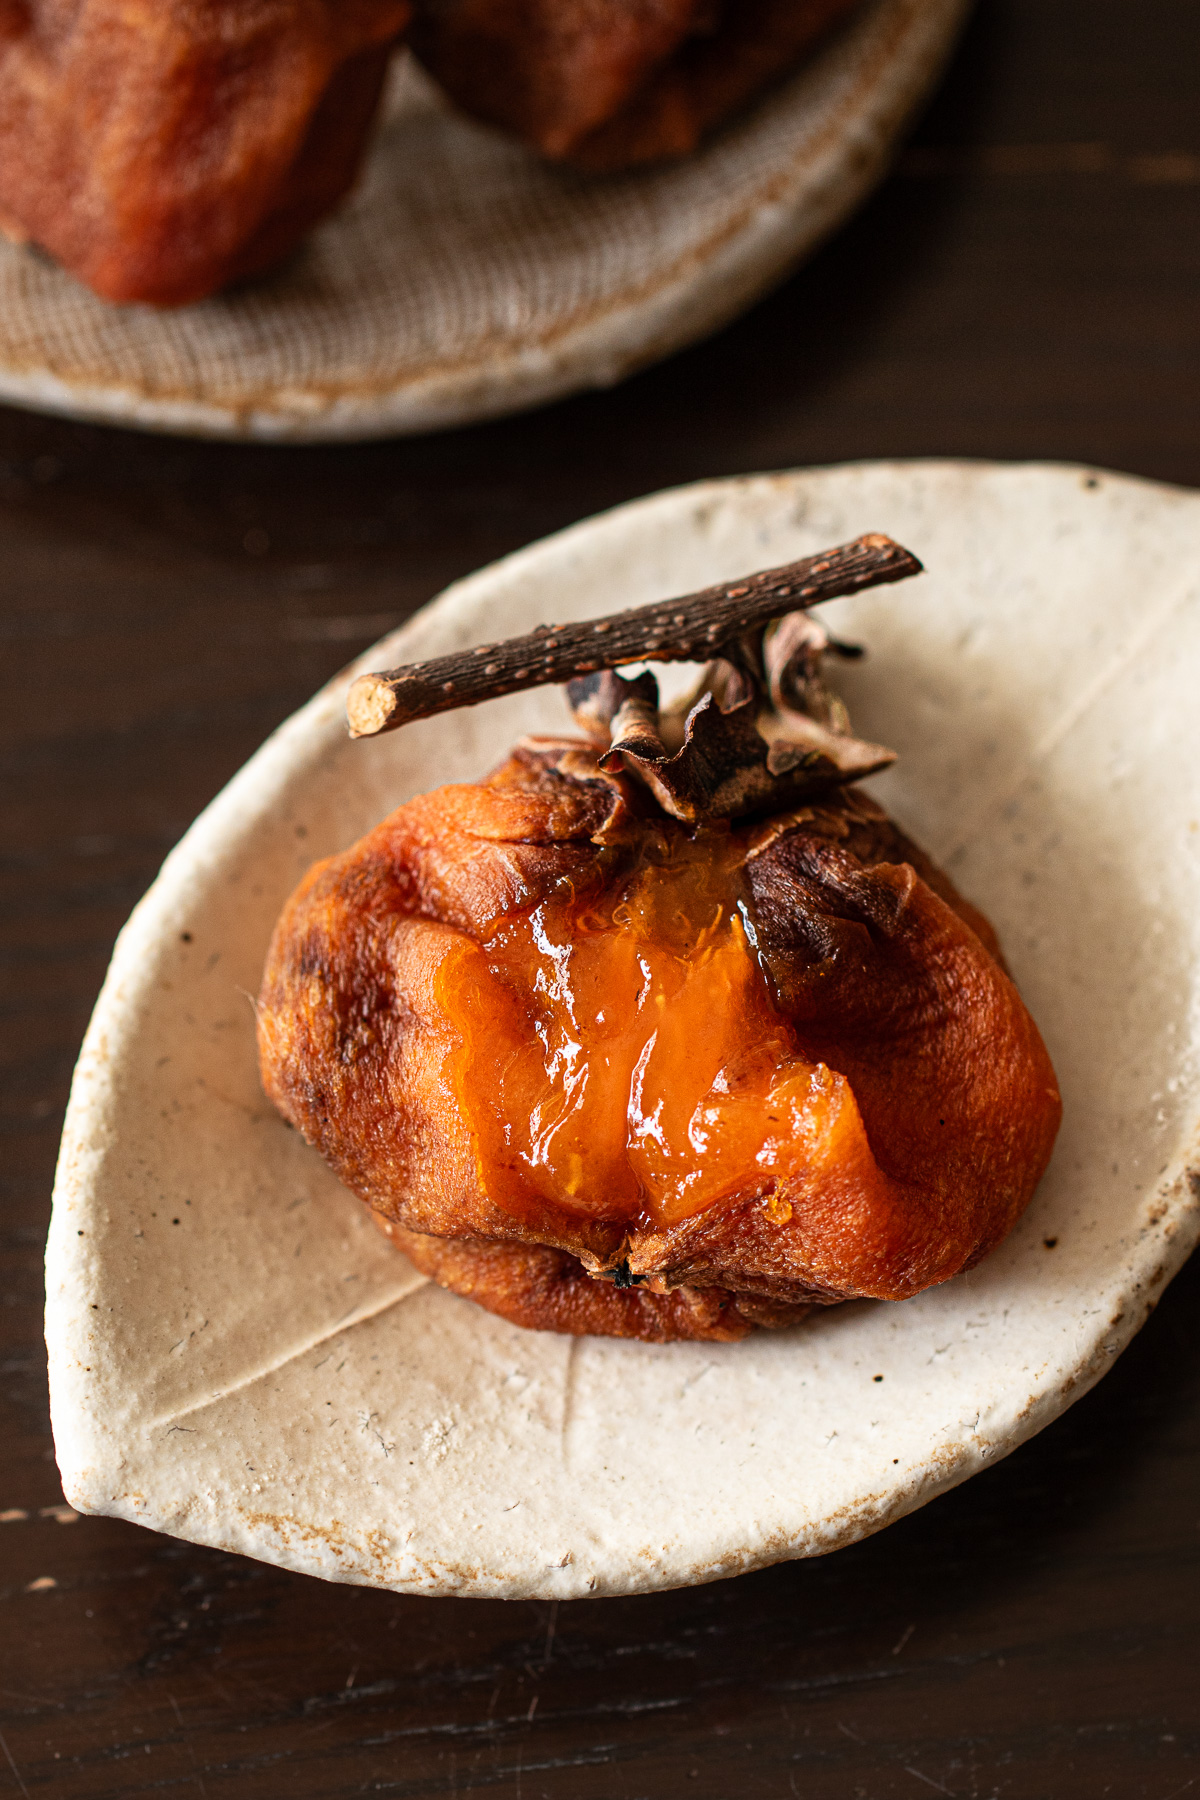
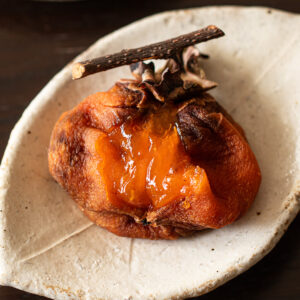
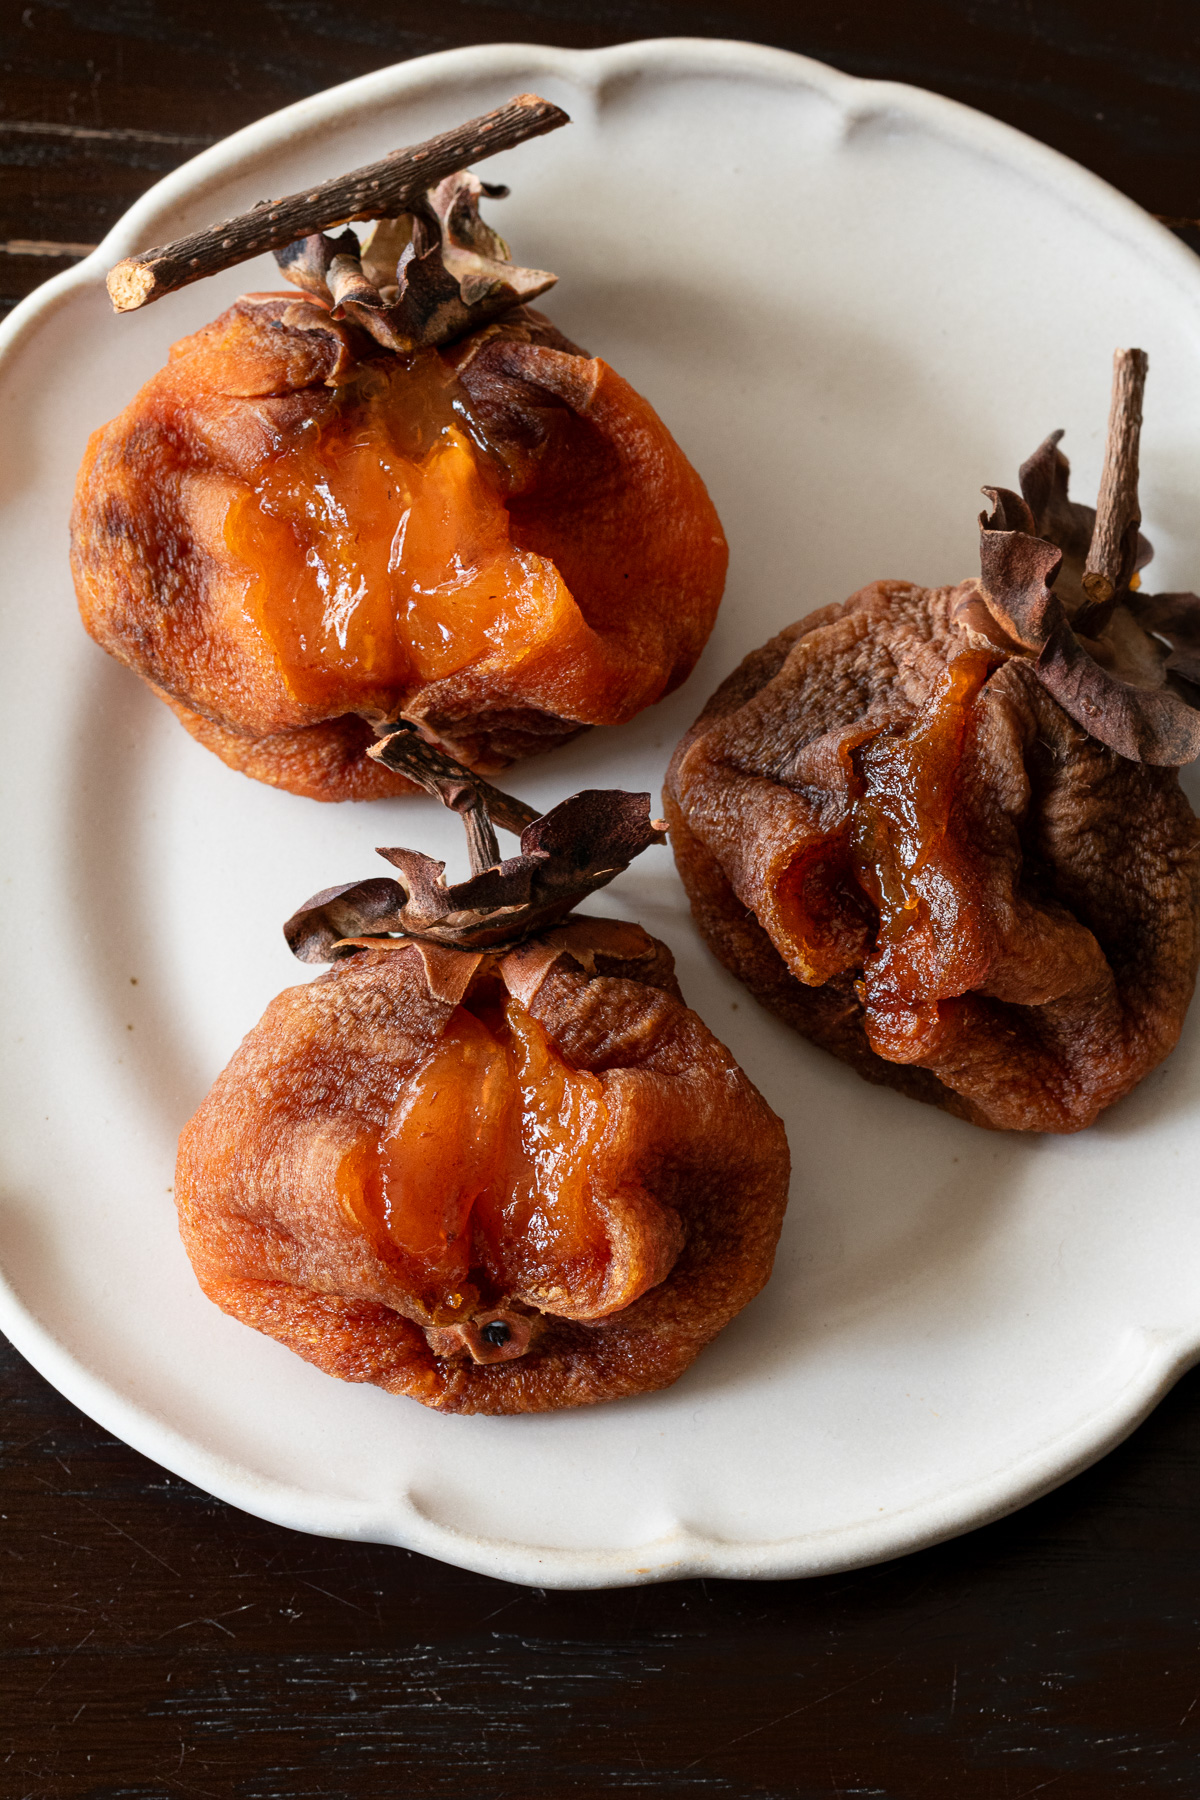
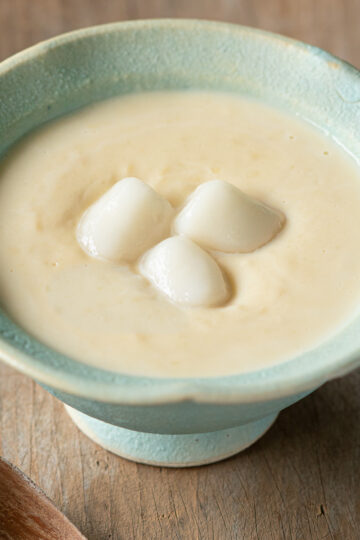
Inside, the flesh had turned glossy and soft—almost like a soft-boiled egg yolk.
The sweetness flooded my mouth.
It felt like anpo-gaki*, without smoking or special tools.
What I love about making hoshigaki myself is this flexibility.
No additives, no fixed finish line.
Stop early for a creamy center.
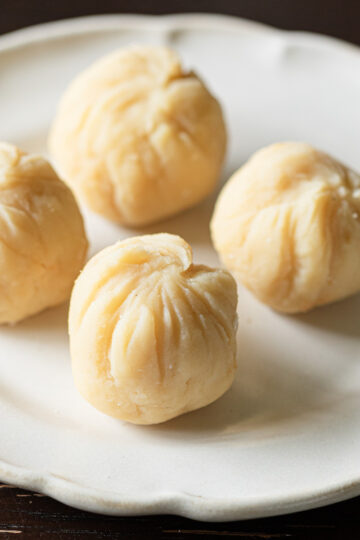
Wait longer, and it turns chewy and dense.
It’s all up to me.
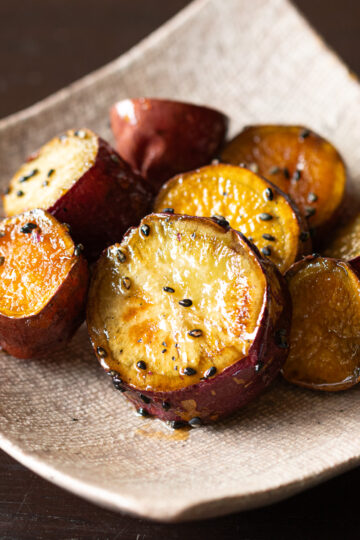
Just like my silky-sweet baked Japanese sweet potatoes (yakiimo/焼き芋), this is one of those small autumn pleasures I always look forward to.
*Anpo-gaki: semi-dried persimmons with a soft, creamy center, traditionally made using a smoking process.
🧺 What Makes This Hoshigaki Special
- A simple, vegan Japanese way to preserve persimmons
- Works with both astringent and sweet persimmons
- Texture is up to you: creamy anpo-gaki or well-dried and chewy
- No spirits or alcohol needed—just hot water and good airflow
🍑 Ingredients & Tools
▶︎ Ingredients
- Persimmons
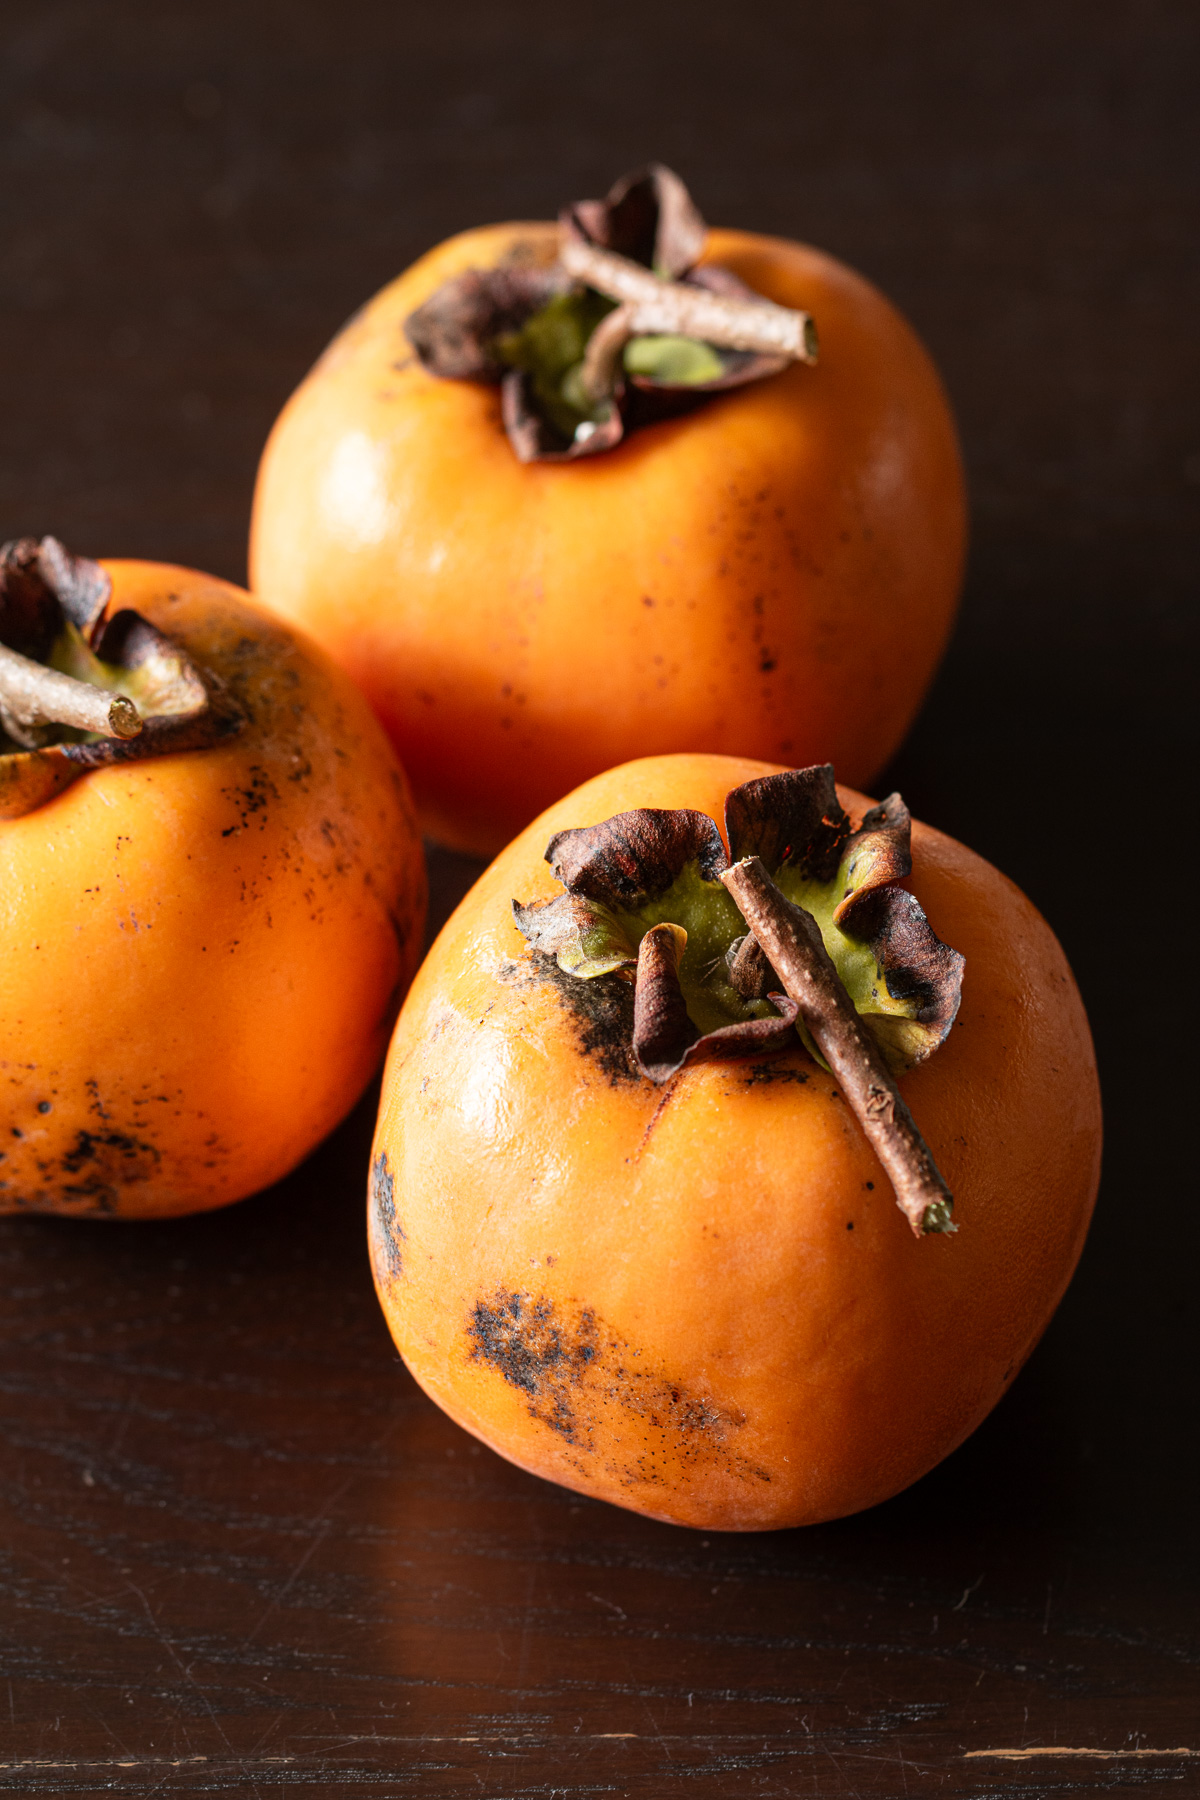
I choose persimmons that are still a little firm, with bright orange skin and flesh that feels fresh and taut—never ripe or mushy.
I usually reach for astringent persimmons with stems attached, but sweet ones work too.
They take longer to dry, and the sweetness is gentler—but the texture can be lovely.
▶︎ Tools
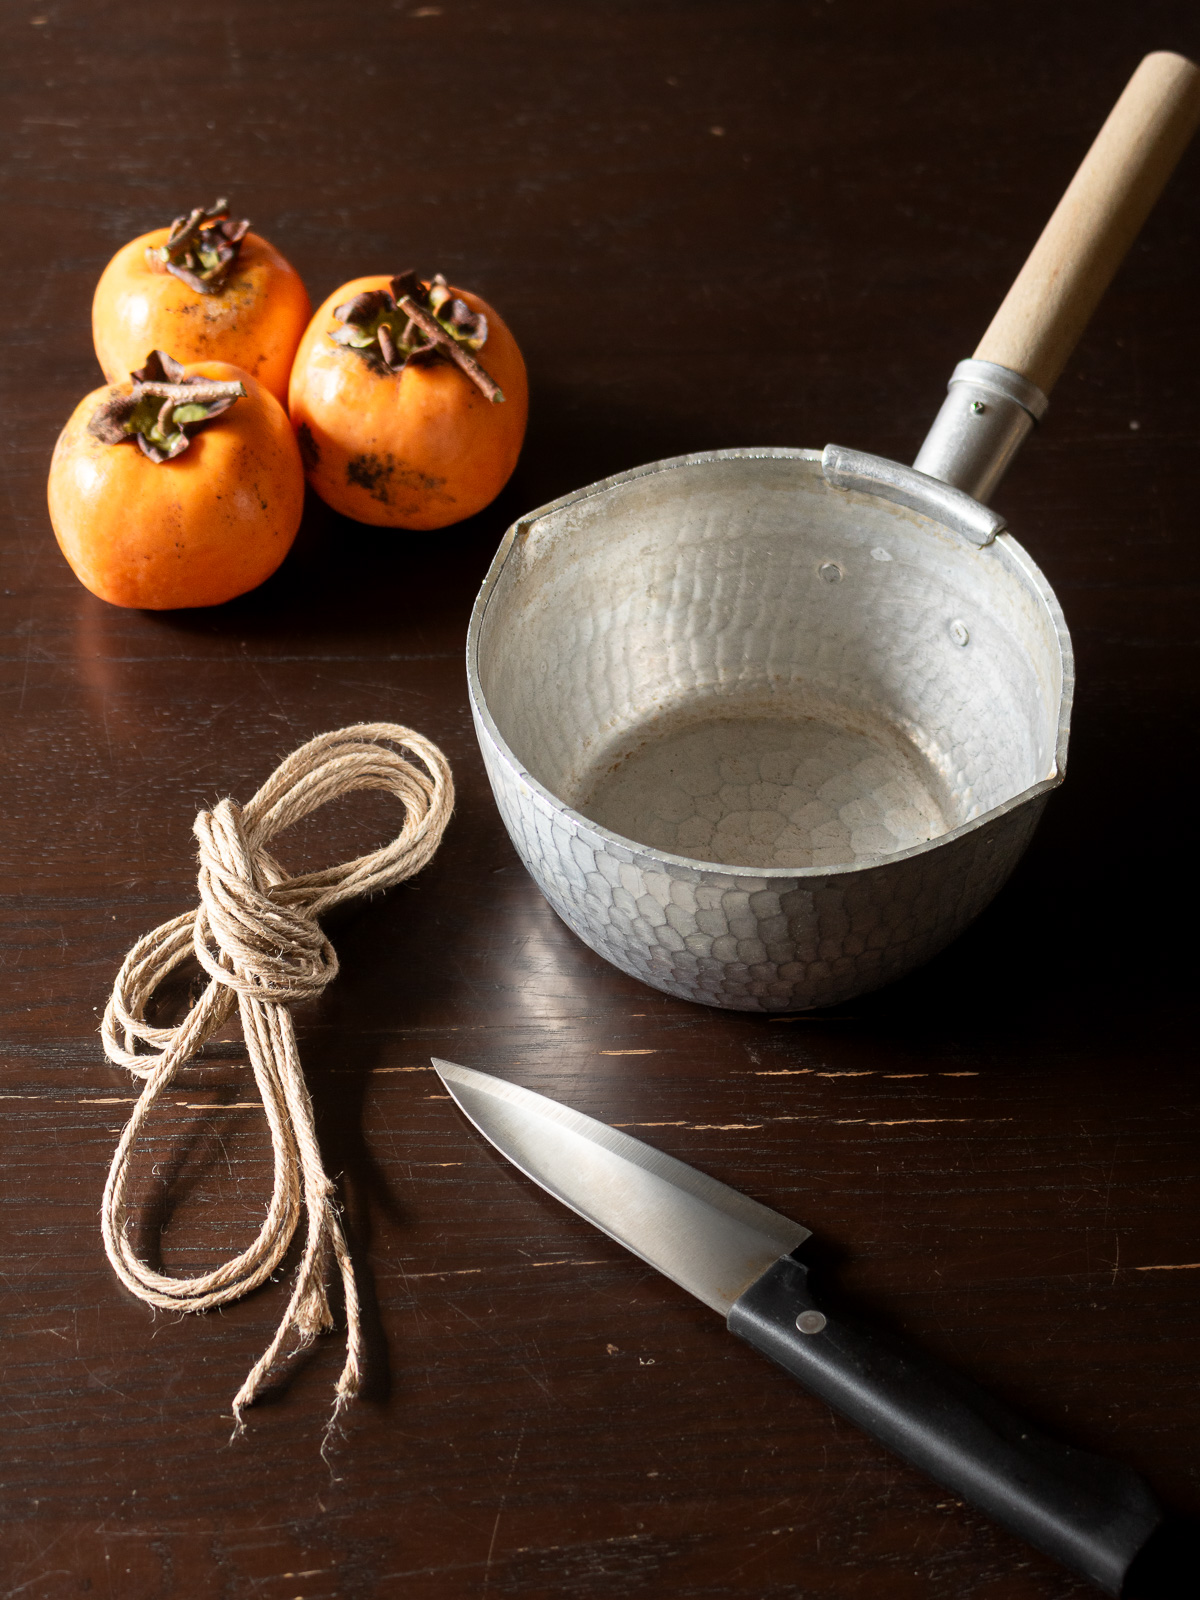
➤ For preparing
- A knife or peeler
- A pot (for brief hot-water sterilizing)
- String (hoshigaki hangers or drying baskets also work)
➤ For drying
➤ For storing
- Plastic wrap and containers
- Freezer bags if freezing
📖 How to Make Hoshigaki
Start on a sunny day, when the forecast looks calm for a while.
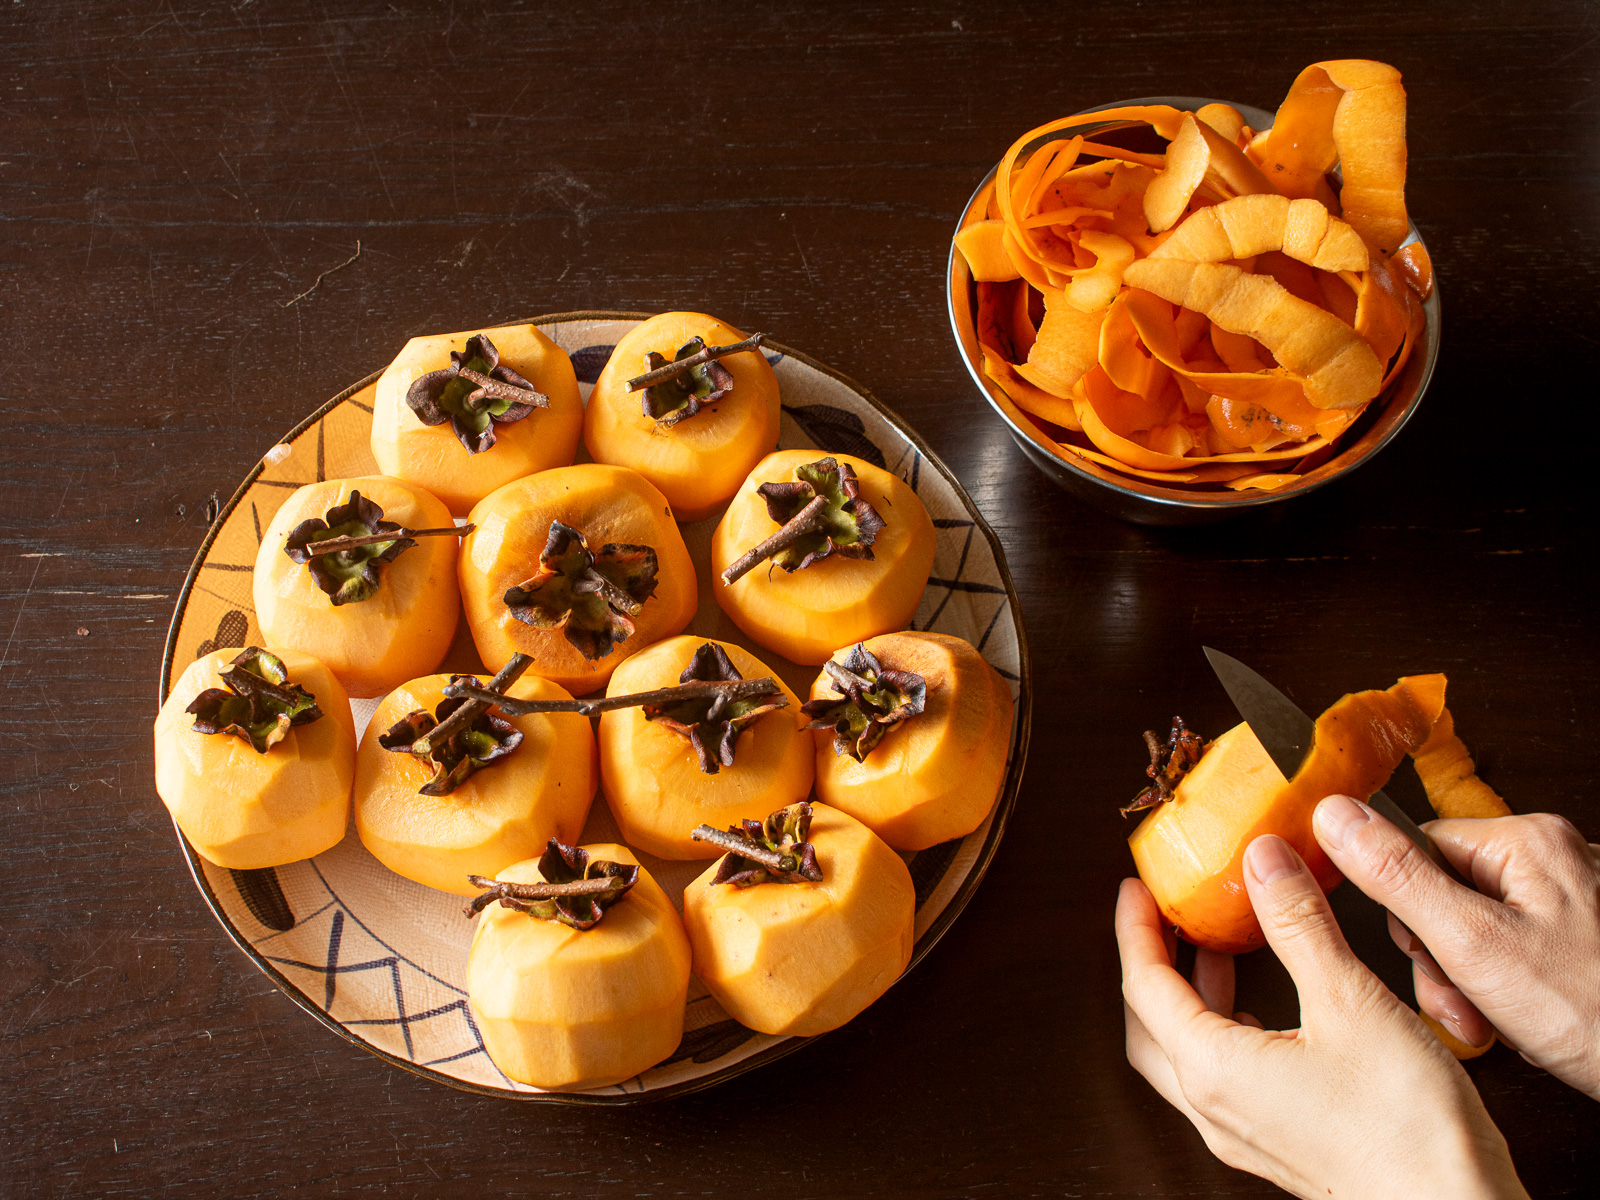
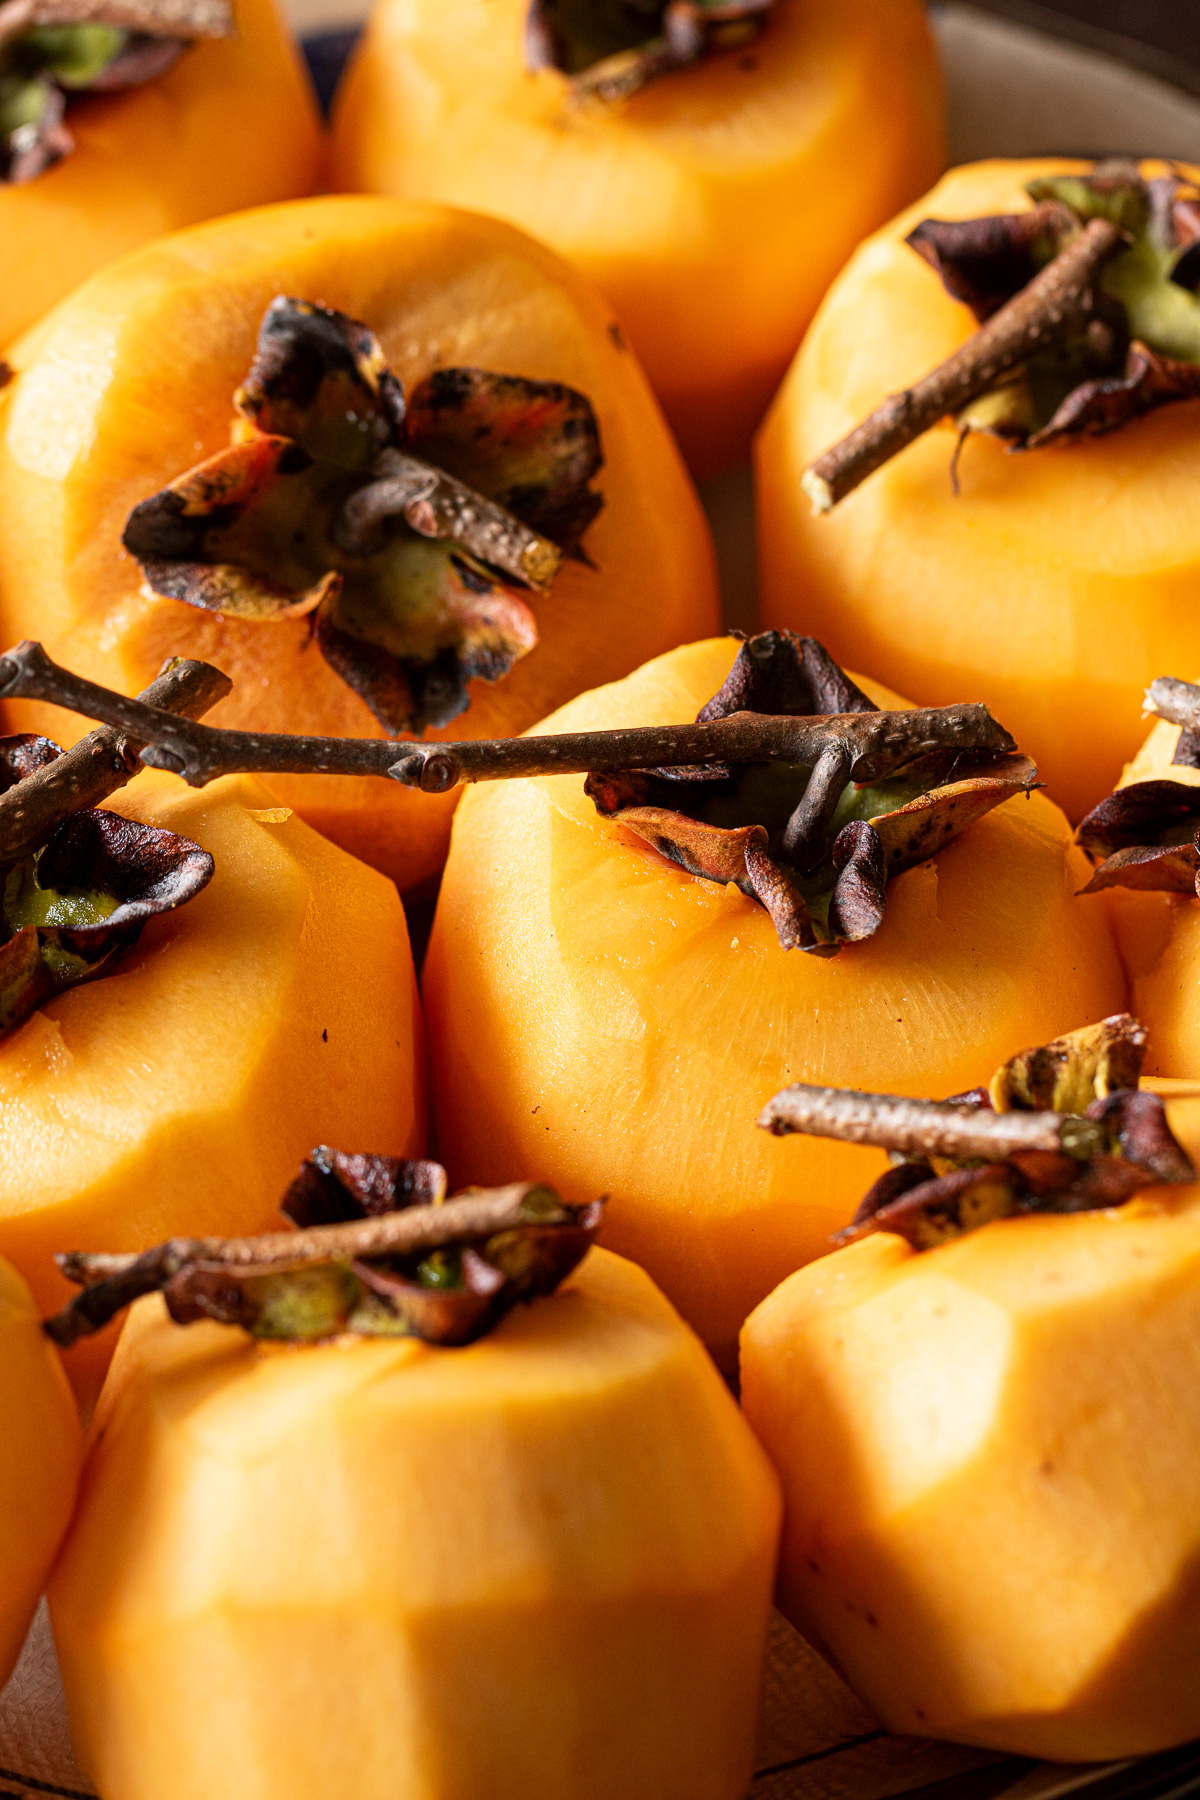
- Peel
- Peel the skin away, leaving the calyx attached.
- I sometimes peel straight down from top to bottom, sometimes in a spiral—both work.
- If there are any soft or damaged spots, cut them away.
🌿POINT:Thinner peels help moisture escape faster. The stems are what I tie the string to, so they're important.
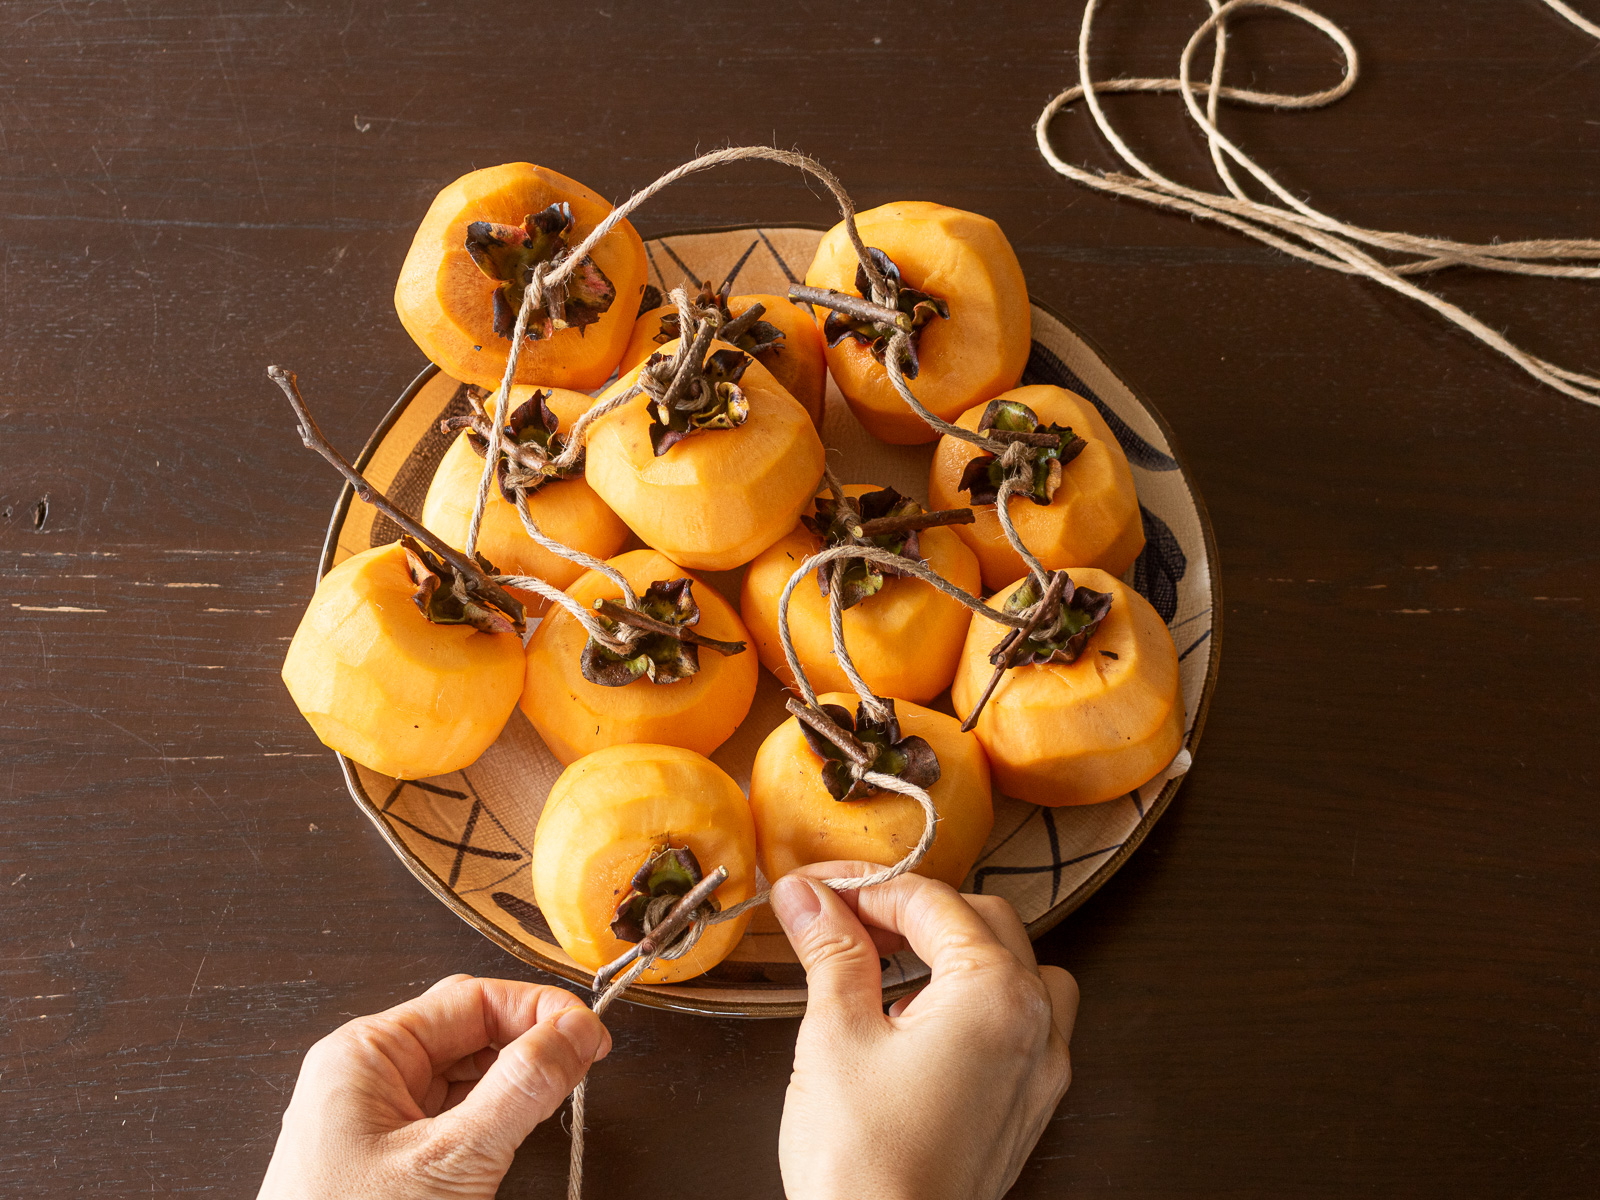
- Tie
- Wrap string around each stem and tie it securely.
- Space them about 15 cm apart along the string.
🌿POINT:If persimmons touch while drying, moisture gets trapped between them—that's usually when mold starts.
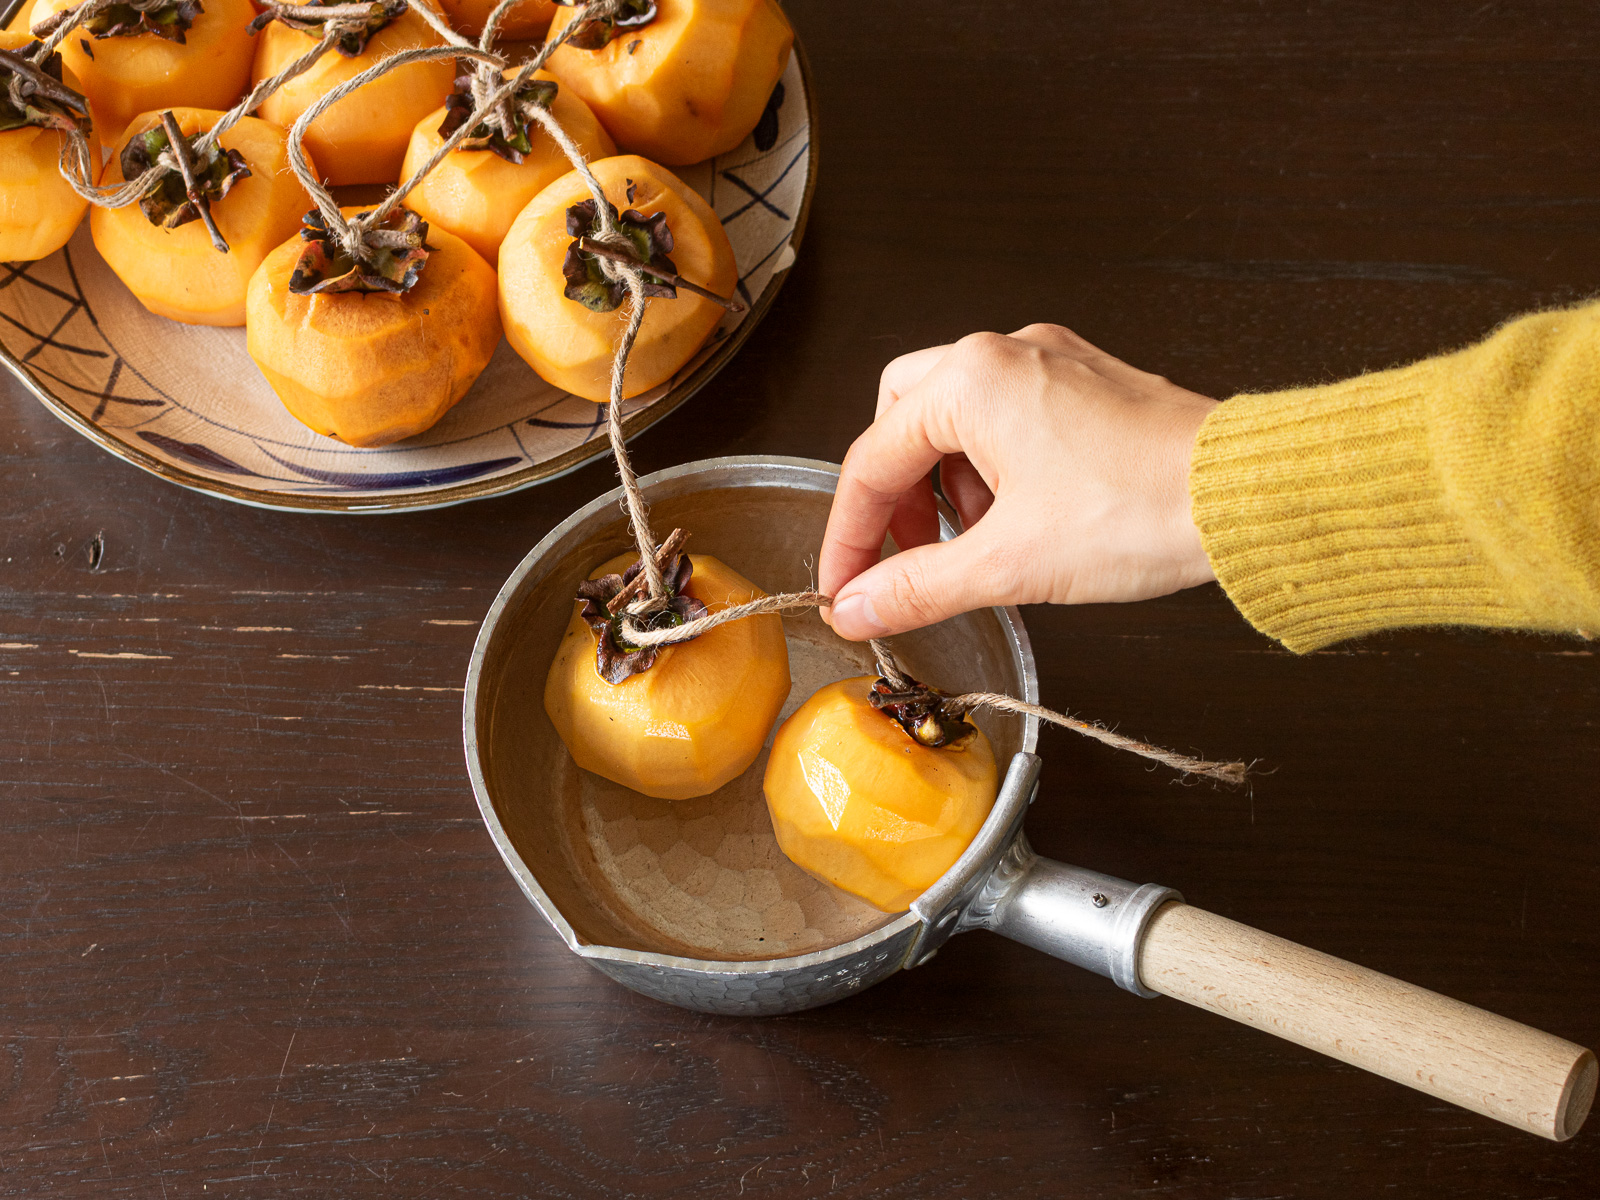
- Dip in Hot Water
- Bring a pot of water to a boil.
- Dip each persimmon for 3 to 5 seconds, then lift it out and set it on a plate.
🌿POINT:This quick dip sterilizes the surface and helps prevent mold. Any longer, and the flesh starts to cook.
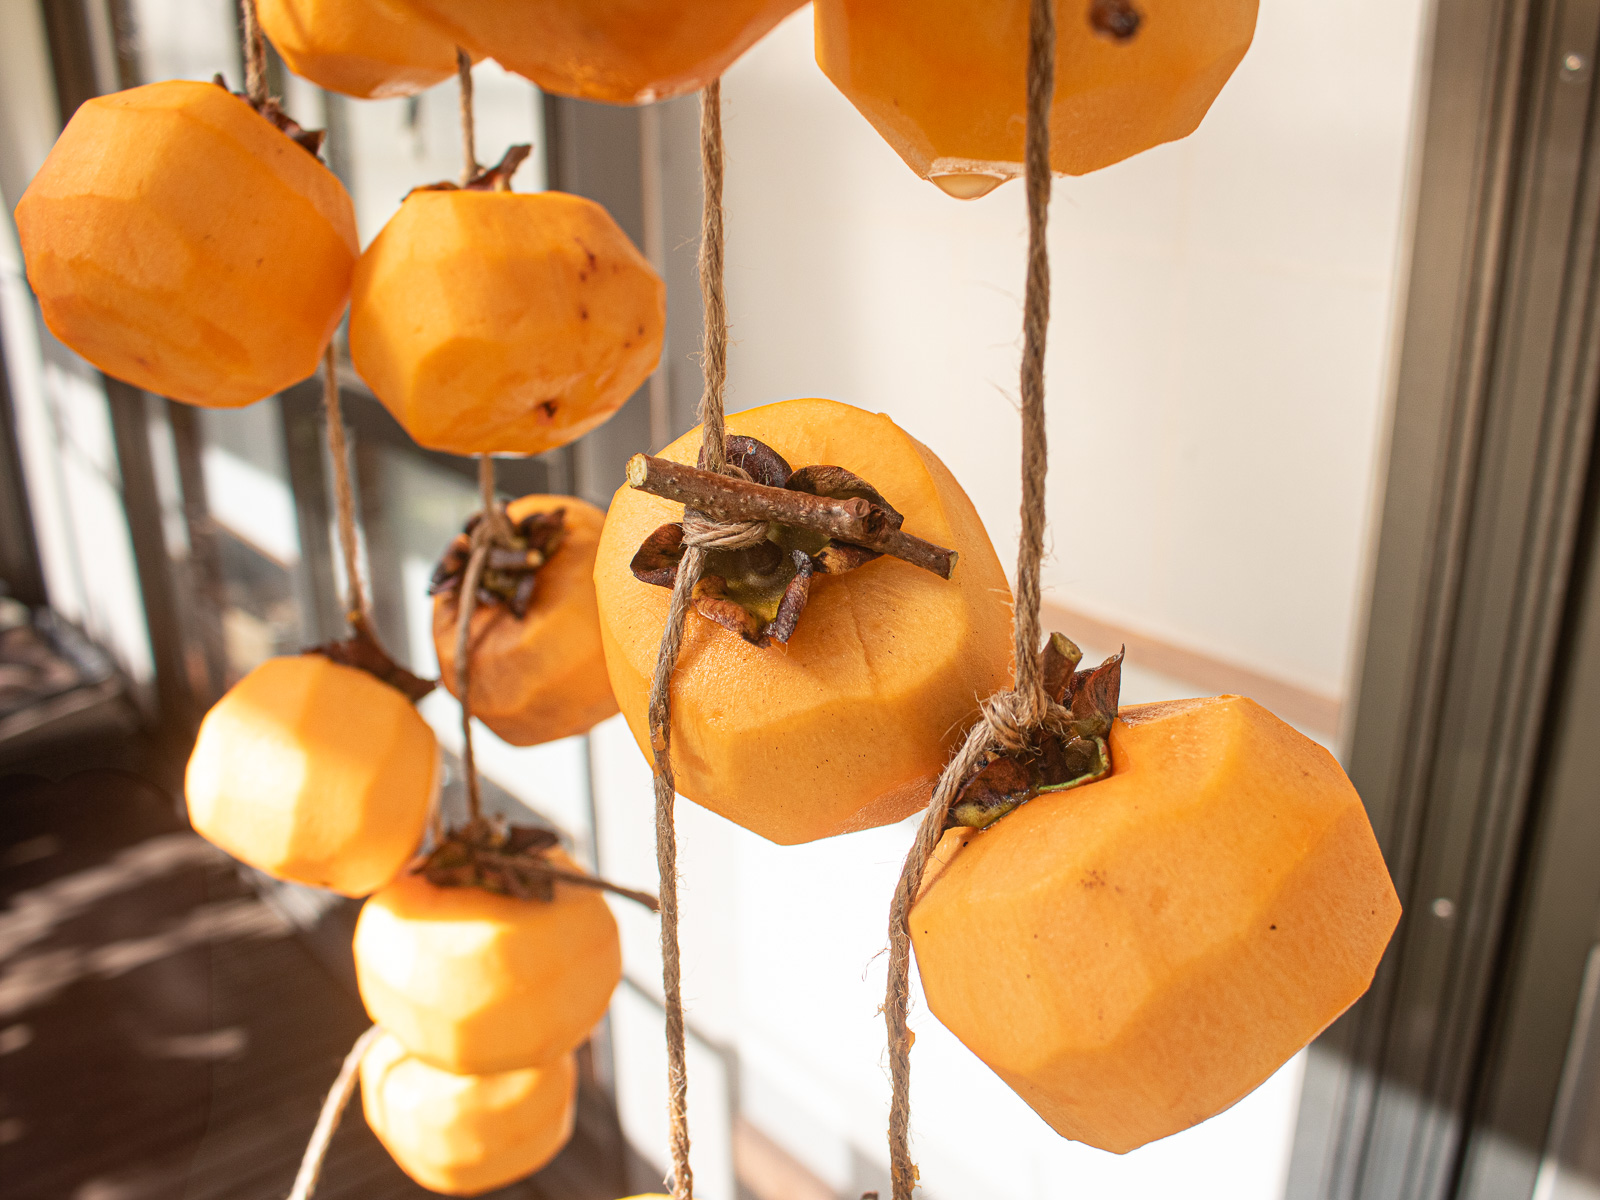
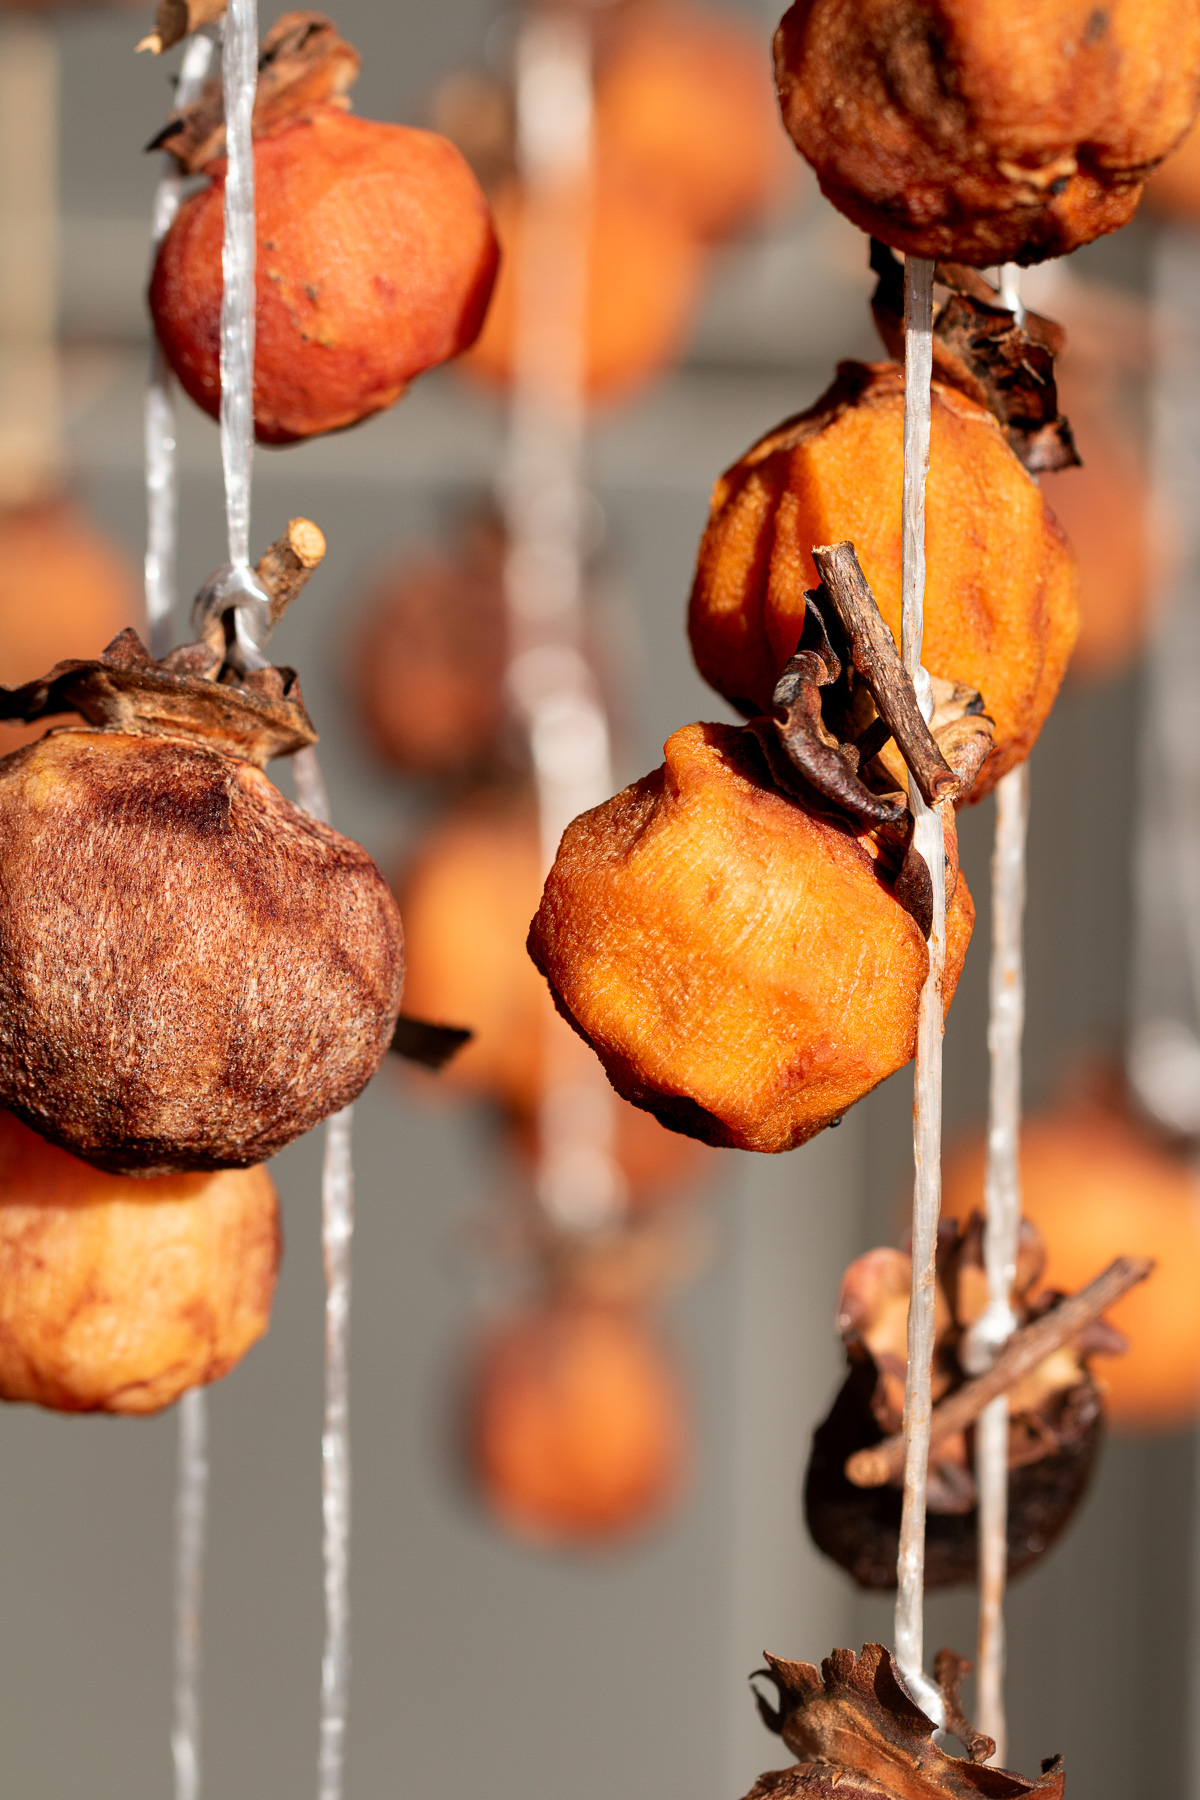
- Hang
- Hang them somewhere with good airflow—under the eaves works well.
- They need some gentle sunlight and protection from rain.
- Leave them for 2 to 4 weeks, depending on their size and how much moisture they hold.
🌿POINT: Rain and dew cause mold. If the weather turns bad, just bring them in and let them keep drying indoors.
- Massage
- Once the surface feels dry—usually after 1 to 3 weeks—I start massaging them gently with my fingers.
- Not hard, just enough to soften the inside a little.
- I do this every few days, 2 or 3 times total.
🌿POINT: Massaging helps the sugars spread evenly. It also makes the texture softer. But honestly, even if I forget, they still turn out fine.

Plus, changing their orientation every few days helps them dry evenly.

- Store (or Eat)
- When they feel right to me, I take them down.
- Some I eat right away. Others go into the fridge or freezer, depending on how soft or firm they are.
🌿POINT: Timing varies by size and moisture content, so I check them often and stop when they reach a texture I like. (See 🗓 How I Decide They’re Ready for more.)
🗓 How I Decide They’re Ready
I don’t follow a strict schedule.
Instead, I pay attention to color, texture, and taste.
Drying time is only a guide.
What matters more is what you see and feel.
▶︎ How to Tell When They’re Ready
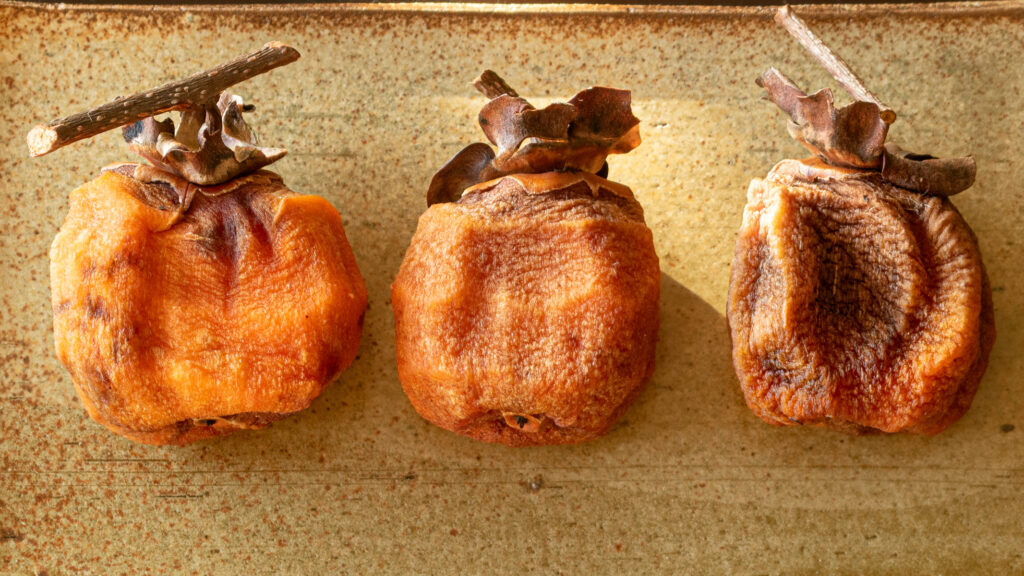
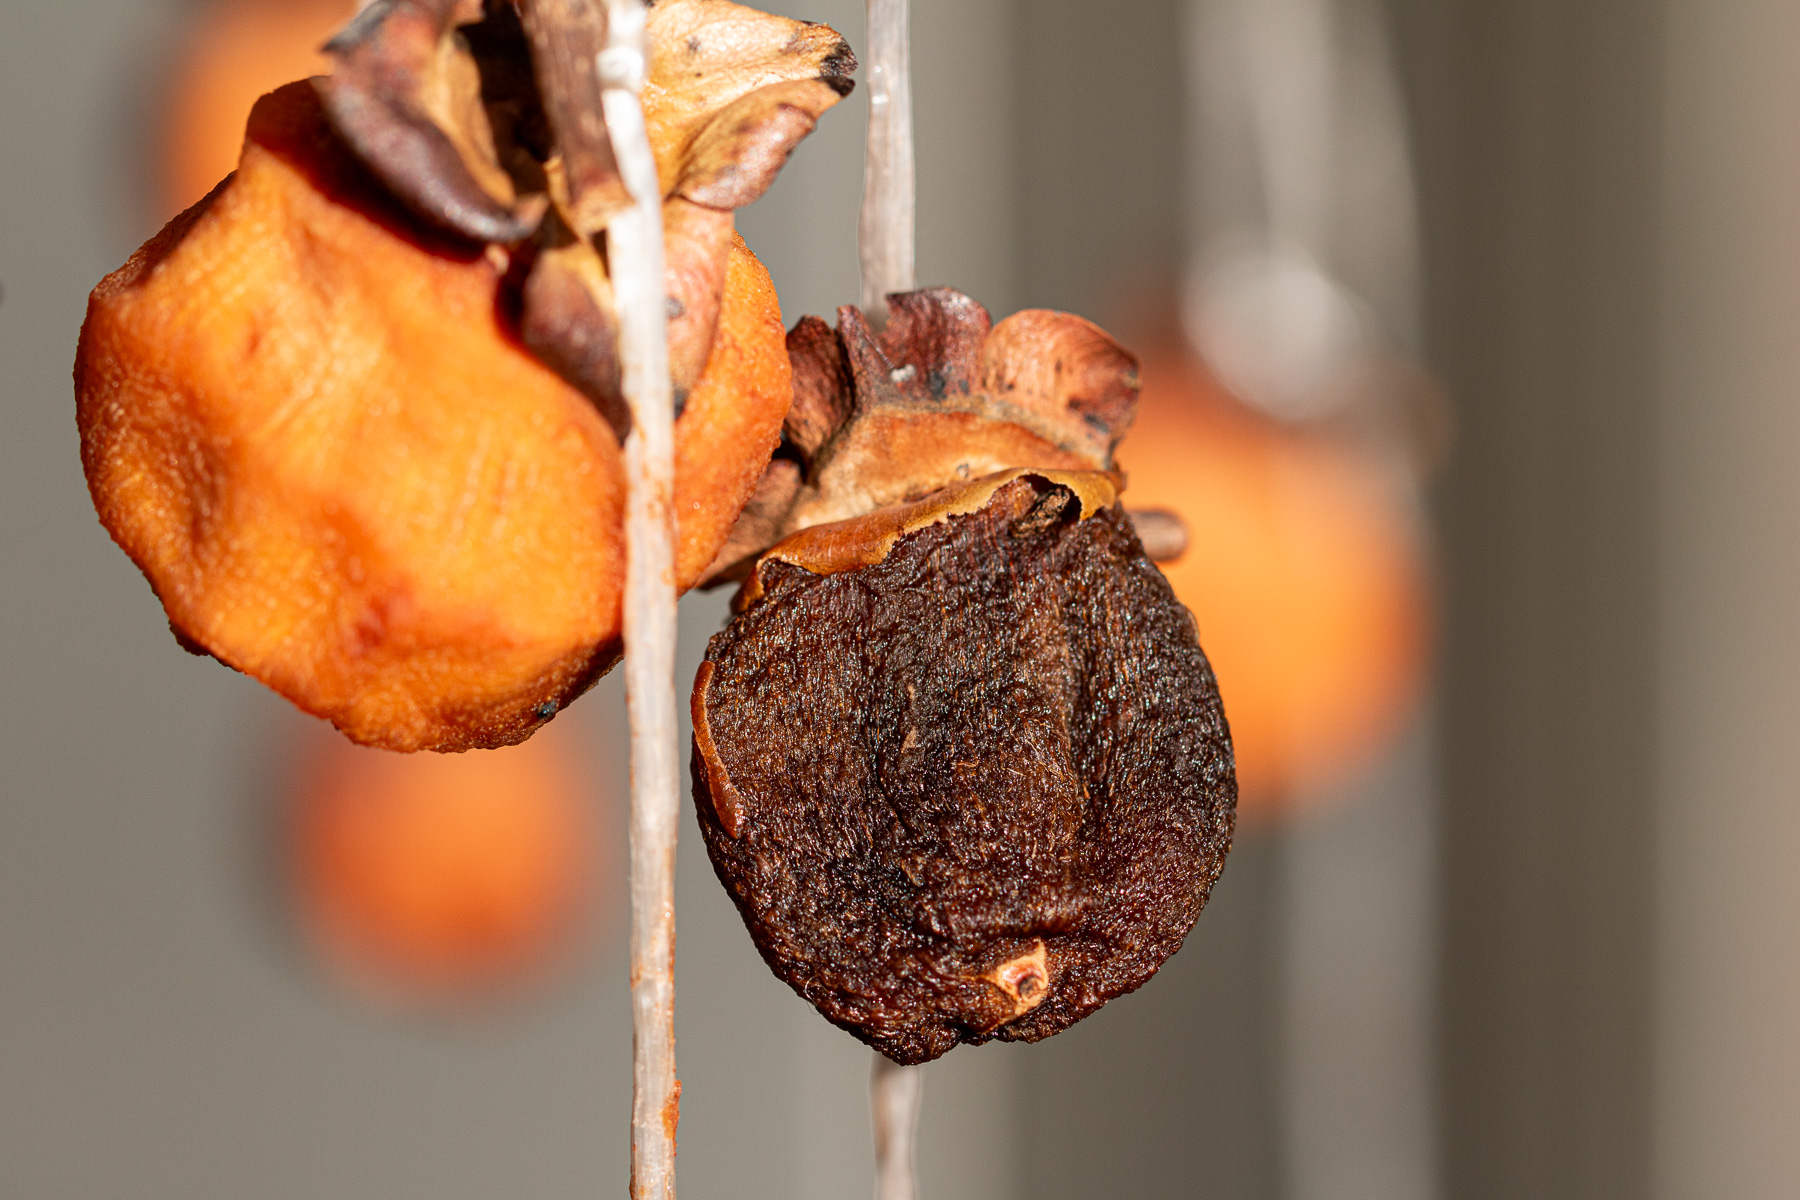
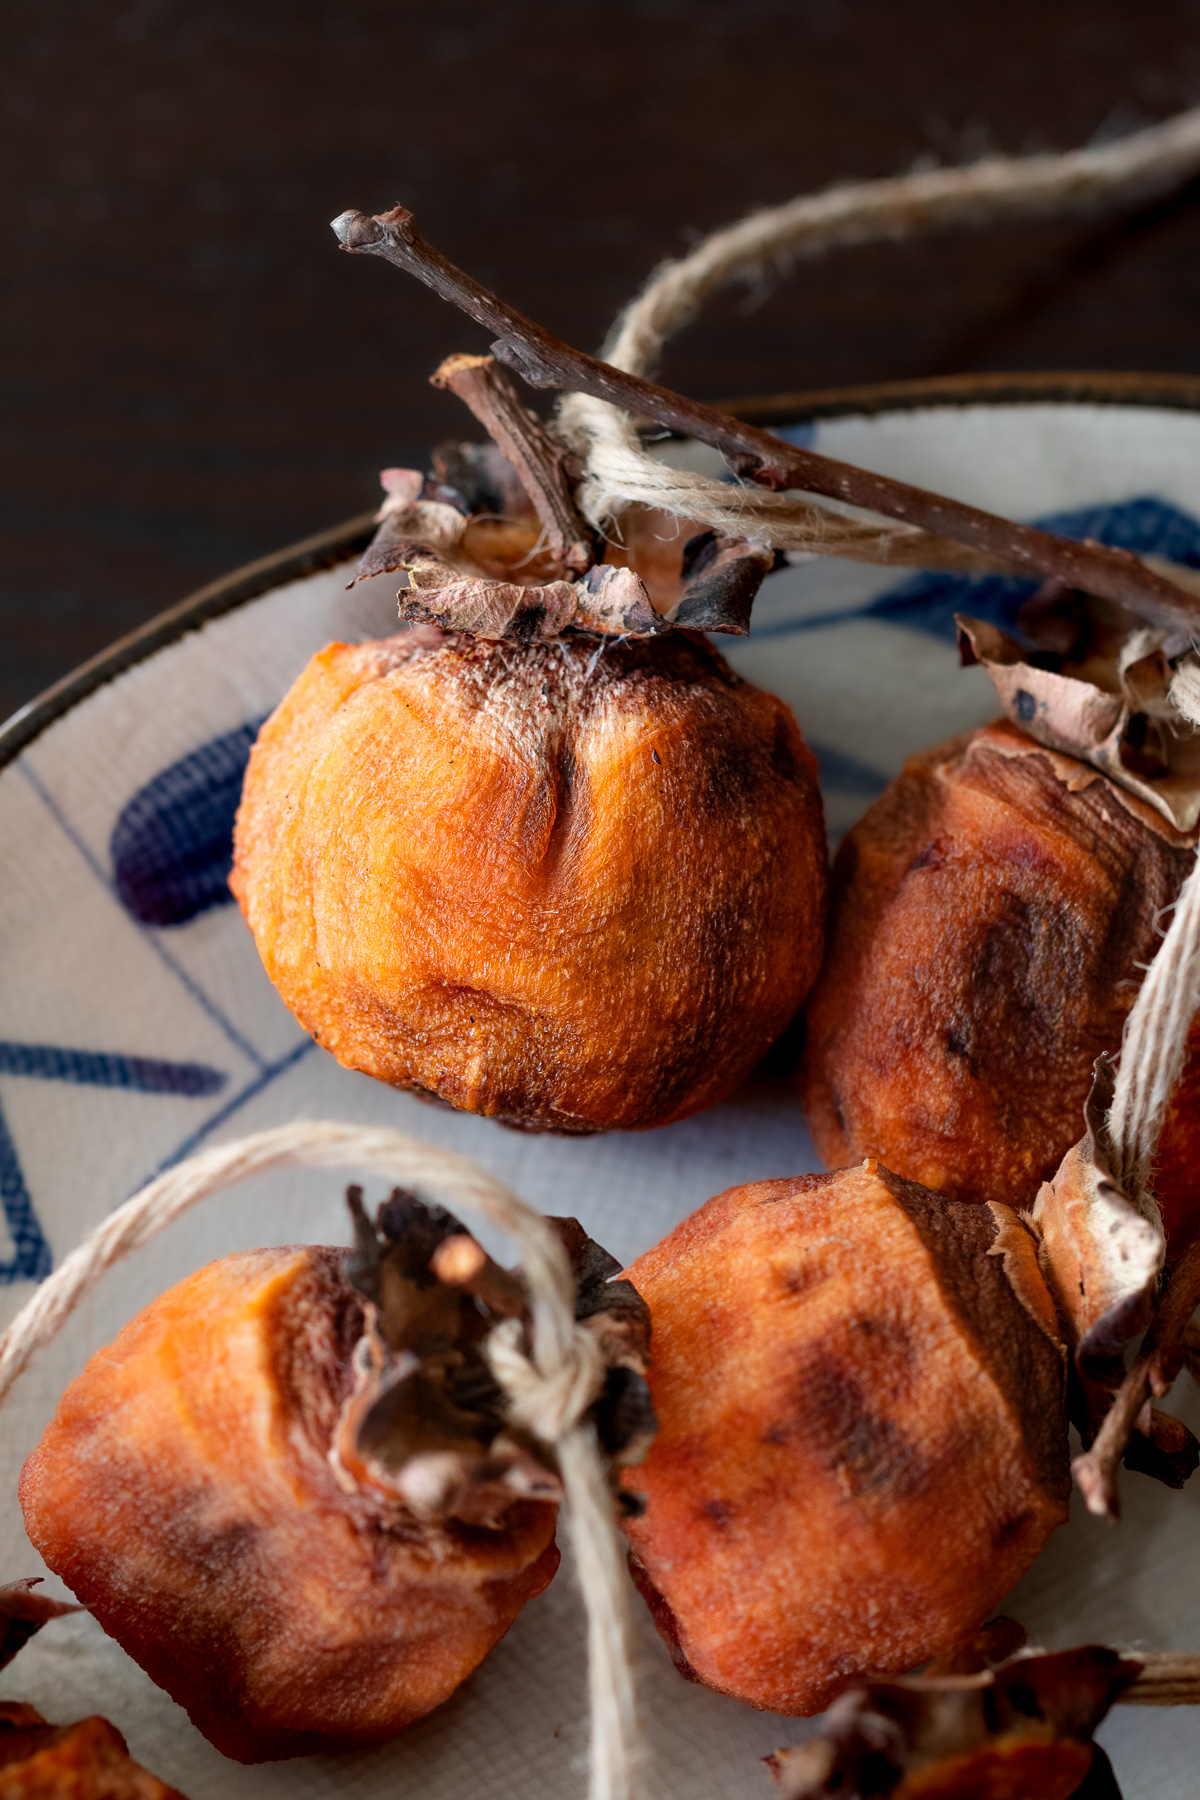
➤ Color
- Start: Bright orange
- Midway: Turns brownish
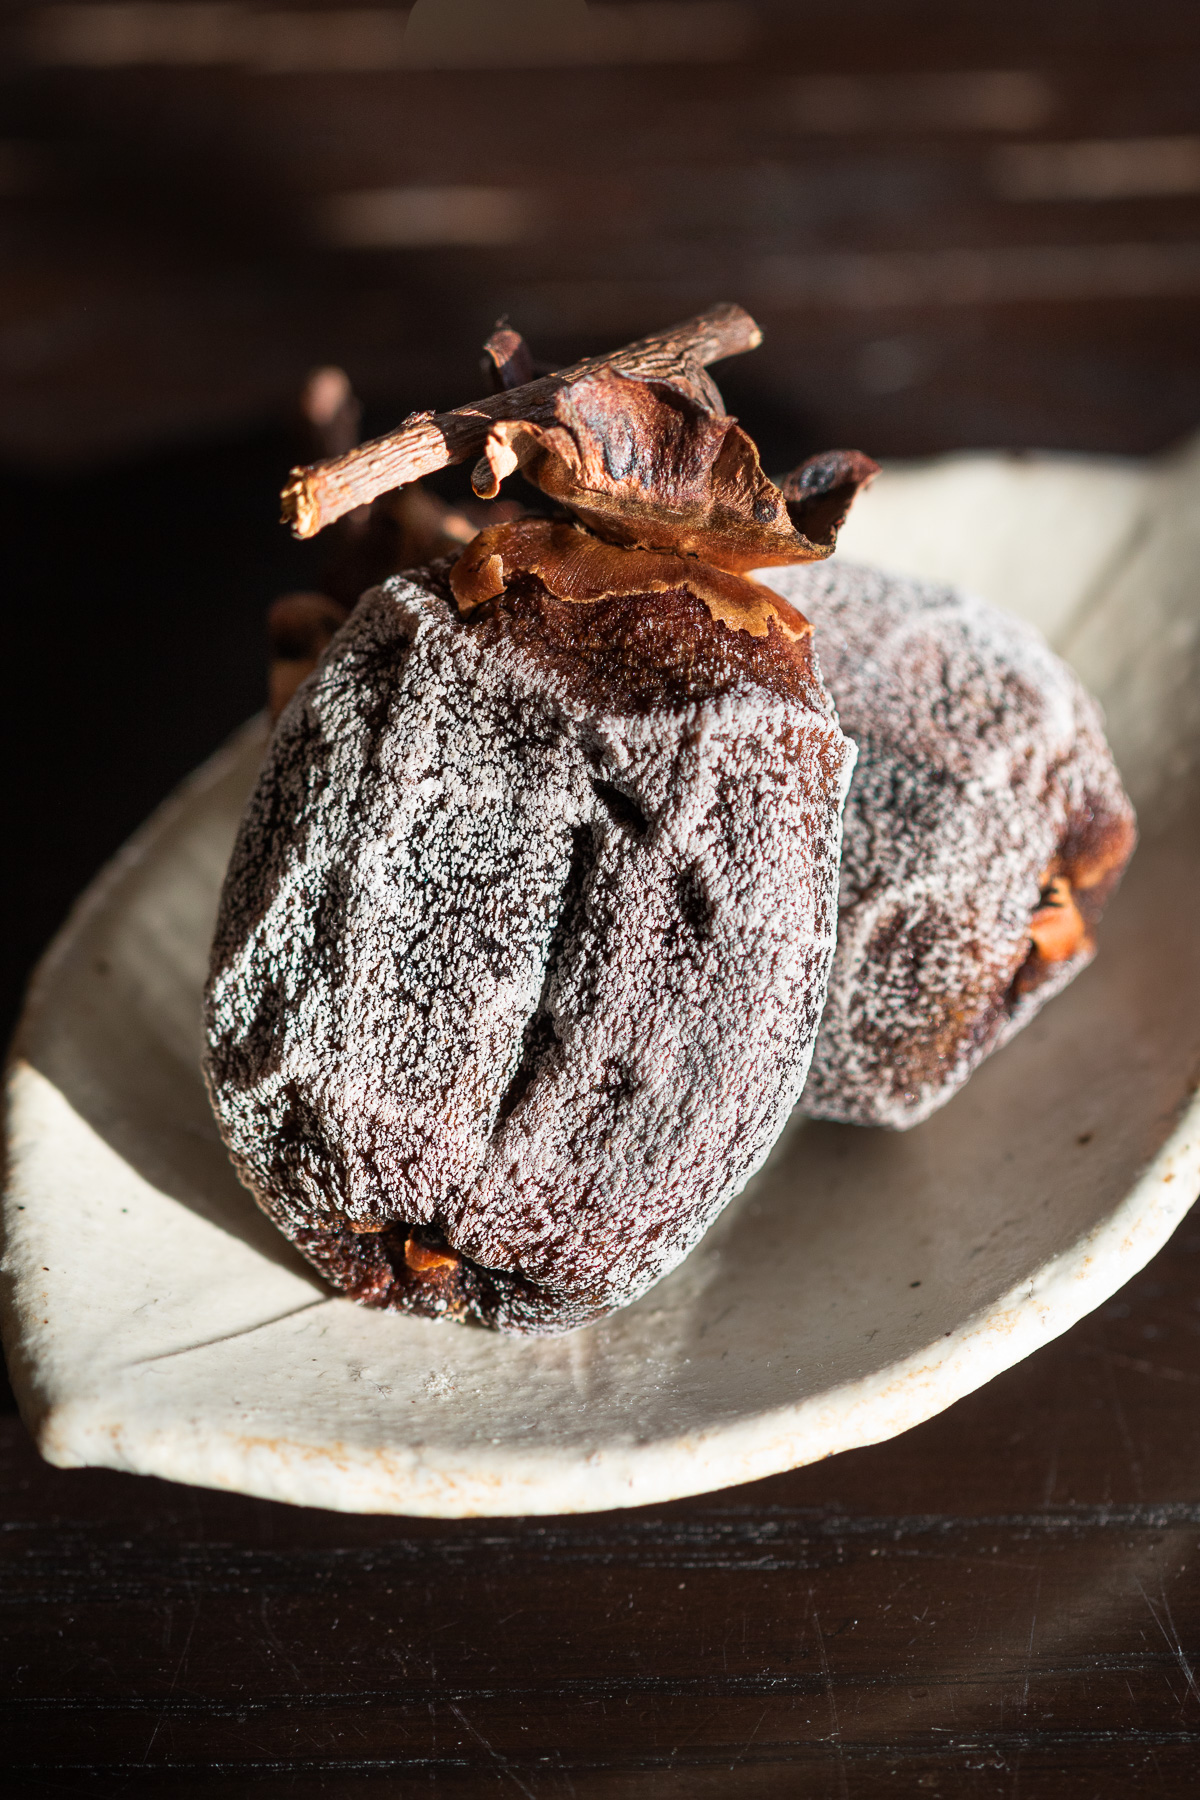
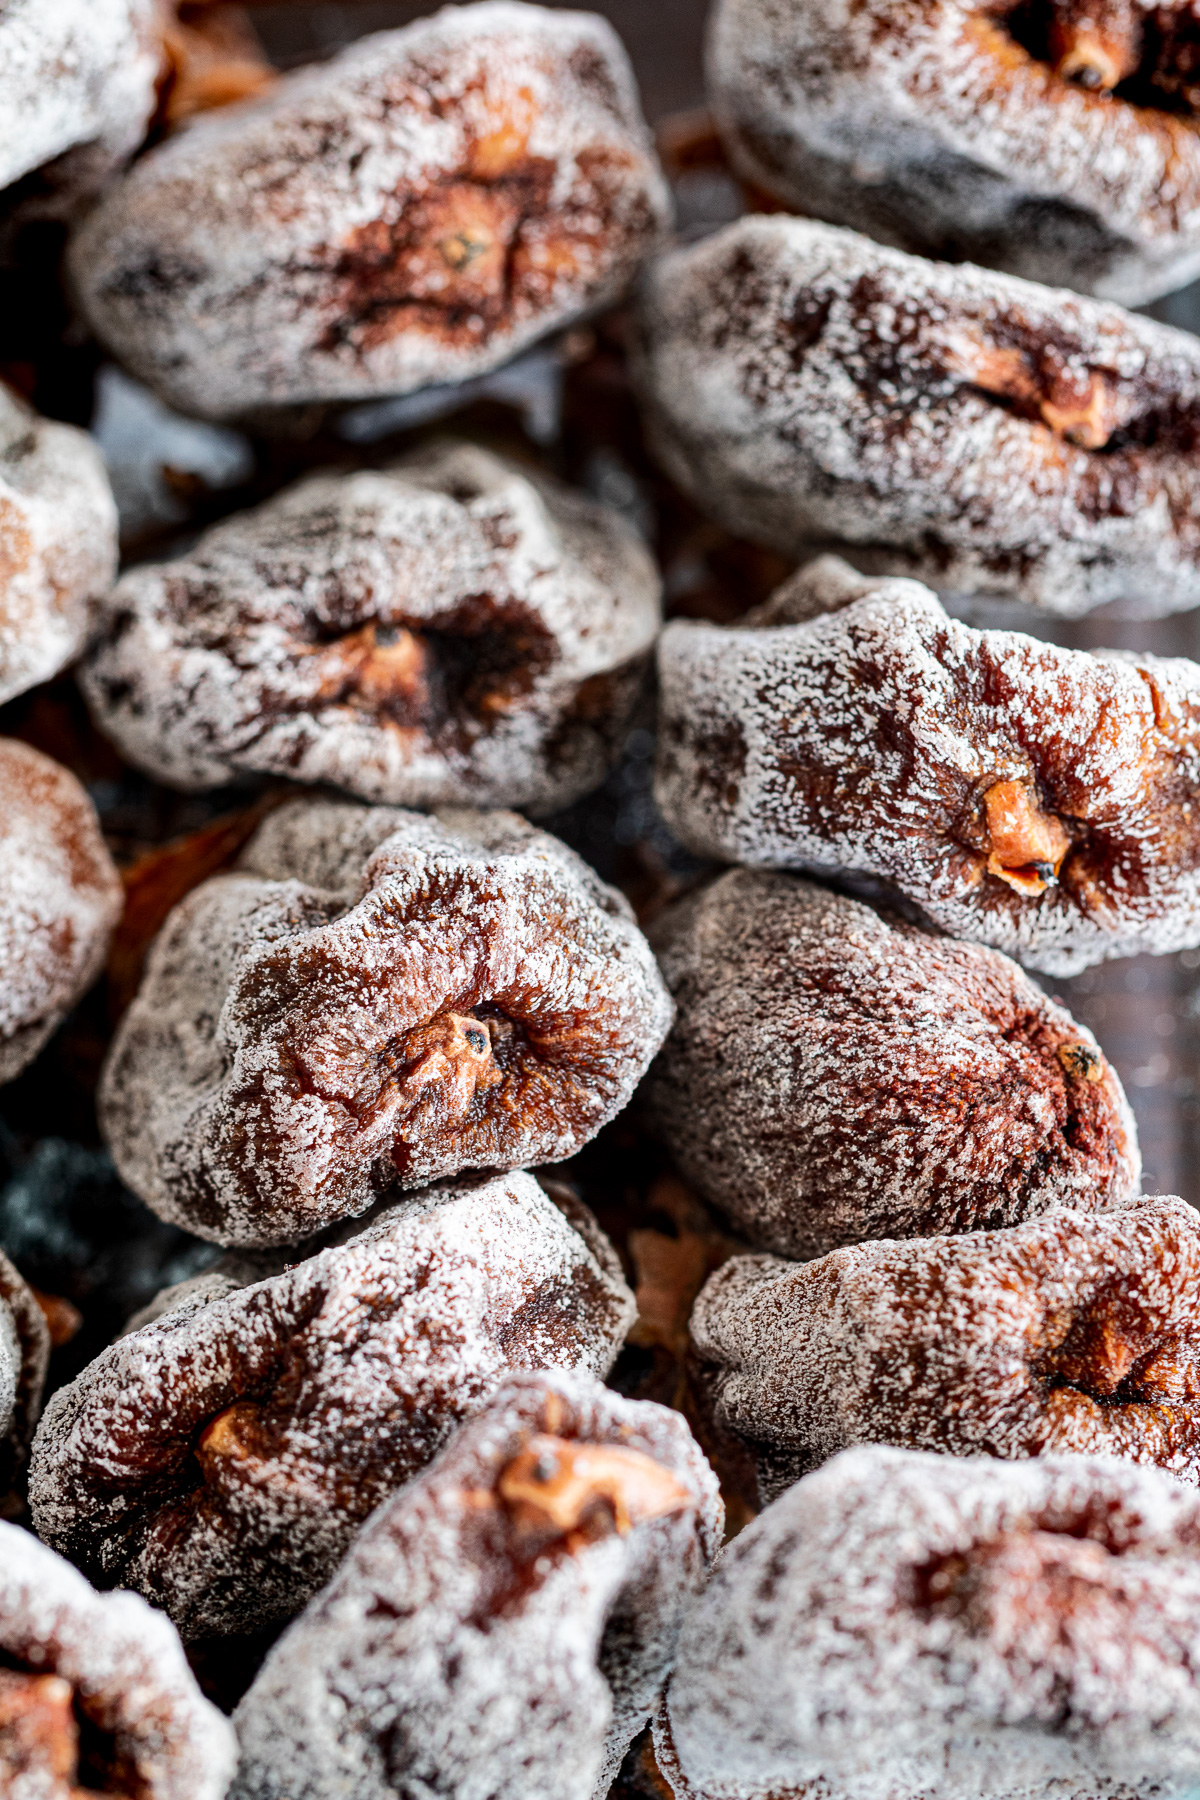
- Complete: Dark brown
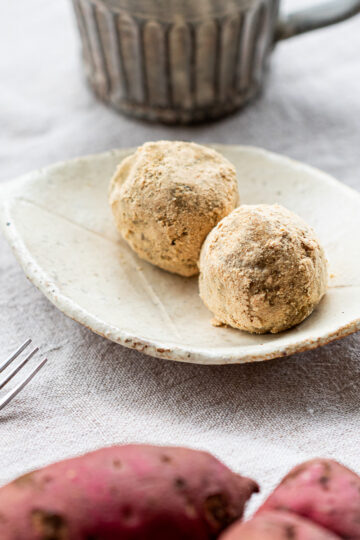
A light white powder (natural sugar bloom) may appear on the surface — a good sign
➤ Firmness
- Soft and springy → creamy, anpo-gaki style
- Medium-firm → chewy and moist
- Quite firm → good for longer storage
Take them down when they reach the texture you like.
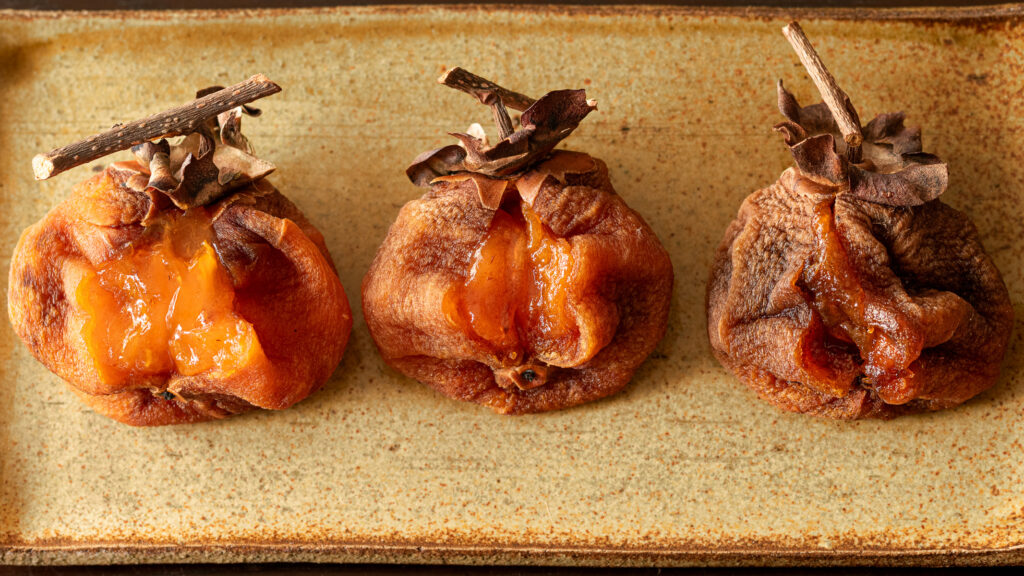
▶︎ Different Stages, Different Textures
I used sweet persimmons this time, so timing is just a rough guide.
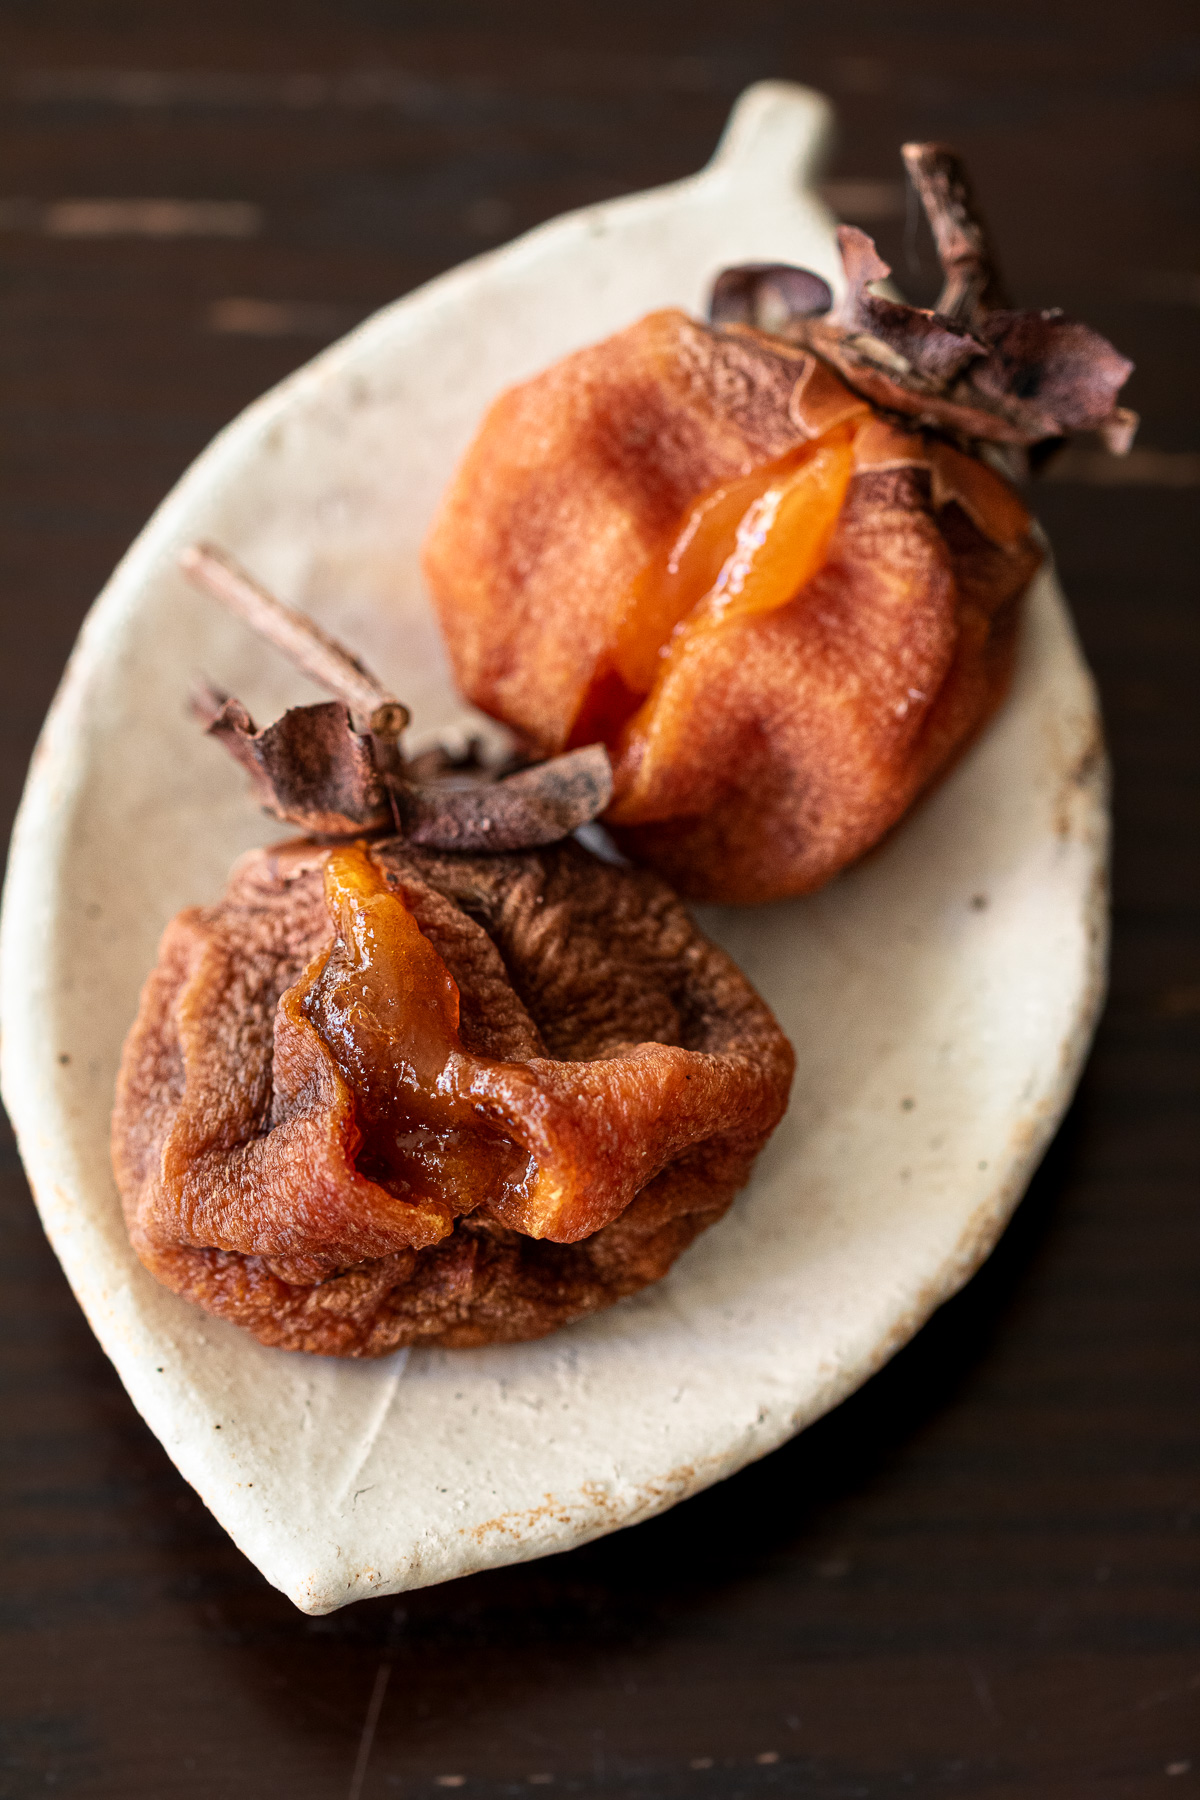
➤ Semi-Dried (Anpo-Gaki Style)
- Drying time: From about 1–2 weeks
- Texture: Soft and creamy, almost like a soft-boiled egg yolk
- Taste: A rich, juicy sweetness that fills your mouth
- Storage:
- Room temperature: Very moist, so best eaten soon
- Long-term: Freezer works best
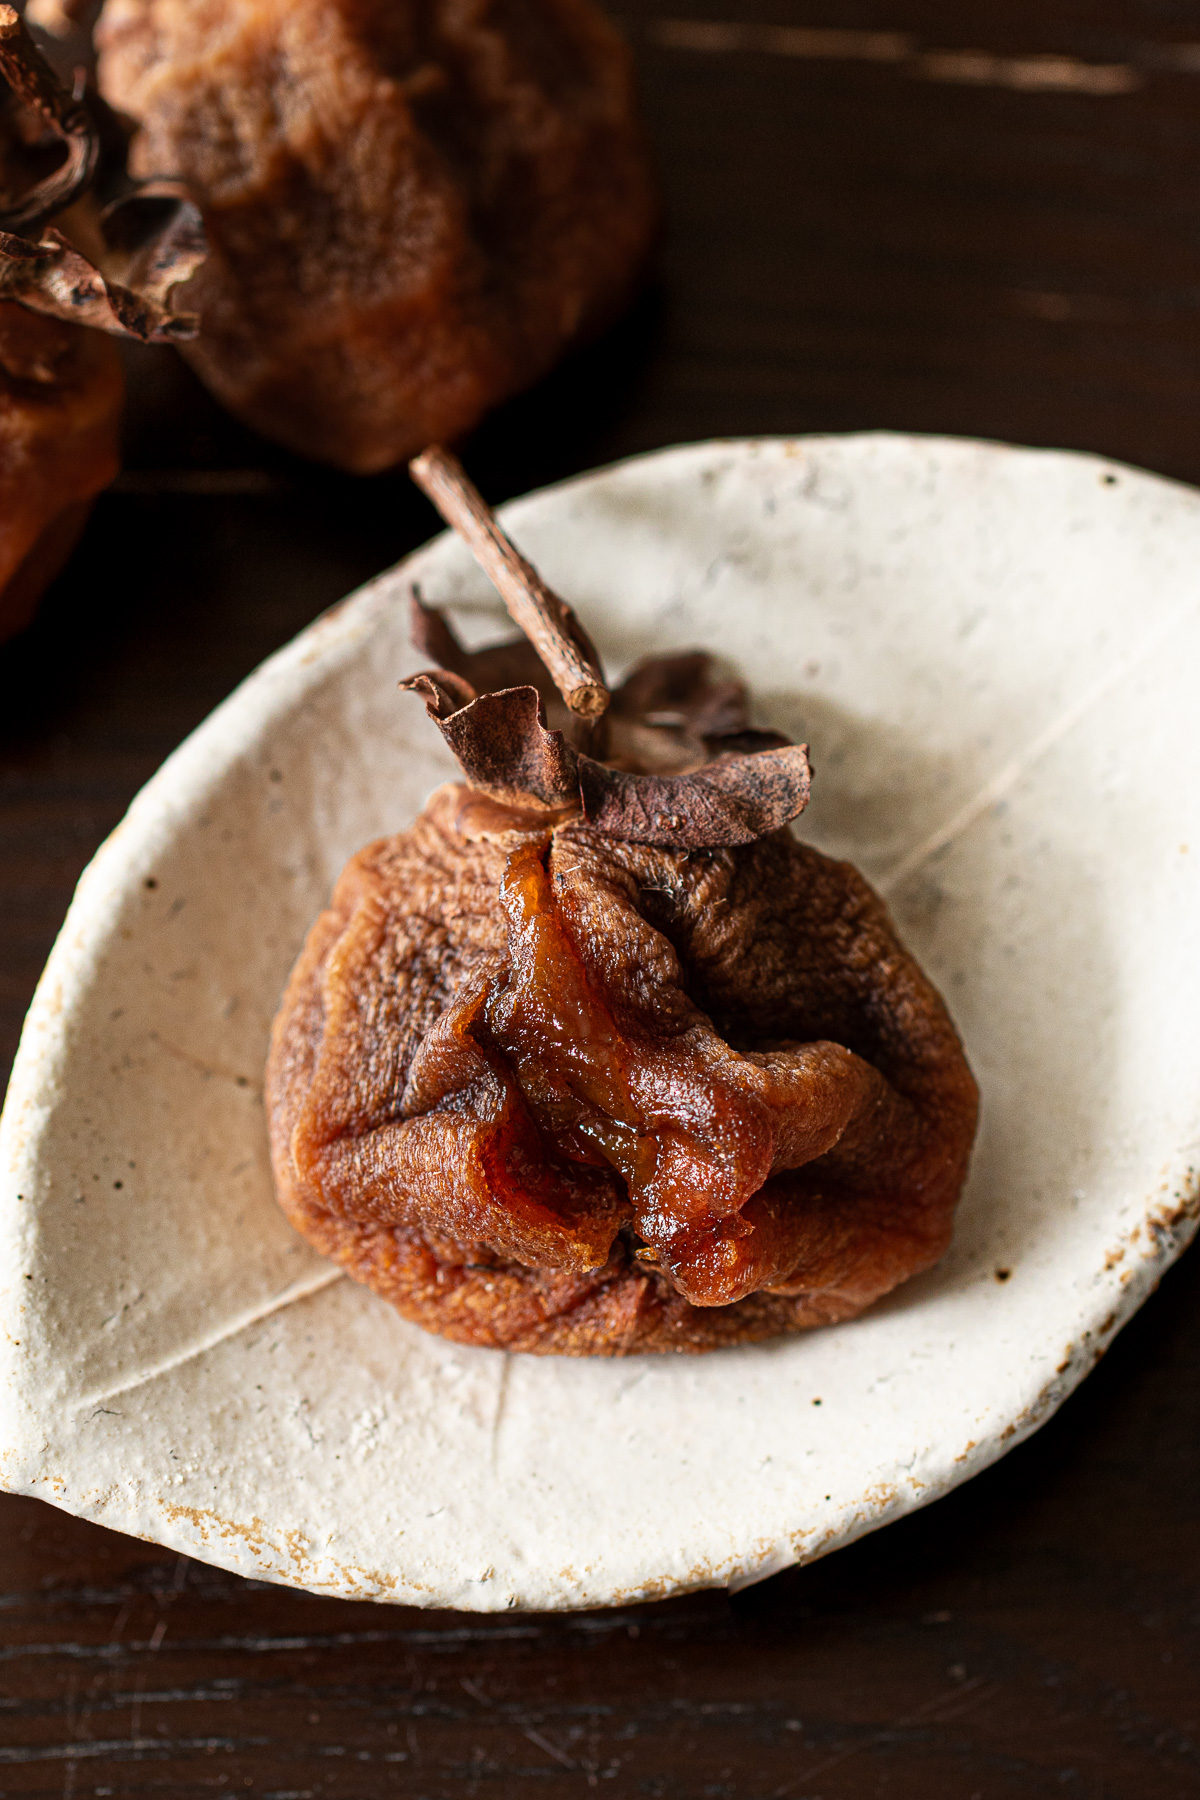
➤ Soft & Chewy
- Drying time: About 3 weeks
- Texture: Chewy and dense
- Taste: A rich, concentrated sweetness
- Storage:
- Room temperature: Keep in a container in a cool, dark place. Enjoy within a short time, keeping an eye out for mold.
- Long-term: Refrigerate or freeze
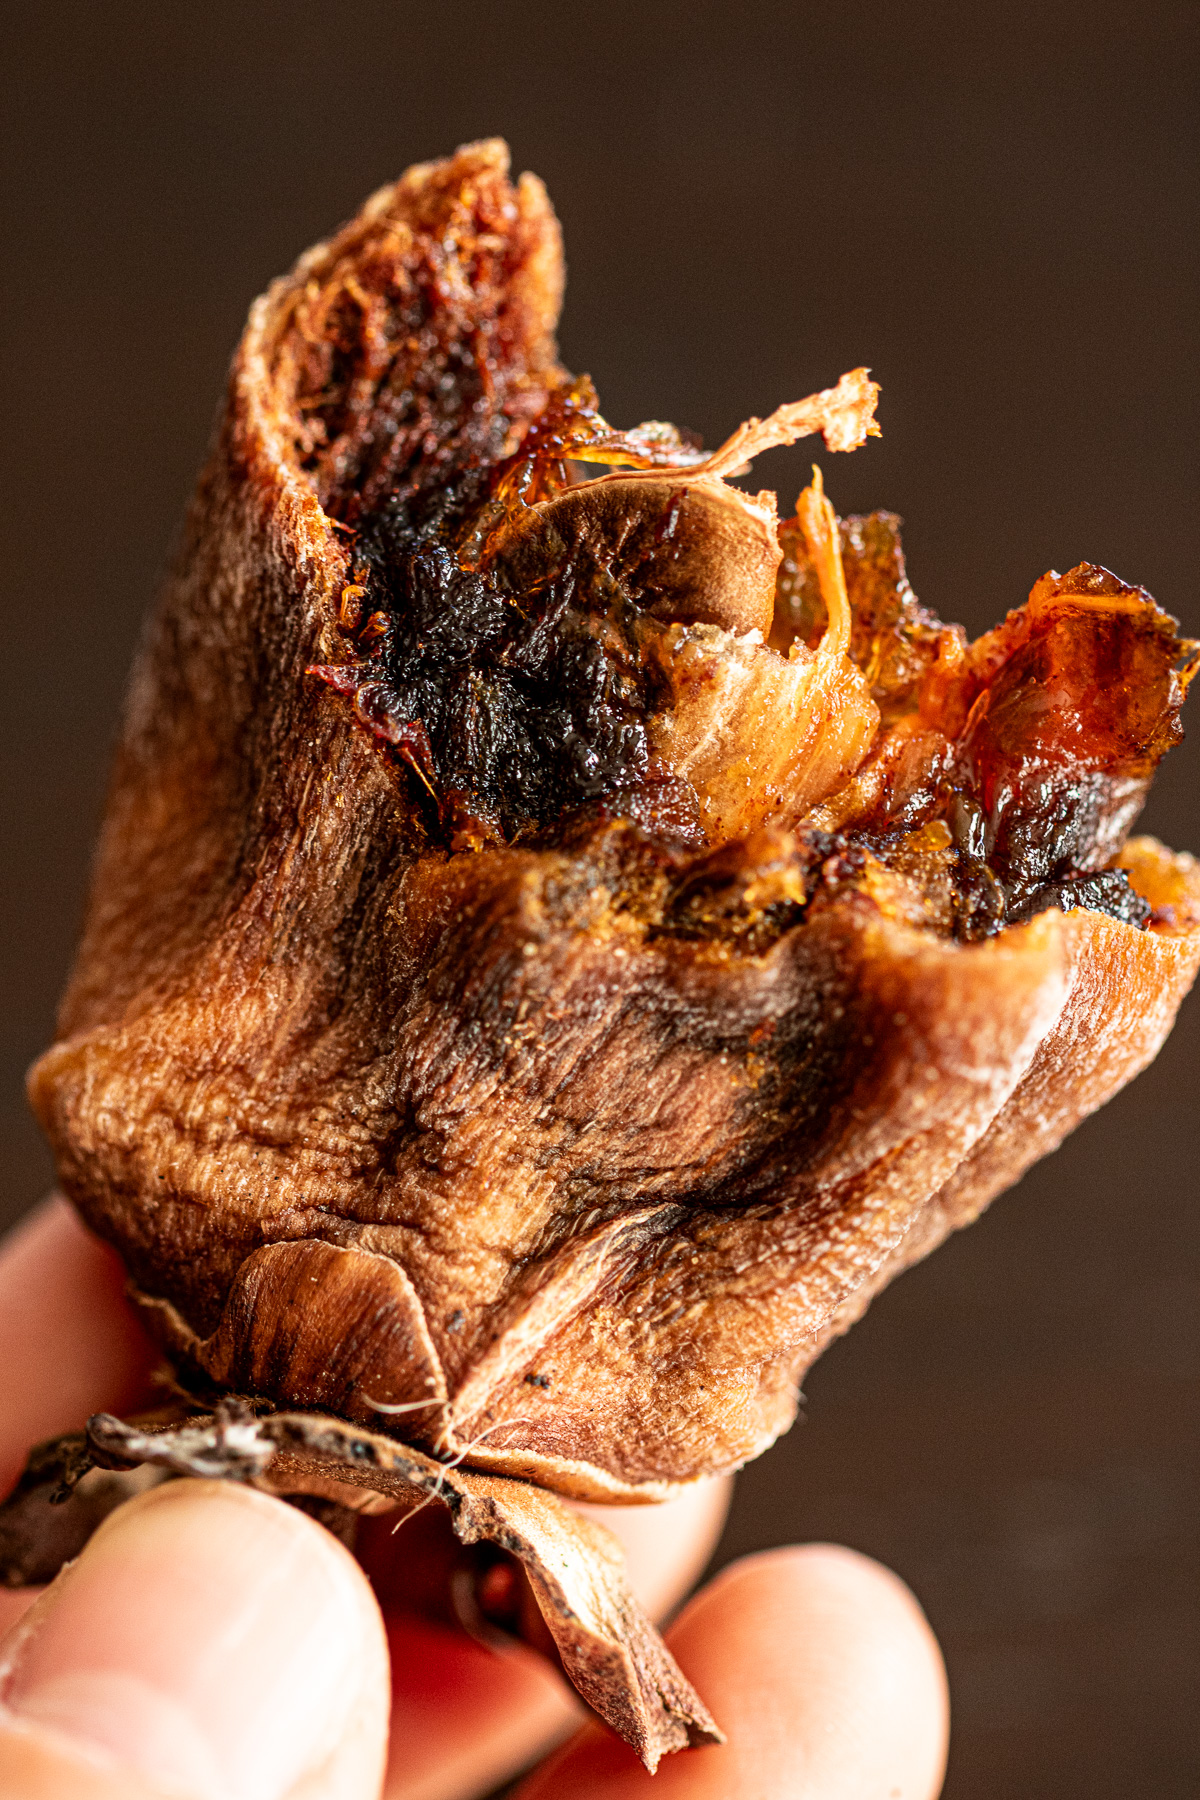
➤ Fully Dried
- Drying time: 3–4 weeks or longer
- Texture: Firm, with a satisfying chew
- Taste: Concentrated sweetness
- Storage:
- Room temperature: Store in a container in a cool, dark place. Best enjoyed within 1–3 months
- Long-term: Refrigerate or freeze
🌿 A note on timing
Size and moisture make a big difference.
Sweet persimmons, especially, take longer since they hold more water.

Large, very juicy ones can still be semi-dried even after a month.
Smaller ones may dry fully in just two to three weeks.

I check them now and then, and stop when they feel right to me.

If you’re using astringent persimmons, or sweet persimmons that turned astringent, tasting too early can leave a bit of bitterness.
It fades naturally as the drying goes on.
▶︎ White Powder or Mold?
- White powder (persimmon bloom):
- Natural sugar crystals.
- Appears evenly on the surface, feels dry and powdery, and smells sweet.
- Mold:
- Green, black, or gray spots.
- Fuzzy in texture and shows up in patches.
🌿 A small note
White powder is a good sign.
When I’m not sure, I trust my nose and how it feels to the touch.

🫙 Storing Hoshigaki
Hoshigaki can be kept at room temperature, in the fridge, or in the freezer.
- Room temperature: Store in a container in a cool, dark place.
If you notice condensation inside the container, that can lead to mold. - Refrigerator: Store in a container, or wrap each one individually and place them together in a container.
- Freezer: Wrap in plastic wrap, then place in a storage bag and freeze.
Most of the time, I leave them hanging and eat them as they change.
Some days I want something soft and yielding.
Other days, something dense and chewy.
These are just rough guidelines.
I check them with my fingers and taste as I go.
The ones that feel ready go into storage; the rest stay hanging a little longer.
Because size and moisture vary so much, it’s hard to store everything at once.
This slow, flexible way of eating is simply how I make hoshigaki.
Being able to taste them along the way—that’s the real pleasure of making them yourself.
📘 Kitchen Notes | Little Things I’ve Learned
- Good airflow matters more than anything
- Rain and dew are the real enemies—bringing them inside helps
- Hot-water dipping plus spacing goes a long way for mold prevention
- Late November drying often gives softer results and better sugar bloom
📚 Q&A
If you massage them only a few times or dry them too long, they can turn out quite hard.
Persimmons with higher moisture content tend to stay softer, even with longer drying.
Yes. It’s natural sugar crystals, known as persimmon bloom.
If it appears evenly, feels powdery, and smells sweet, it’s a good sign.
Mold looks patchy and fuzzy, and smells unpleasant—trust your nose and touch.
It doesn’t always happen. Temperature, humidity, drying time, and sugar content all affect whether bloom forms.
No white powder doesn’t mean anything is wrong.
Sometimes it appears later, after storing the hoshigaki in a container at room temperature.
I’ve also noticed that starting in late November, rather than early November, often encourages bloom—something to remember for next year.
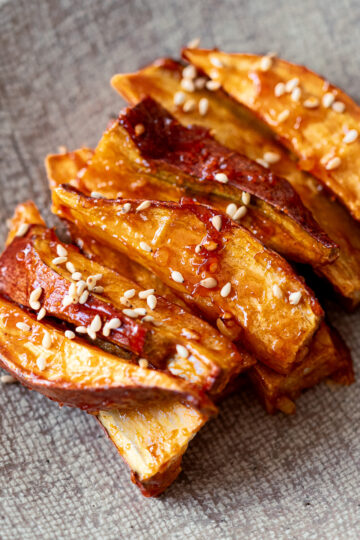
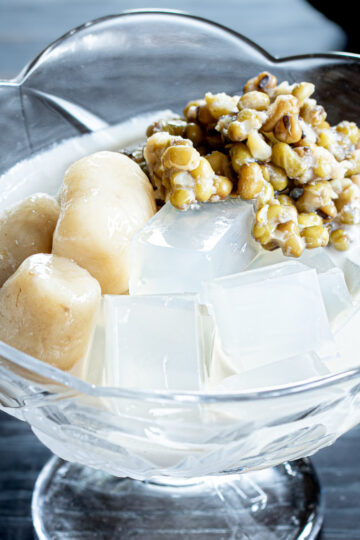
Chop them and mix into yogurt or salads.
Use them as a natural sweetener in bread or baked goods.
Soaking them briefly in hot water can soften them again.
Usually 2–4 weeks.
Size, moisture content, weather, and humidity all play a role.
I don’t follow a strict schedule—they’re ready when they feel right to you.
If they’re not dried enough, some bitterness can remain.
Even sweet persimmons—especially those that turned astringent—can taste slightly bitter if tasted too early.
As drying continues, the astringency fades.
No. Hot-water sterilization works just fine.
Some traditional methods use shochu for extra sterilization, but it’s not necessary.
To sterilize the surface and help prevent mold.
Three to five seconds is enough—any longer, and the flesh begins to cook.
Yes. Dark brown or even blackish coloring is a natural part of drying.
As long as there’s no off smell and no mold, they’re fine.
Poor airflow and trapped moisture are the main causes.
A quick hot-water dip, good spacing, bringing them inside on rainy days, and regular checking all help keep mold away.
🍠 With Sweet Potatoes...
Vegan recipes that highlight the natural sweetness of sweet potatoes:

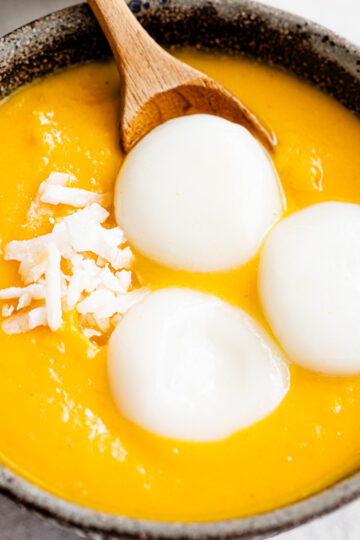
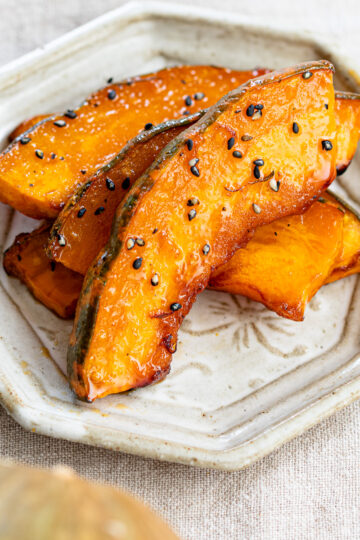
🎃 Using Kabocha...
A collection of vegan recipes using kabocha,
from everyday sides to quiet desserts and soups:

✏️ Recipe Card | Summary
How to Make Hoshigaki (Japanese Dried Persimmons)
Equipment
- Knife or peeler
- Large pot - (for boiling water)
- String - (or hoshigaki hangers/drying baskets)
- Clothesline pole or drying rack
- Location with good airflow - (under eaves ideal)
- plastic wrap
- Storage bags or containers
Ingredients
- persimmons (astringent persimmons with stems attached preferred; sweet persimmons also work)
Instructions
Peel
- Leave the persimmon stems in a T-shape, about 2–3 cm longpersimmons
- Peel the skin away, leaving the calyx attached*Peel straight down from top to bottom, or in a spiral—both work
- Cut away any soft or damaged spots
Tie
- Wrap string around each stem and tie securely*Space them about 15 cm apart along the string
Dip in Hot Water
- Bring a pot of water to a boil
- Dip each persimmon for 3 to 5 seconds
- Lift out and set on a plate
Hang
- Hang somewhere with good airflow—under the eaves works well*Ensure they get some gentle sunlight and are protected from rain
- Leave for 2 to 4 weeks, depending on size and moisture content*On rainy or very humid days, bring them inside
Massage
- Once the surface feels dry (usually after 1 to 3 weeks), massage gently with your fingers*Don't press hard—just enough to soften the inside a little
- Repeat every few days, 2 or 3 times total
- Optional: Change their orientation every few days for even drying
Store (or Eat)
- When they reach your preferred texture, take them down
- Eat right away, or store in fridge or freezer depending on firmness
Notes
- Astringent persimmons with stems are traditional and sweeter when dried
- Sweet persimmons work but take longer and are less sweet
- Choose firm ones without bruises, with orange-colored skin
- Thinner peels help moisture escape faster
- Keep the stems—they're what you tie the string to
- Hot water dip sterilizes the surface
- Keep persimmons from touching while drying—trapped moisture causes mold
- Bring them inside on rainy days
- Good airflow is essential
- Under eaves or similar spot with airflow and partial sun
- Must be protected from rain and dew
- If weather turns bad, continue drying indoors
- Helps sugars spread evenly and creates softer texture
- Don't worry if you forget—they'll still turn out fine
- Changing orientation every few days helps even drying
- Timing varies greatly by size and moisture content
- Check often and stop at your preferred texture
- See "How I Decide They're Ready" section for detailed guidance on textures:
- Semi-dried (1-2 weeks): Soft and creamy, anpo-gaki style
- Soft and moist (3 weeks): Chewy and dense
- Well-dried (3-4+ weeks): Firm with concentrated sweetness
- Semi-dried: Freeze for long-term (eat soon at room temp)
- Soft and moist: Refrigerate or freeze
- Well-dried: Room temp in cool, dark place (1-3 months), or refrigerate/freeze for longer
- Watch for condensation in containers—it causes mold
🍂 Closing
Every year, hoshigaki turn out a little differently.
The weather, the fruit, the timing—nothing is ever fixed.
As I make them, I find myself tasting one, then another,
wanting to check how they’re coming along.
Before I know it, I’ve eaten more than I meant to.
Last year, this year—each batch has its own character.
And next year will surely be different again.
I make hoshigaki while looking back on the year,
and taste them as if I’m slowly chewing over its memories,
welcoming the new season ahead.
When these are done, I’ll move on to dried sweet potatoes.
Autumn always gives me something else to dry, taste,
and quietly enjoy.


Comments
No Comments