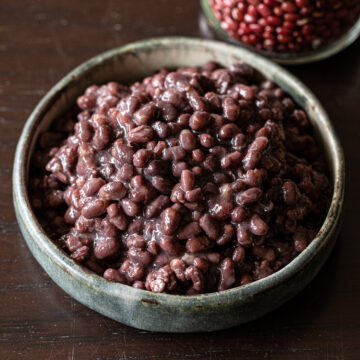
A step-by-step guide to cooking dried adzuki beans from scratch — no soaking required.
This method follows traditional Japanese techniques, including parboiling and steaming, to bring out the best in the beans. Works on the stovetop or in a pressure cooker (including an Instant Pot).
Whether you're making anko, ohagi, oshiruko, or adzuki porridge, this is a base you'll come back to.
Ways to use cooked adzuki beans
Once cooked, these become the starting point for a range of Japanese recipes:
- Anko (sweet red bean paste) — the filling for many traditional Japanese sweets
- Ohagi — sticky rice balls coated in anko or kinako
- Oshiruko — a warm sweet red bean soup with mochi
- Adzuki porridge — a savory rice porridge with adzuki beans
🌿 More recipes using cooked adzuki beans — including chocolate truffles, oatmeal porridge, and no bake chocolate oat cookies — are listed below.

Jump to:
- 🫘 Ingredients
- 🥄 Tools
- 🧺 The parboiling step (and why it matters)
- 🥣 Instructions
- 🥢 The plumping stage
- ⏱️ Using a pressure cooker or Instant Pot
- 🫙 Storage
- 💭 FAQ
- 🥮 Recipes using cooked adzuki beans
- 📘 Other basic bean cooking guides
- 🌸 Seasonal vegan recipes
- ✏️ Recipe Card
- How to Cook Dried Adzuki Beans — Stovetop or Pressure Cooker
🫘 Ingredients
- Dried adzuki beans
- Water
Choosing your beans
Fresh-crop beans (harvested the same year) cook faster and are easier to work with. Older beans take longer to absorb water and may need extra cooking time. Check the package for the harvest year if possible — the newer the better.
👇Exact quantities are in the recipe card at the bottom of this page
🥄 Tools
This recipe is designed to work with a small saucepan (around 16cm / 6in diameter, at least 7cm deep). A larger pot works just as well.
For the pressure cooker or Instant Pot method, I use a stovetop pressure cooker (Pearl Metal 3.5L). Follow Using a pressure cooker or Instant Pot below.
🧺 The parboiling step (and why it matters)
Parboiling means briefly boiling the beans and discarding the water before the main cook. With adzuki beans, this draws out some of the bitter, astringent compounds in the skin — giving you a cleaner, milder flavor in the finished dish.
Parboiling also removes some of the beans' natural flavor and nutrients. So, how many times you do it (or whether you do it at all) depends on what you're making and how you want to present the final dish:
- No parboiling — keeps the full flavor and nutrients intact. Best for sweet preparations like anko (sweet red bean paste) and oshiruko (sweet red bean soup with mochi) — the beans' natural depth really comes through.
- Parboil once (recommended for most uses) — boil for 5 minutes, then drain. Good for savory dishes like adzuki porridge.
- Parboil twice — for a particularly clean, mild flavor. Worth the extra step when you want a refined result, such as for gifting.
🥣 Instructions
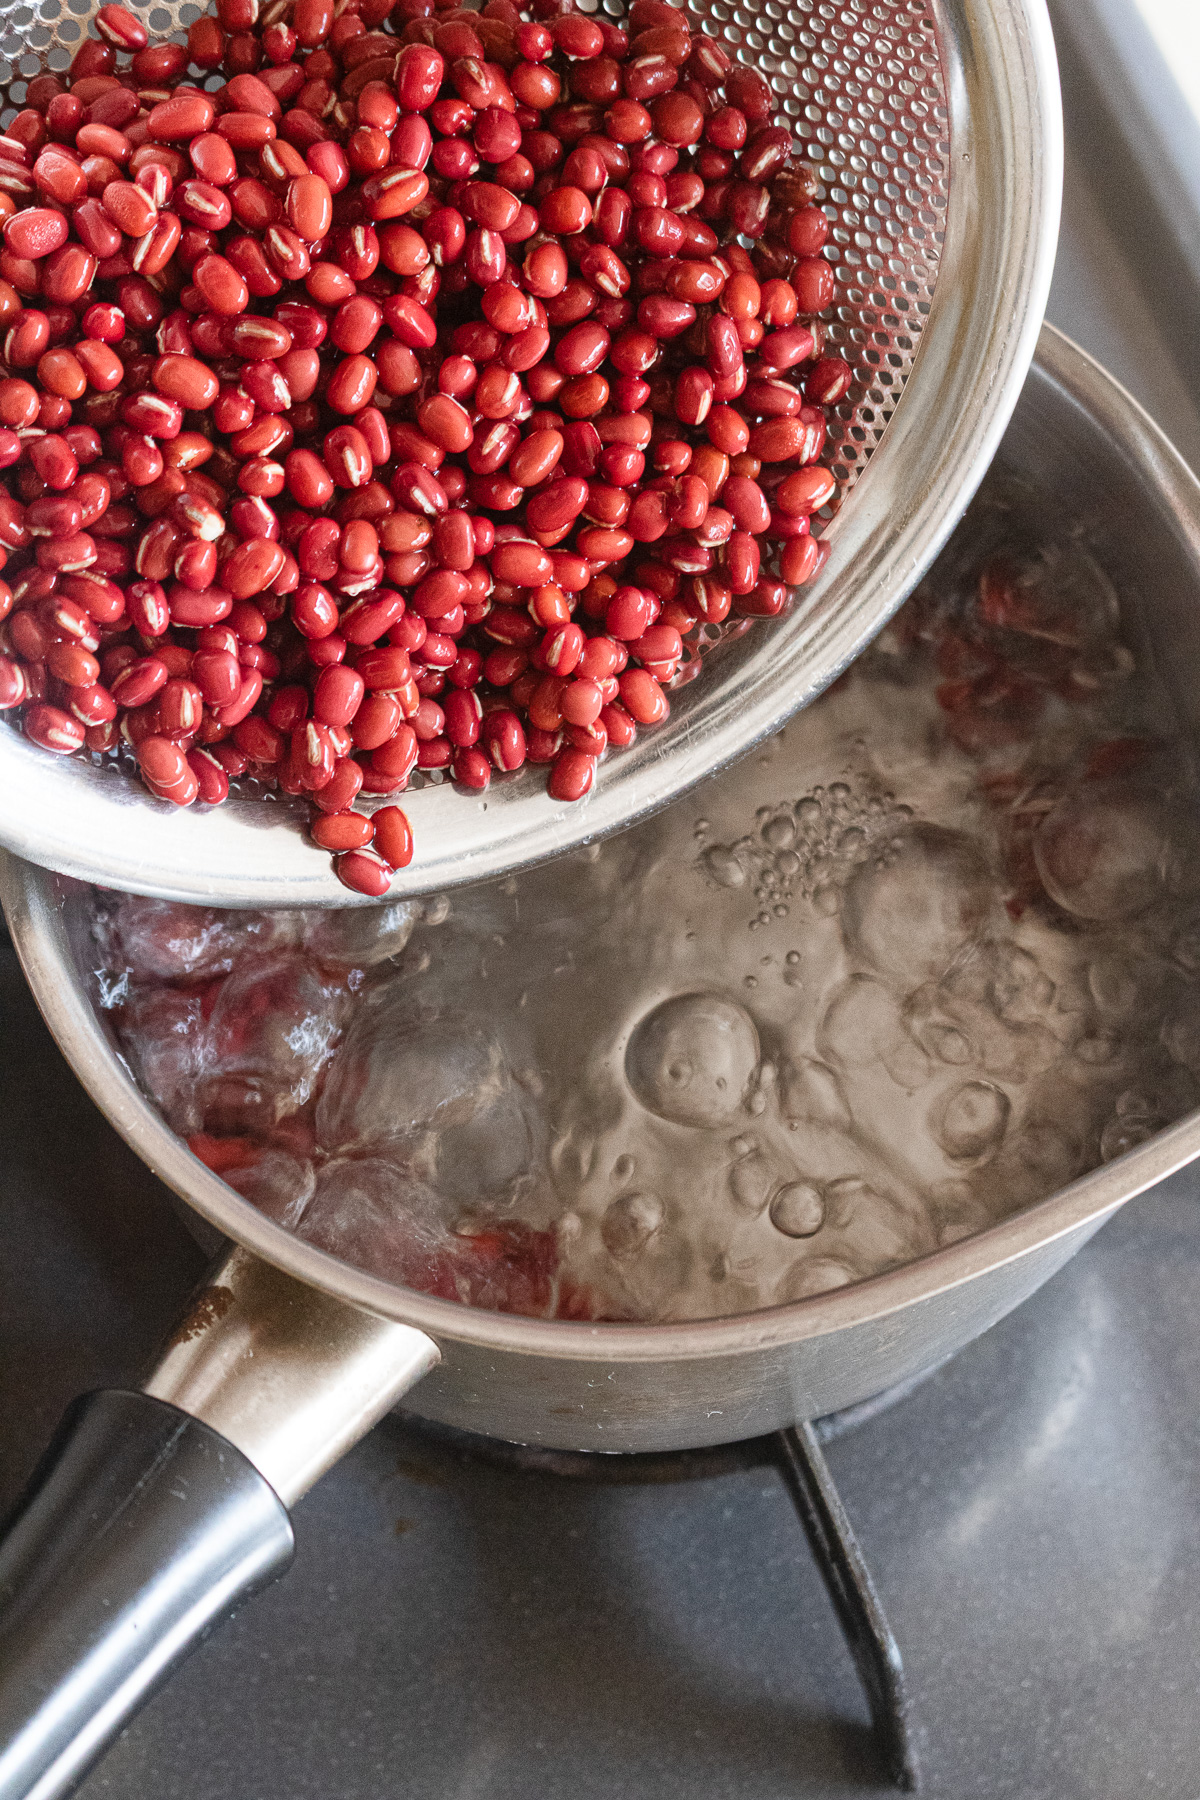
- Wash the beans
- Bring 600ml of water to a boil.
- Rinse 200g of dried adzuki beans quickly under running water and add to the pot.
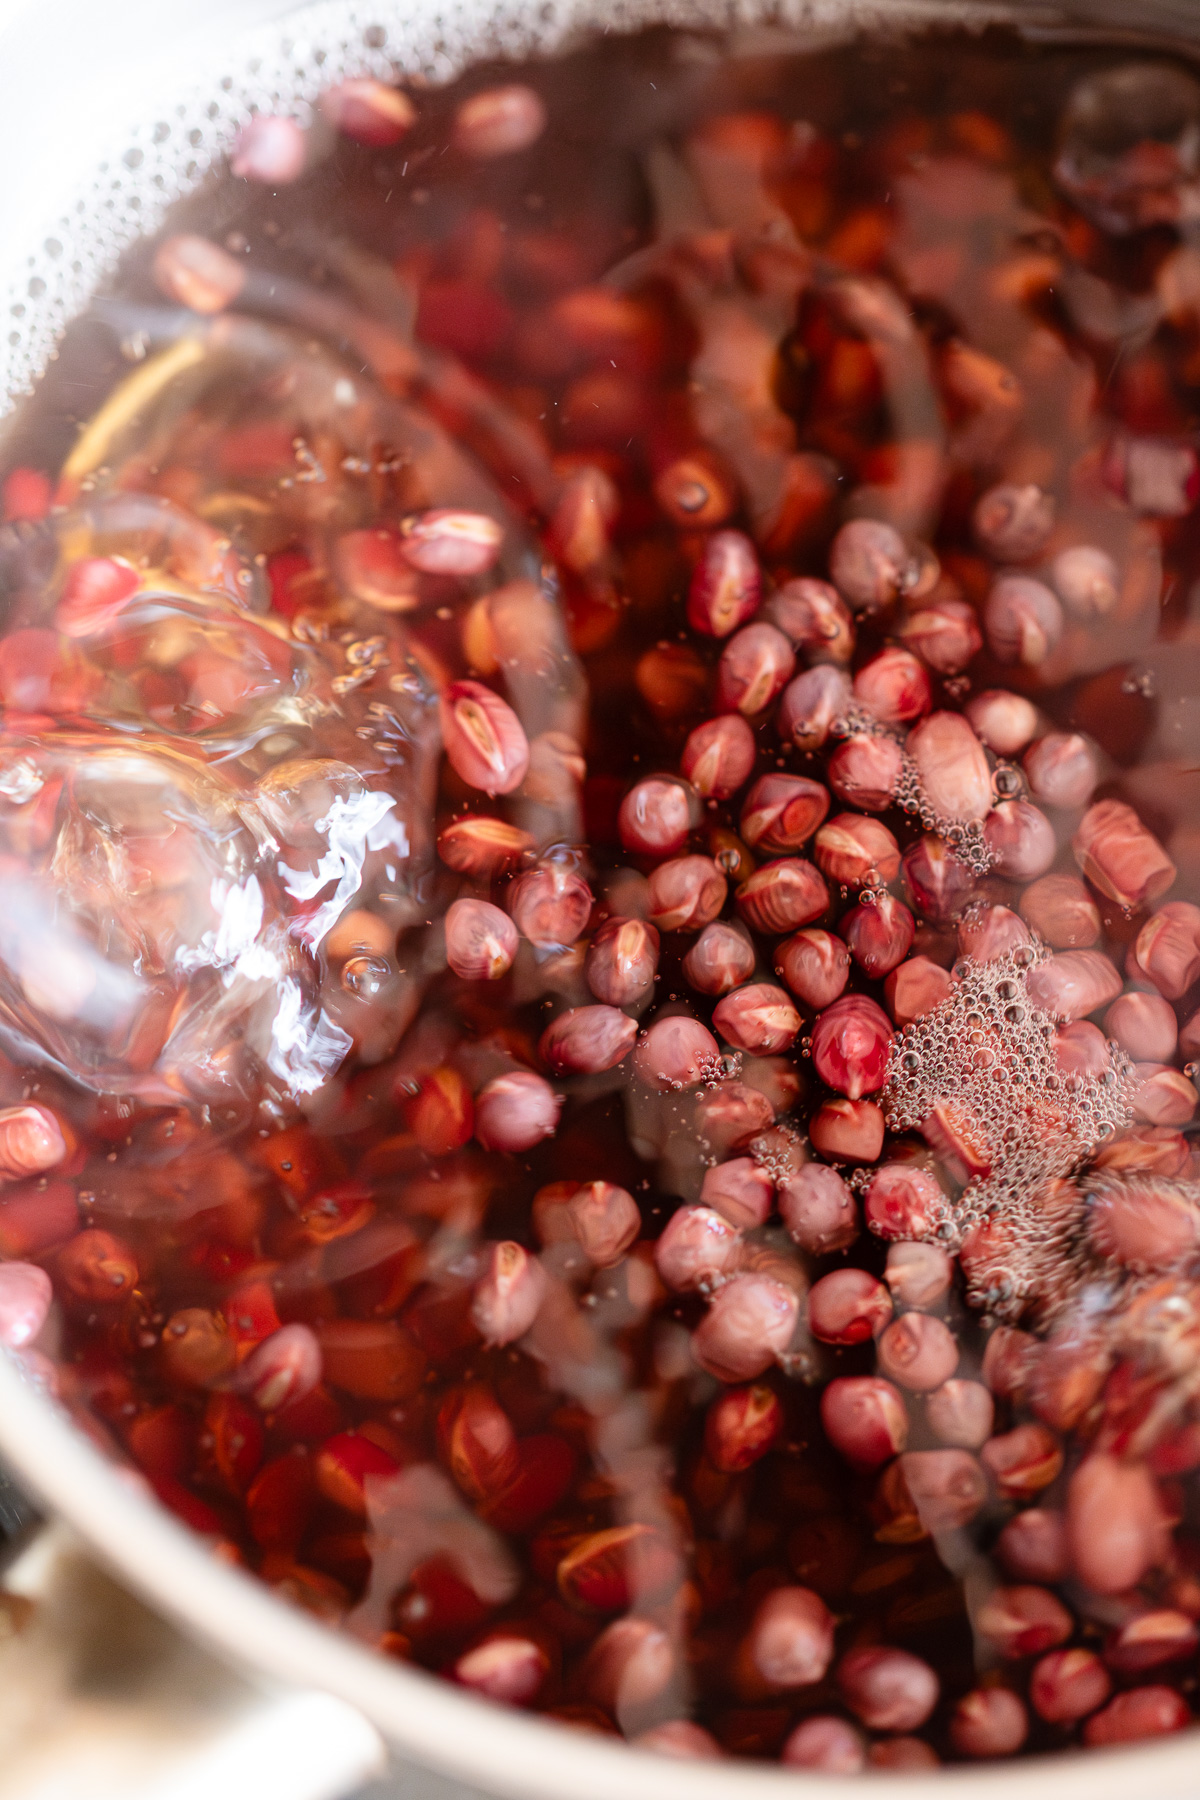
- Boil for 5 minutes
- Bring to a boil over high heat, then reduce to medium and cook for 5 minutes.
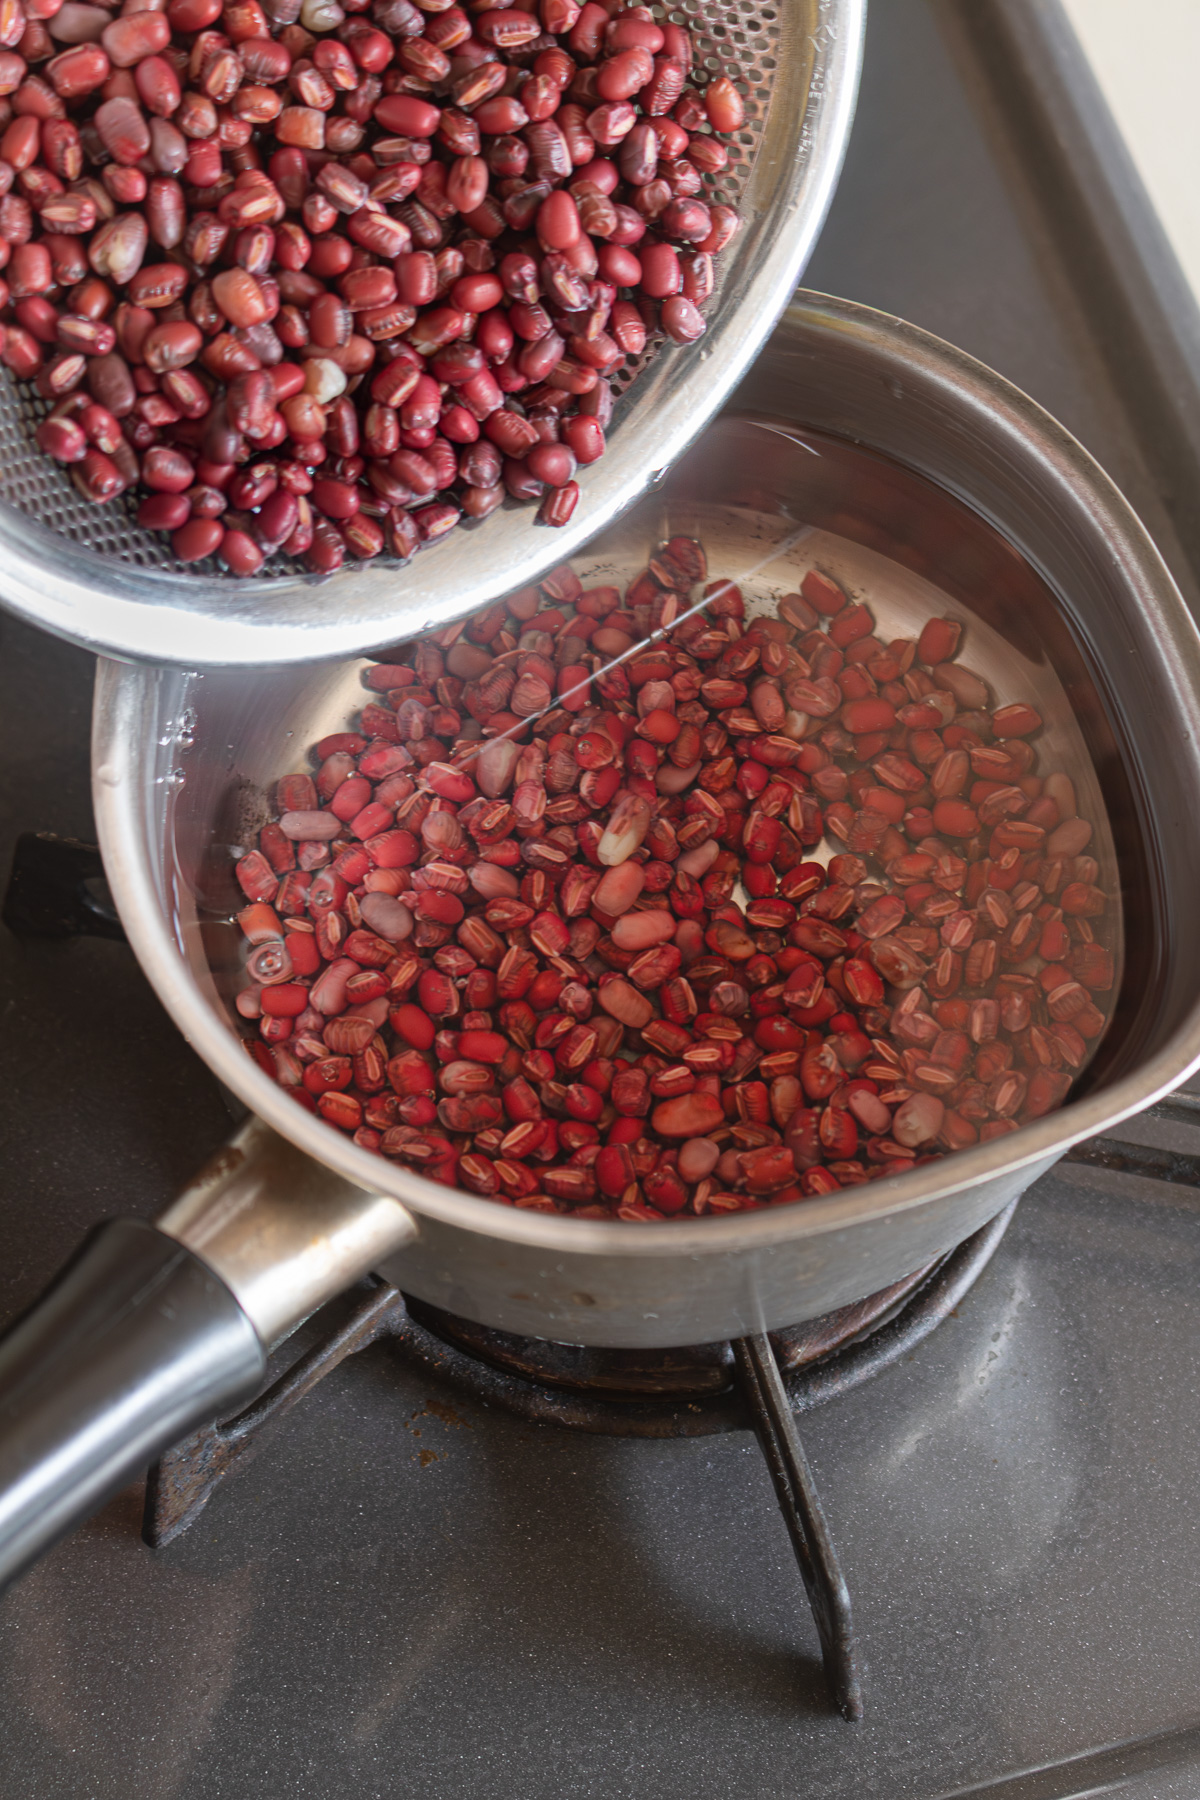
- Drain (first parboil)
- Remove from heat and drain through a sieve.
- Return the beans to the pot with 600ml of fresh water.
🌿 If skipping parboiling (the cold shock method): Turn off the heat and add about 250g of ice. Wait until the ice has fully melted (1–2 minutes), give it a gentle stir, then continue to the next step.

This rapidly lowers the water temperature, helping the inside and outside of the beans cook more evenly.
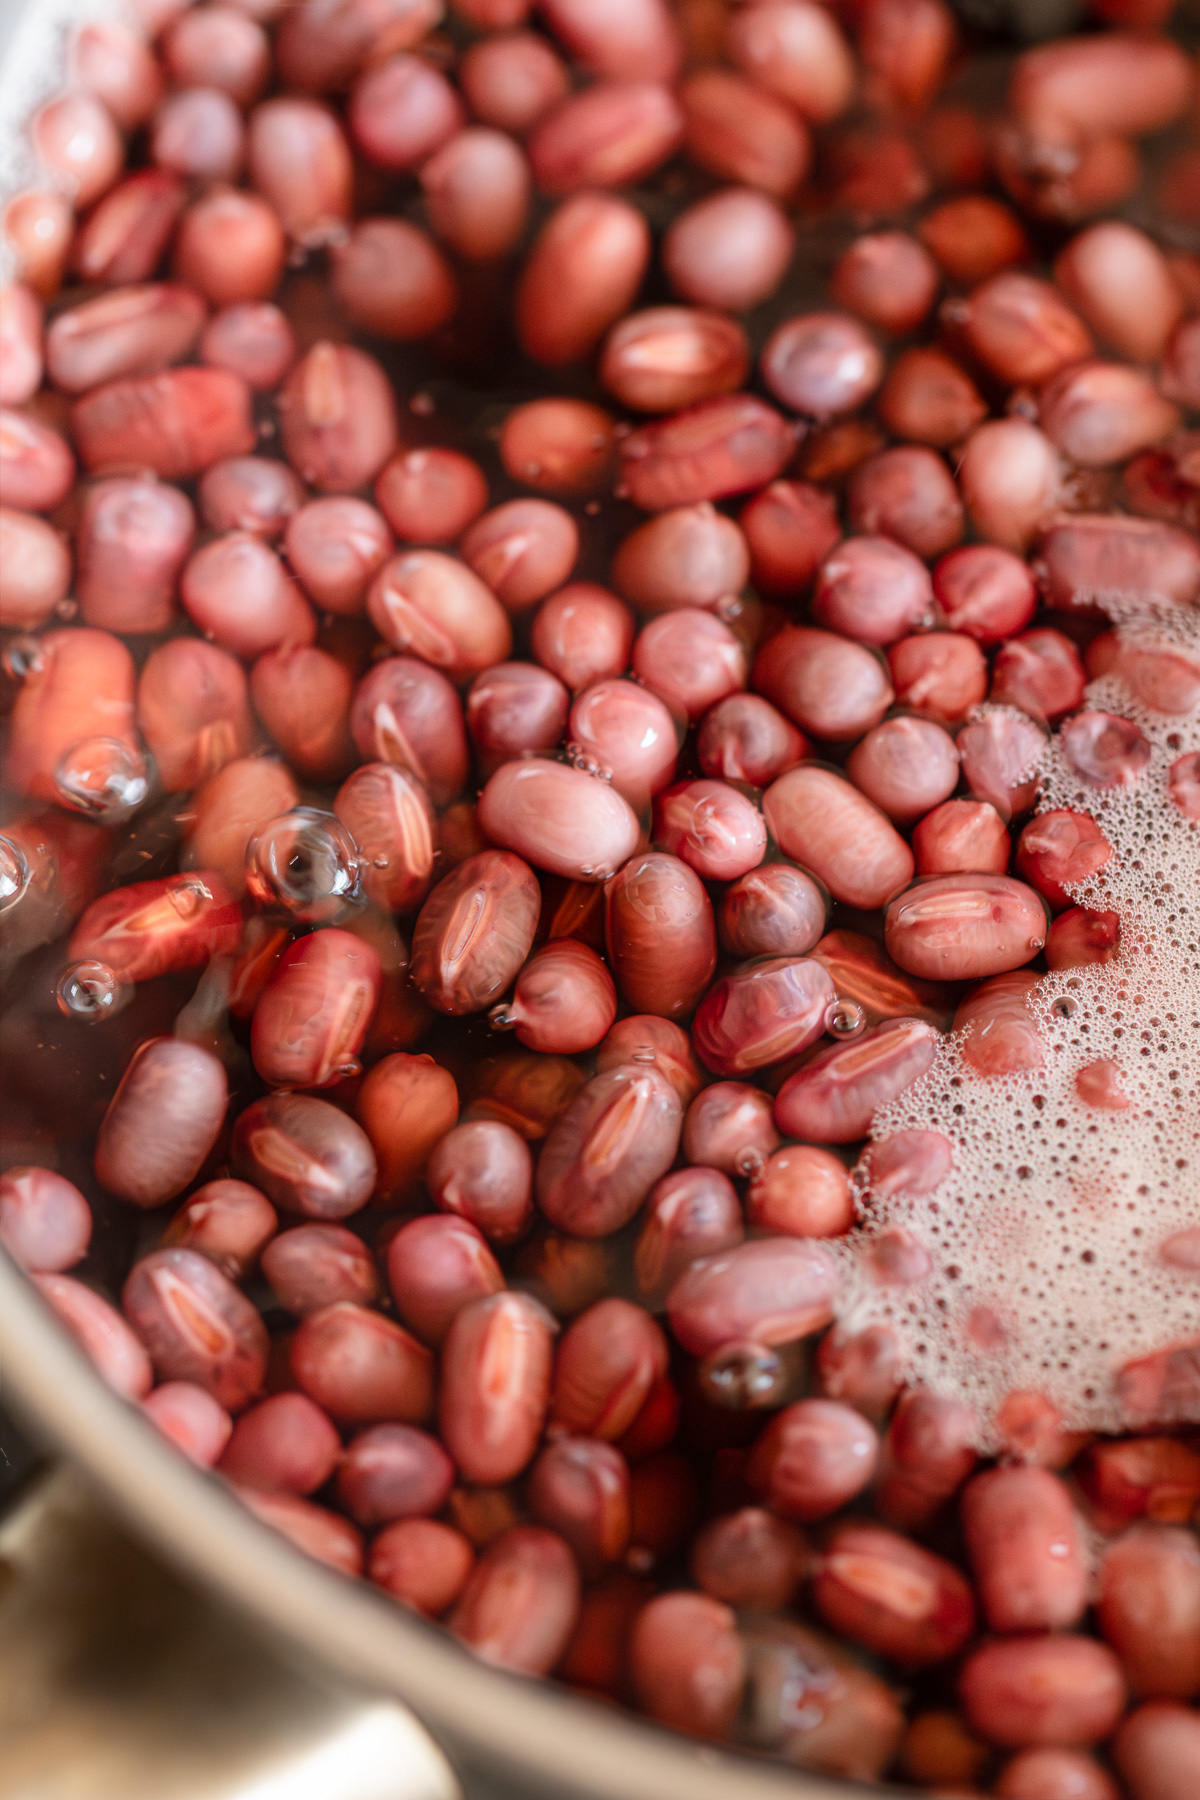
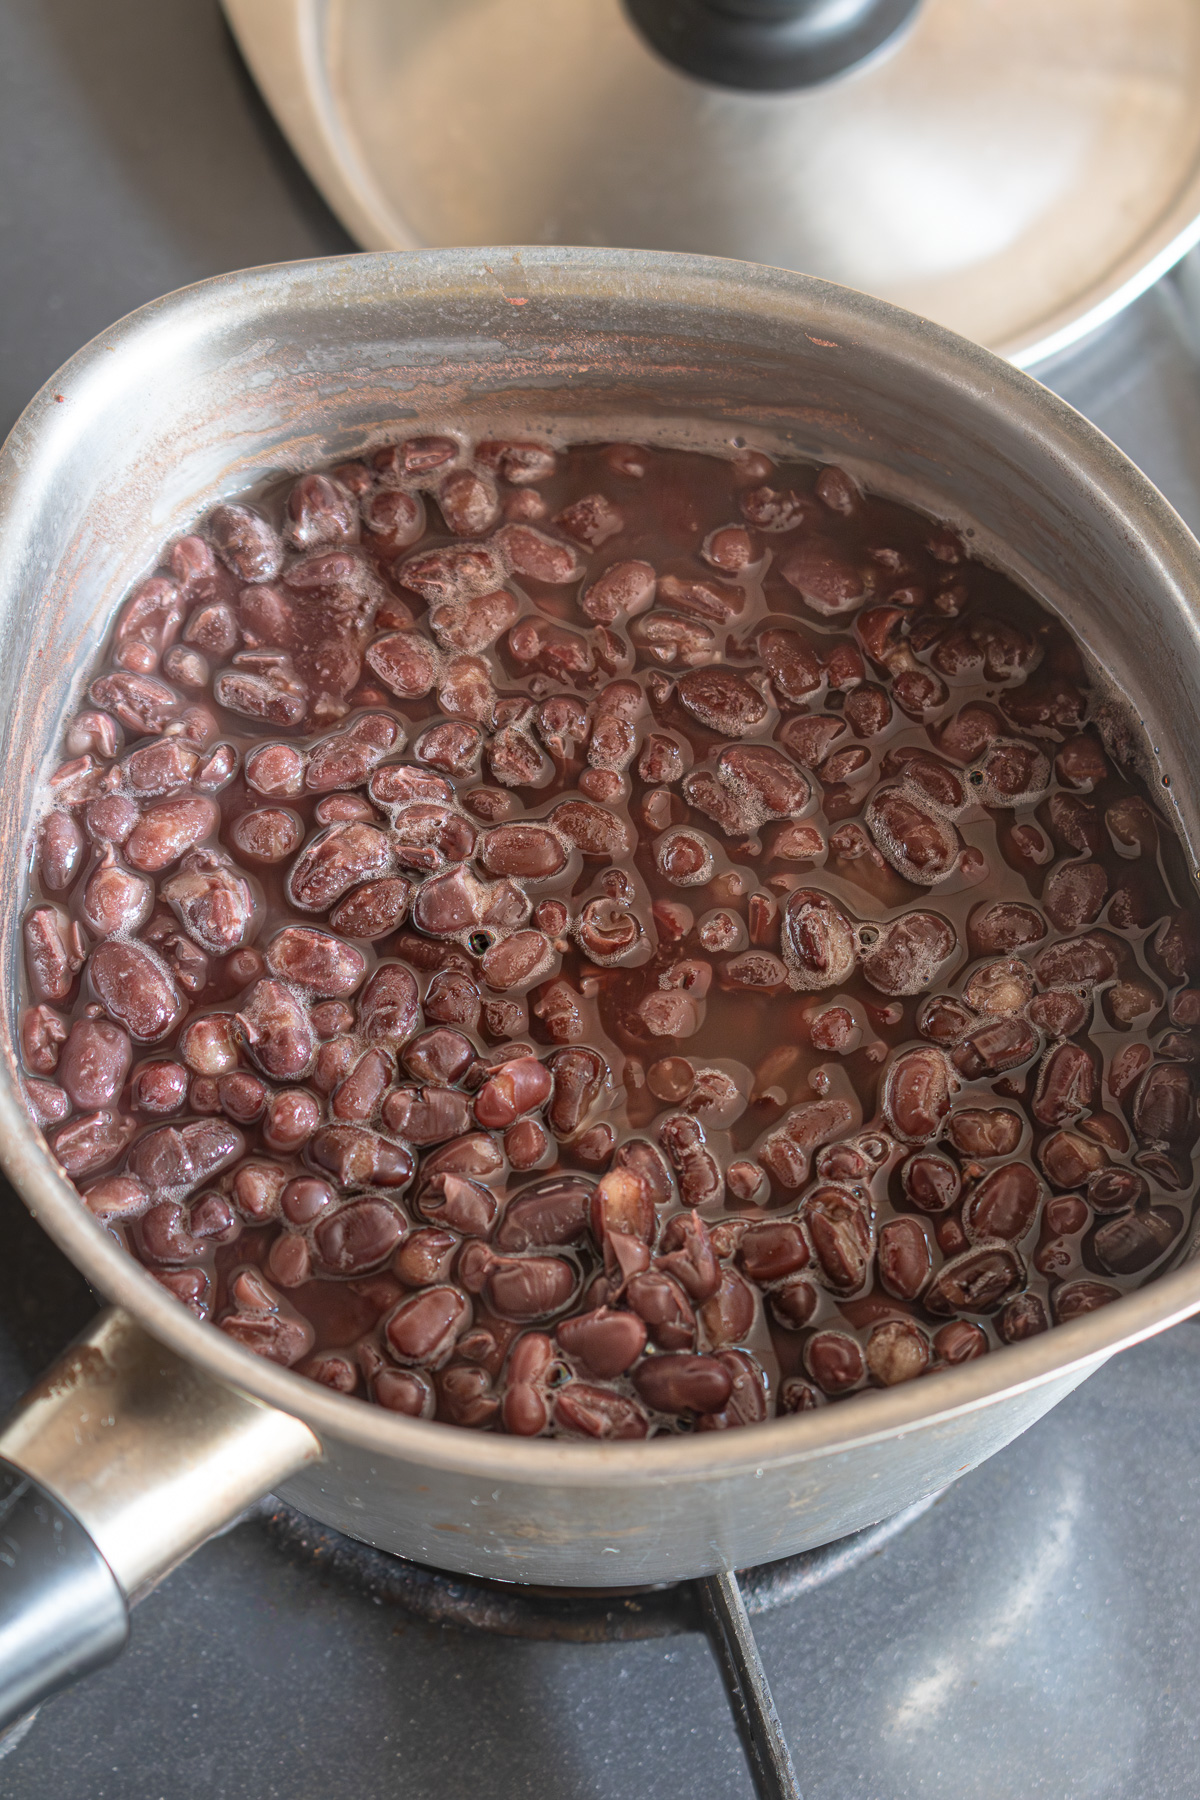
- The plumping stage
- Reduce to medium-low heat to maintain a gentle simmer (the surface should bubble lightly, with the beans moving just slightly).
- Cook for about 15–20 minutes, until the skins of most of the beans are smooth and taut. (See The plumping stage for details.)
🌿 Add water little by little as needed to keep the beans submerged throughout.

🌿 If parboiling twice, drain the beans again at around the 5–10 minute mark, then return them to fresh water and continue.
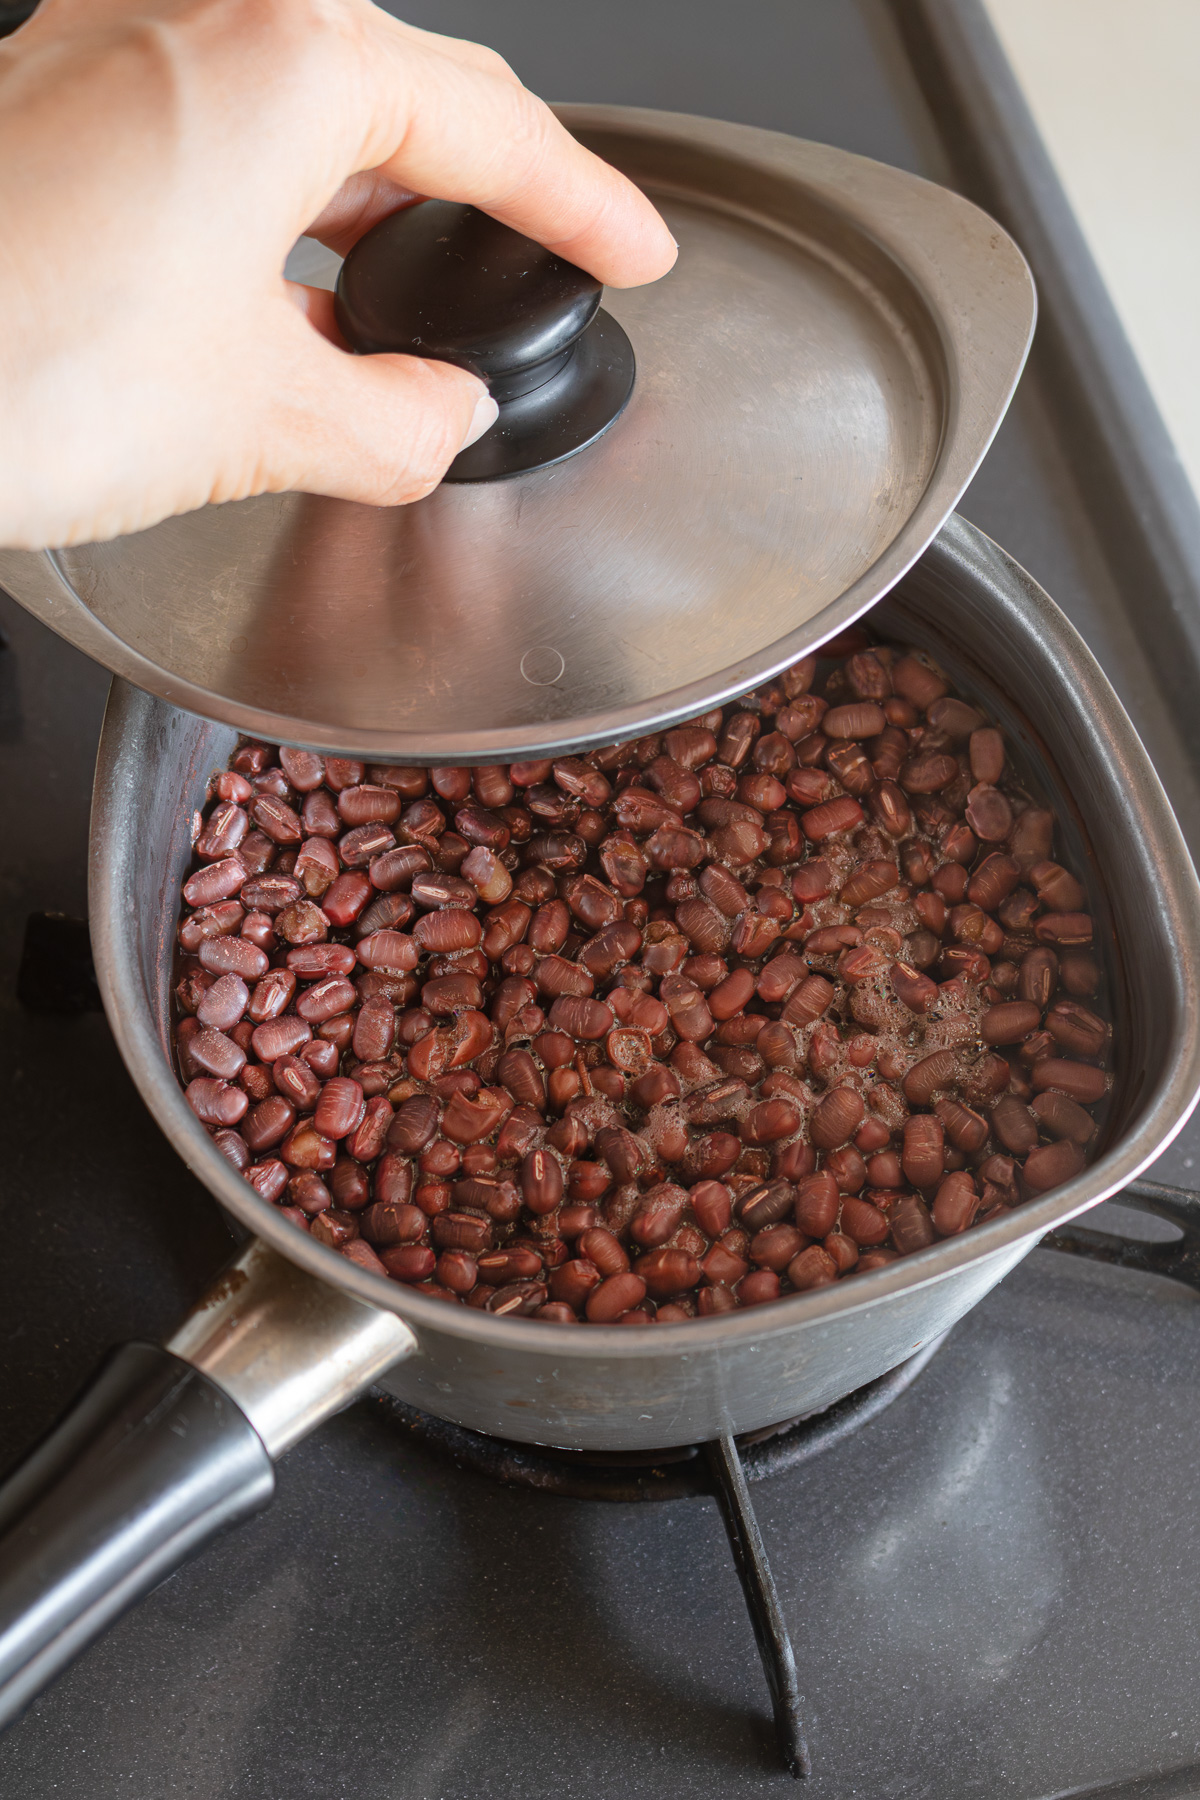
- Steam
- Remove from heat, cover with a lid, and steam for 30 minutes.
🌿 If finishing in a pressure cooker or Instant Pot, follow Using a pressure cooker or Instant Pot from here.

🌿 For adzuki porridge made in a rice cooker, the prep ends here — the rice cooker takes care of the rest.

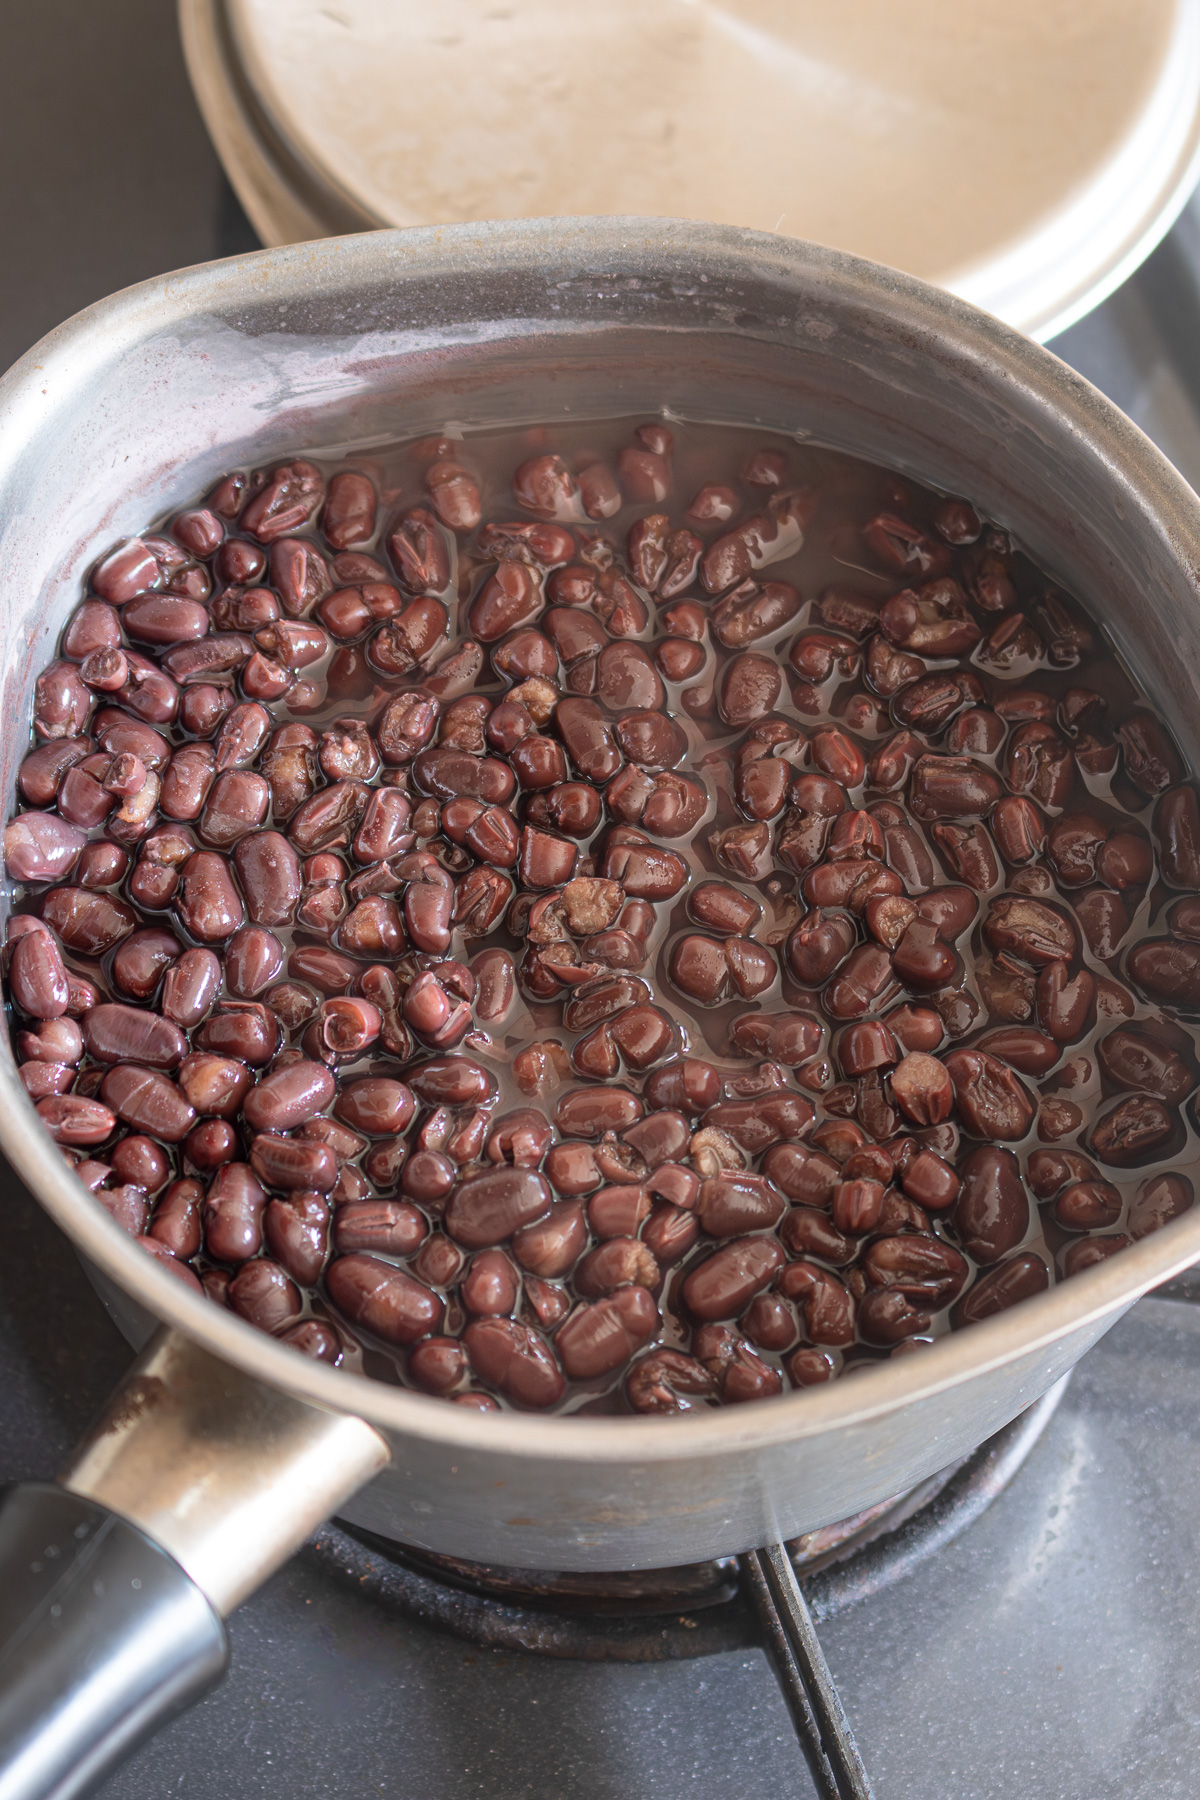
- Add water
- Return the beans to the pot and add just enough water to cover.
🌿 The beans absorb water at different rates depending on variety and age, so start with just enough to cover and add more as needed.
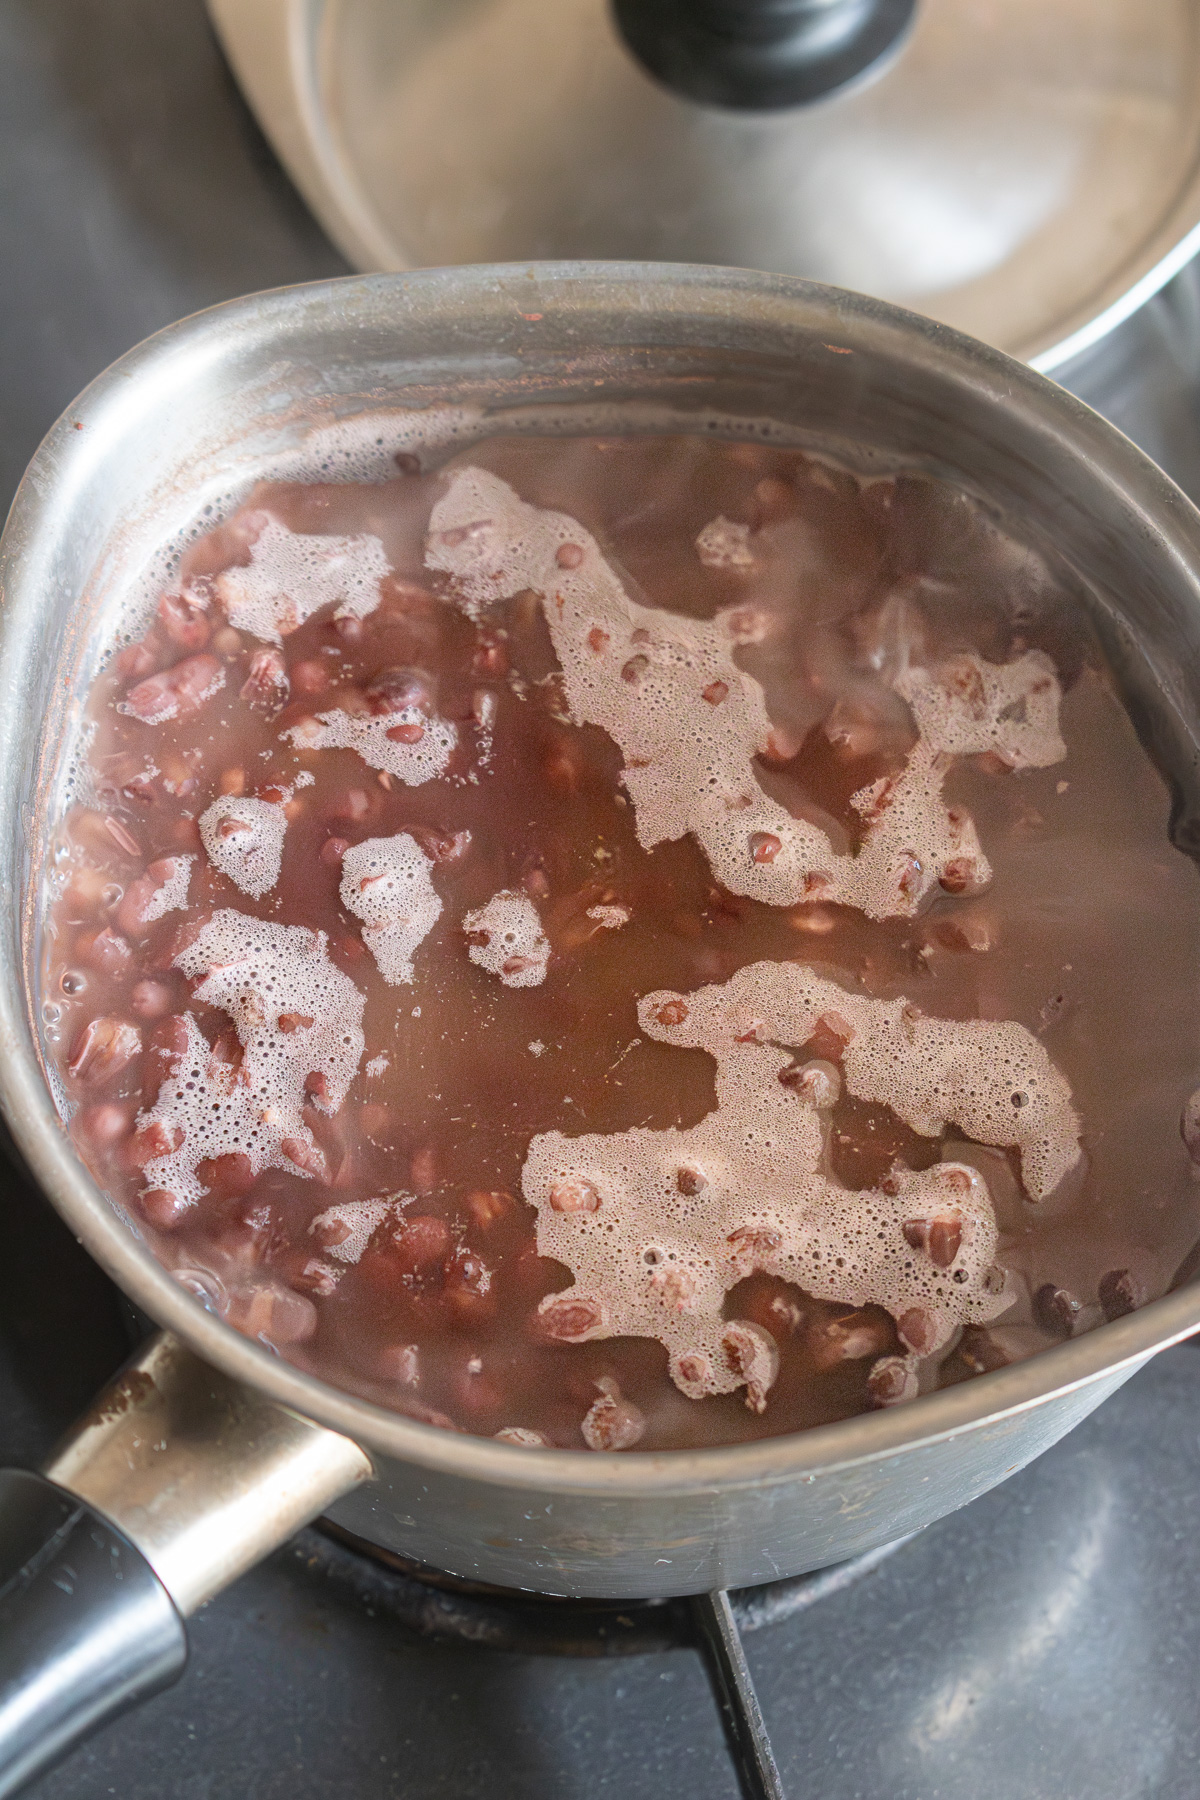
- Simmer
- Bring to a boil over high heat, then reduce to low to medium-low (the surface should barely move, with the beans not knocking against each other).
- Cook until the beans are tender.
🌿 Add water as needed to keep the beans just submerged throughout.
- Check for doneness
- Pick up a few beans (including both darker and lighter ones) and press between your fingers.
- When all of them crush easily without resistance, move on to the next step.
🌿 Cooking time varies depending on the variety and harvest year — keep checking as they cook.
- Steam
- Cover with a lid and steam for at least 30 minutes.
- This allows the beans to absorb moisture and finish plump and tender.
🌿 You can also leave them overnight if you like (refrigerate in summer).
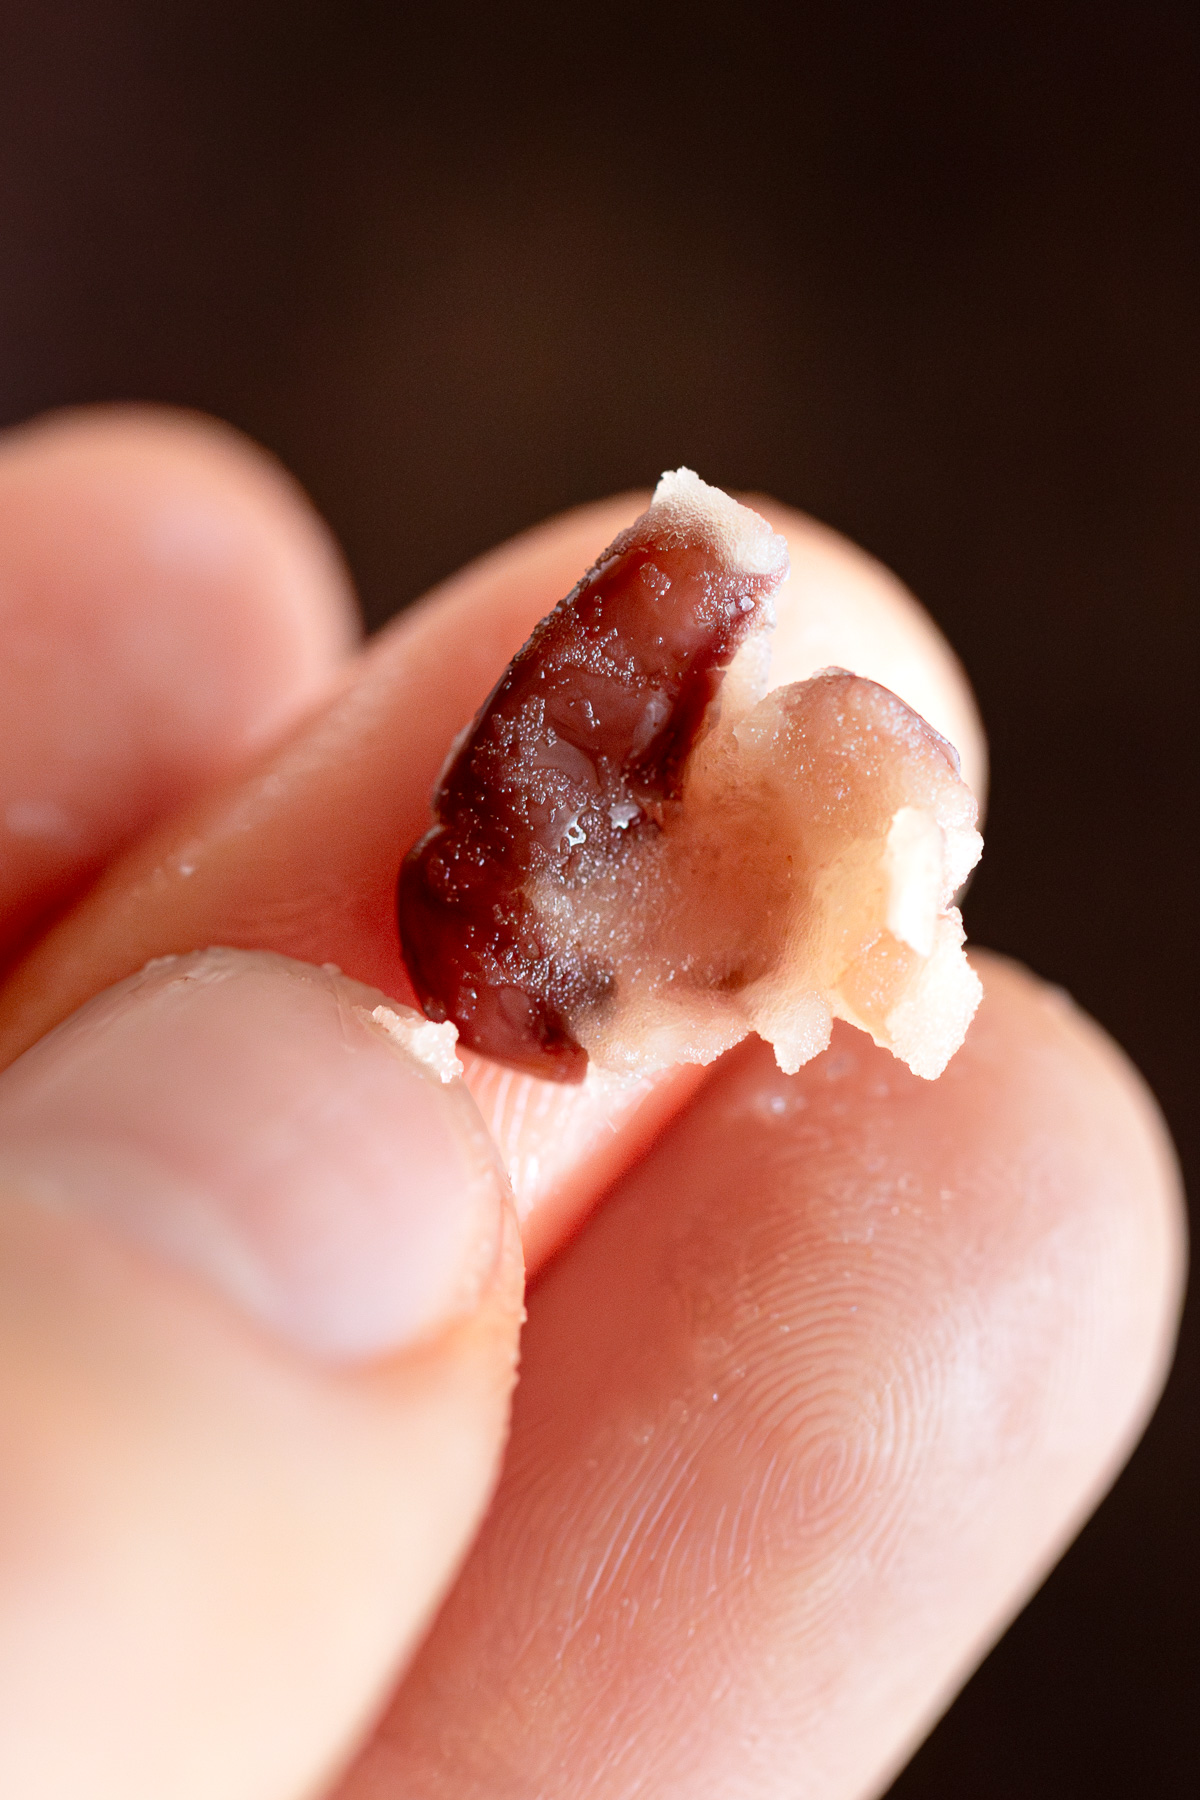
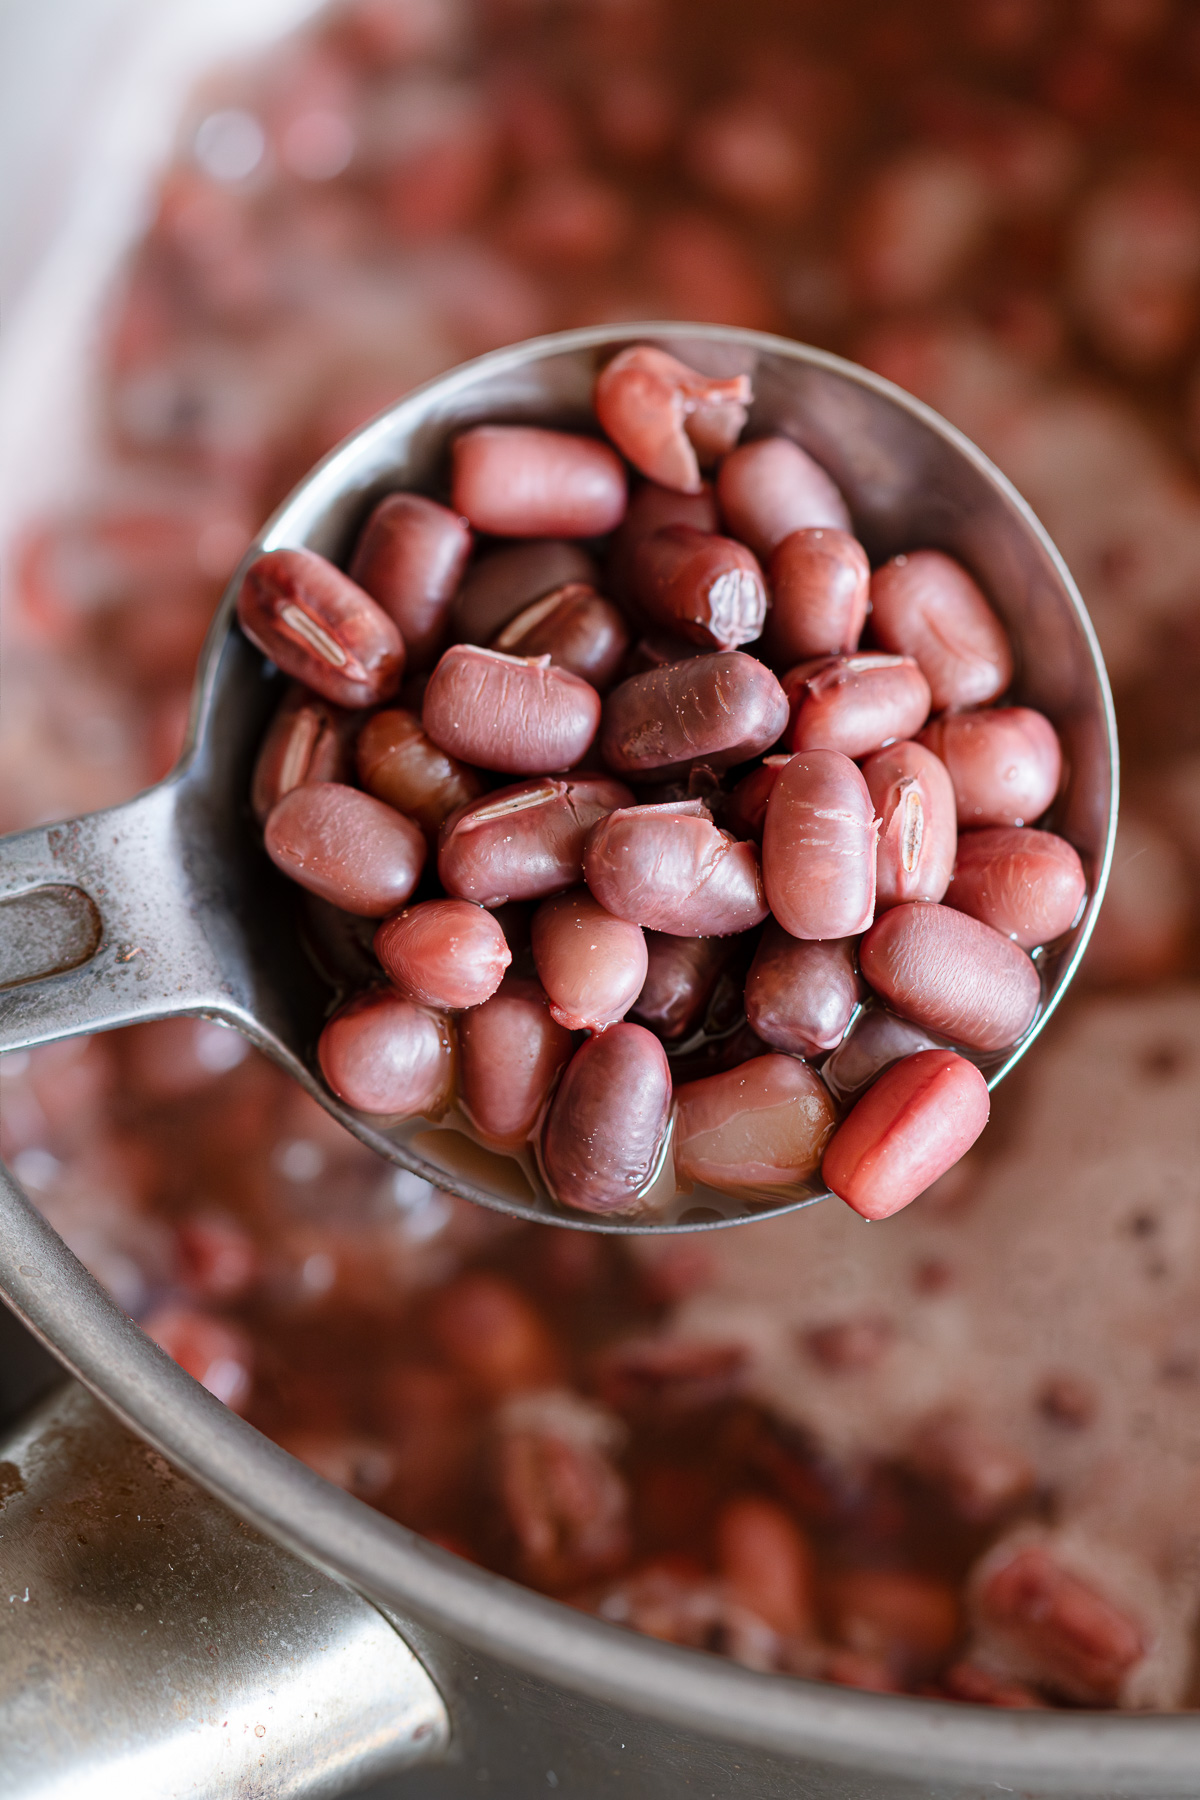
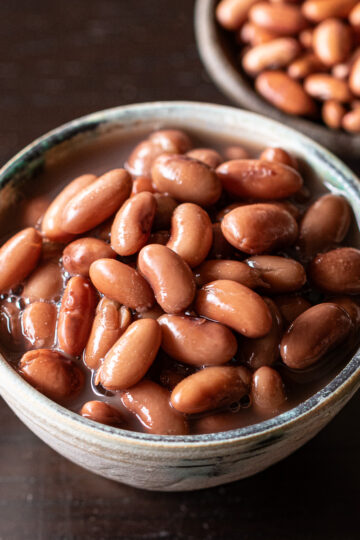
🥢 The plumping stage
Before moving on to the main cook, the skins of the beans should be smooth and taut — no more wrinkles.
This is the sign that moisture has started to penetrate evenly.
The bean in the center of the photo above has smooth, taut skin — that's what you're looking for. Once about 80–90% of the beans reach this stage, move on to the steaming step.
If too many beans still look wrinkled, the moisture hasn't fully penetrated yet and you're likely to end up with unevenly cooked beans.
⏱️ Using a pressure cooker or Instant Pot
A pressure cooker cuts down the cooking time significantly and gives you soft, tender beans with minimal effort.
Follow the main instructions through step 5 (the first steaming), then continue here:
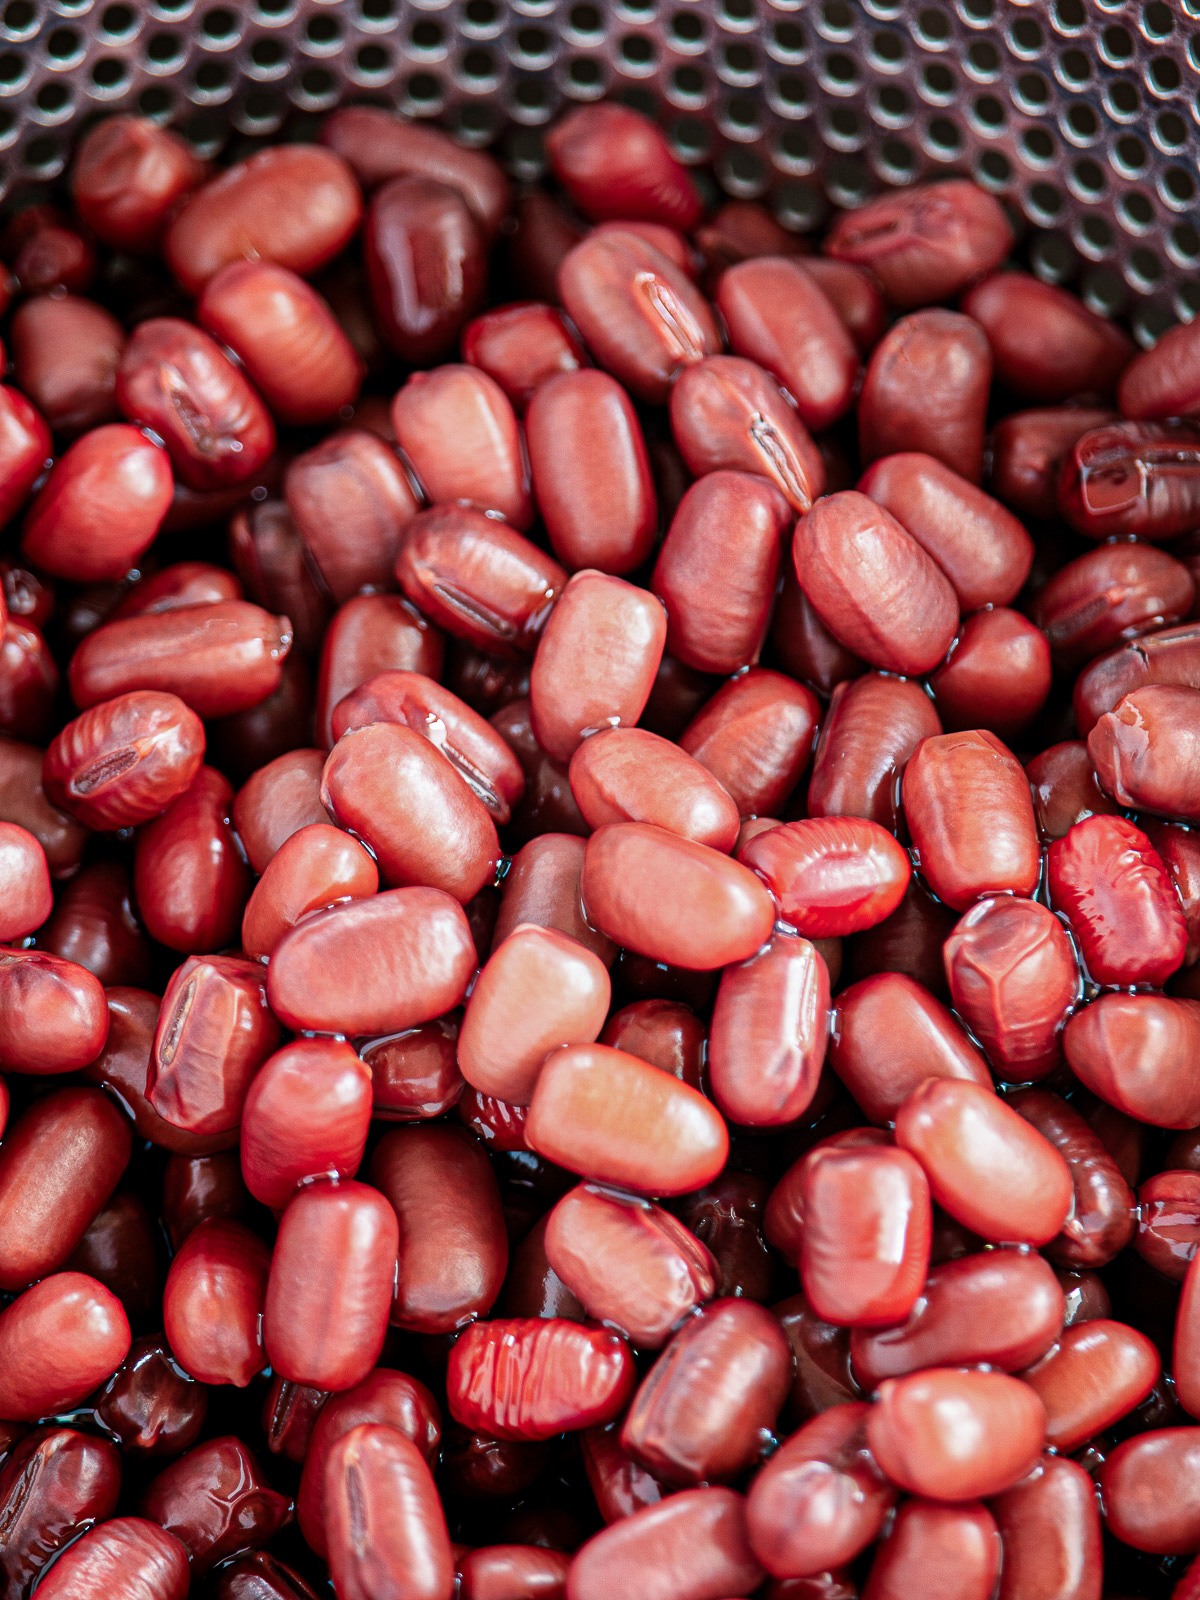
- Drain the beans over a bowl to catch the cooking liquid. Return the beans to the pressure cooker.
- Measure the cooking liquid, then add water to bring the total to about 250–300ml.
- Add it to the pot — the water level should just cover the surface of the beans.
- Bring to high pressure over high heat, then reduce to low and cook for 2 minutes. Turn off the heat.
- Let the pressure release naturally. Once the pressure has fully dropped, the beans are ready.
🌿 The beans are especially fragile right after cooking — let them cool slightly before handling if you want to keep them whole.
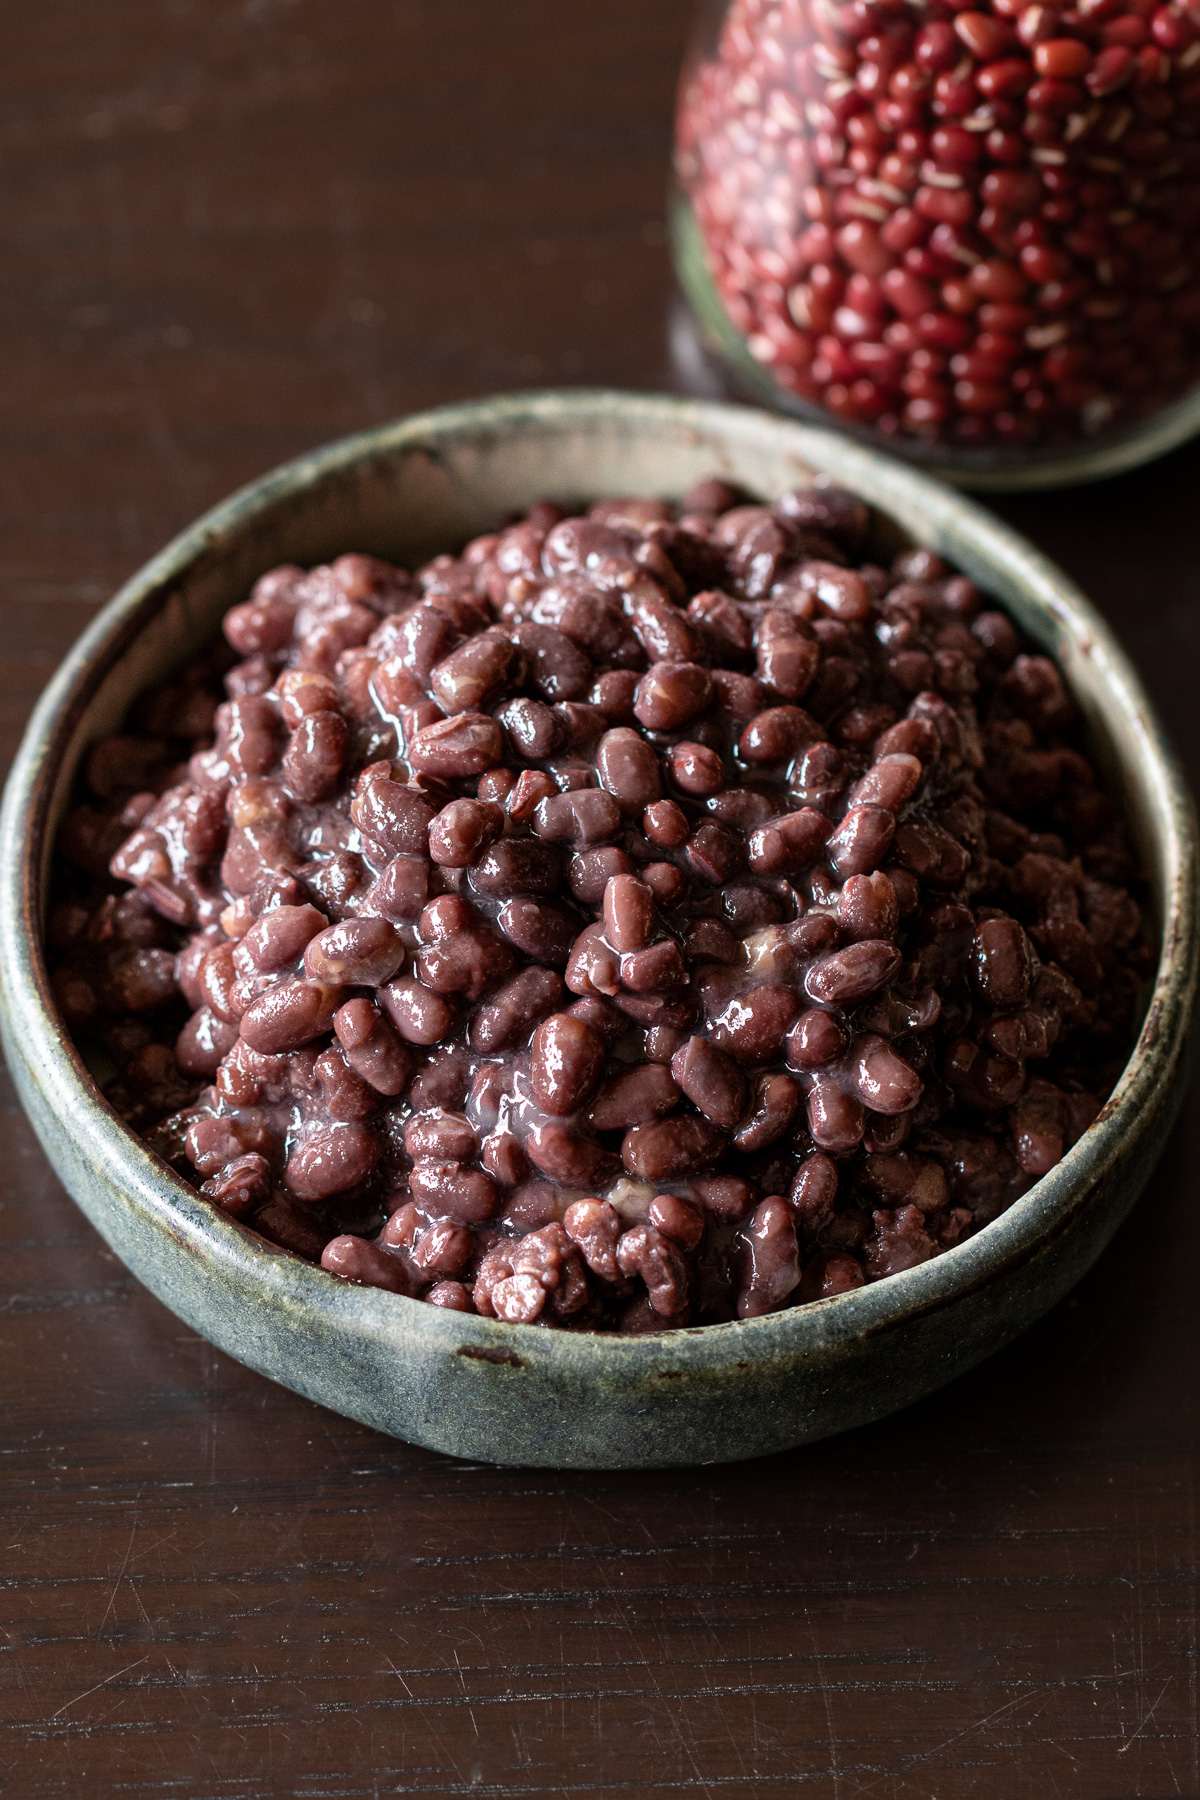
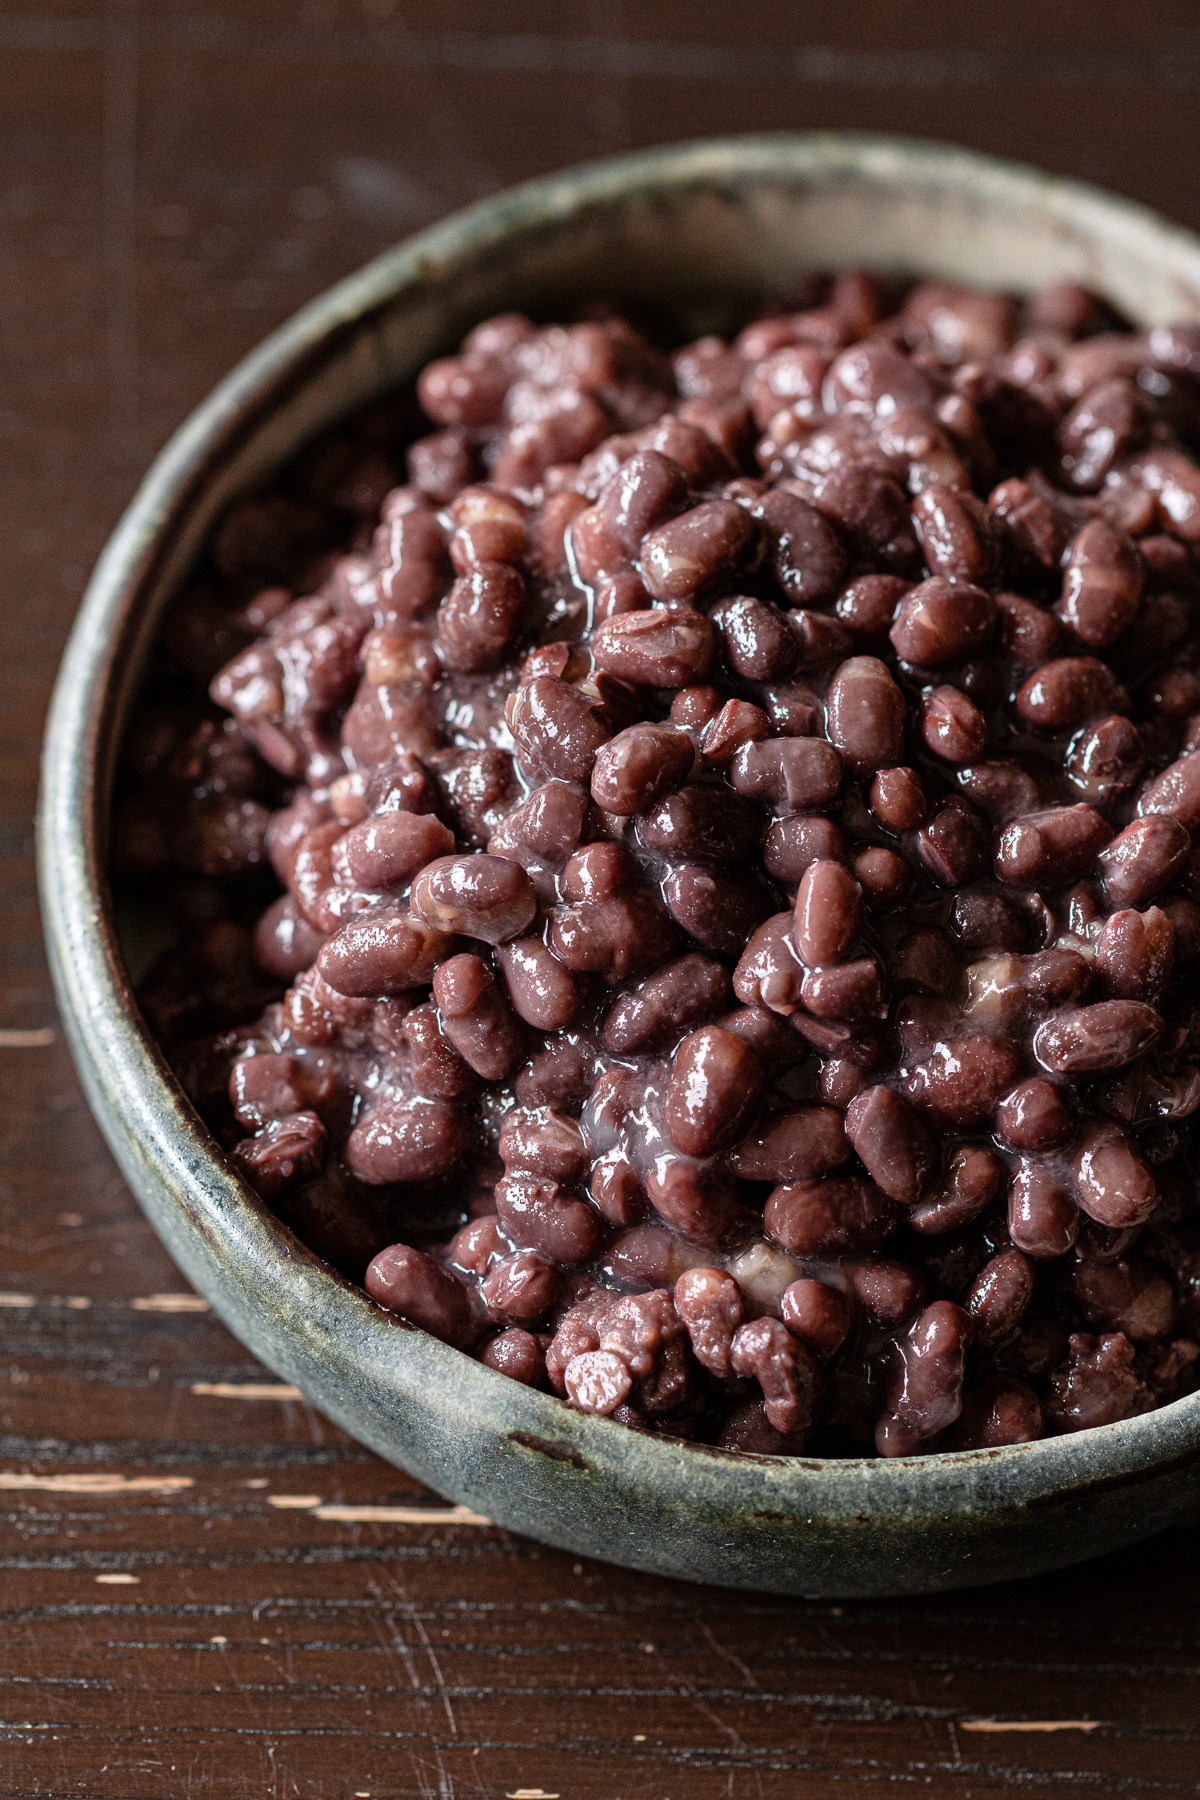
🫙 Storage
Transfer to an airtight container and refrigerate. Best used within a few days.
To freeze, divide into portions, wrap in plastic wrap, and store for up to 2 months.
💭 FAQ
No soaking needed. Unlike many other dried beans, adzuki beans have a firm skin that doesn't absorb water well through soaking.
Adding them directly to boiling water softens the skin first, which allows them to absorb water quickly and cook through evenly.
Adzuki beans are a type of red bean, but not all red beans are adzuki. They are smaller than red kidney beans, and in Japanese cooking, adzuki (also spelled azuki) are the variety most commonly used for sweet preparations like anko and ohagi.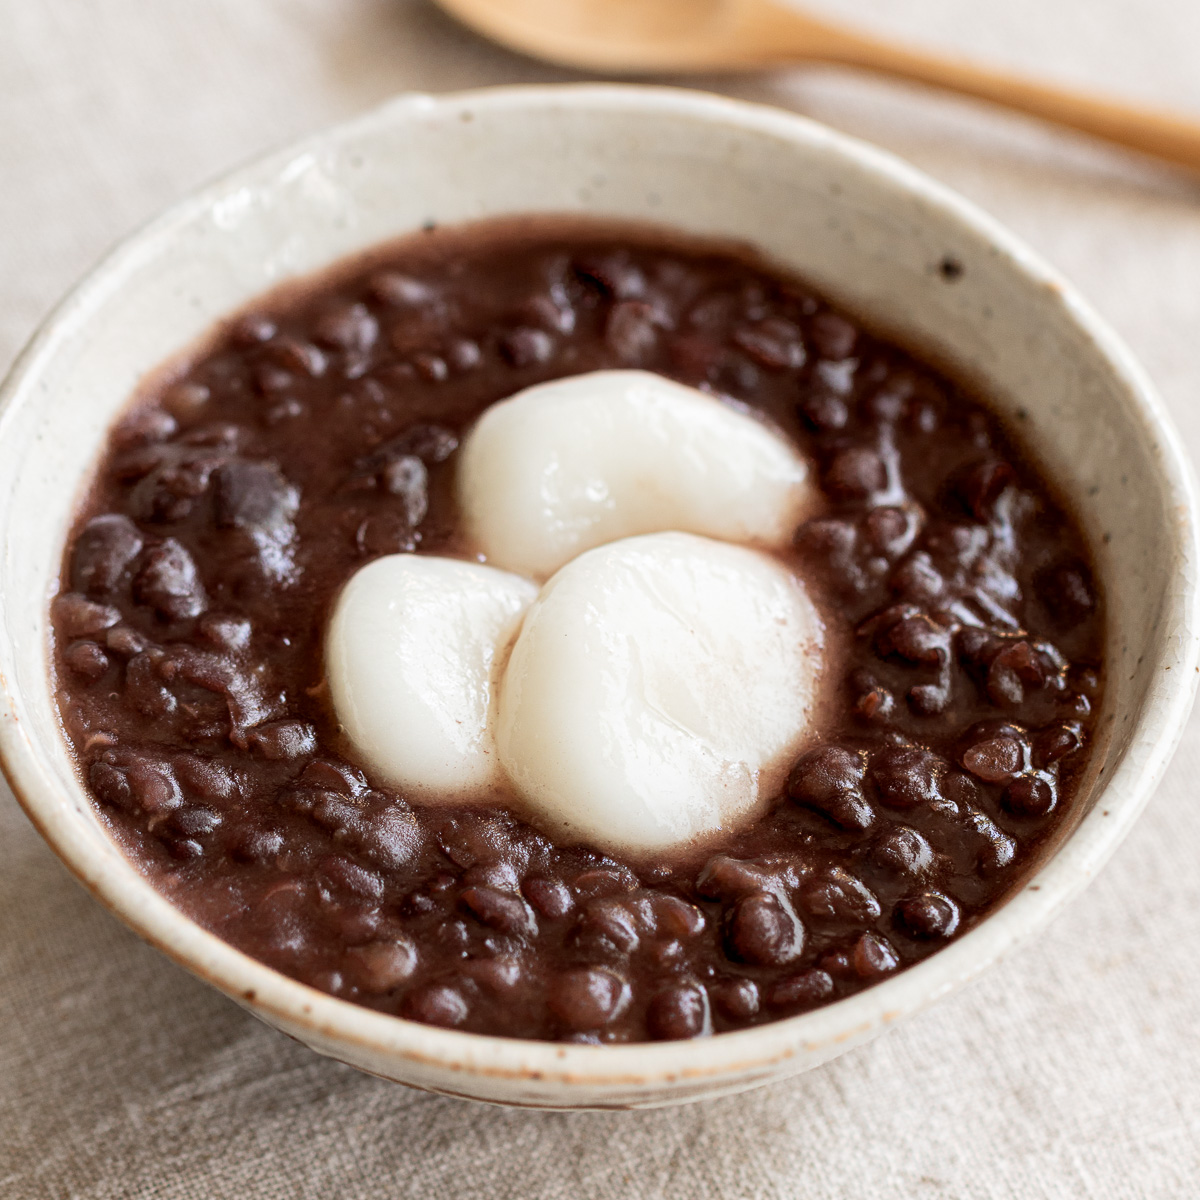
A regular pot gives you more control over texture, making it ideal for recipes where you want the beans to hold their shape, like anmitsu or zenzai.
A pressure cooker produces softer beans in less time, making it better suited for smooth red bean paste (anko) or oshiruko.
The liquid from the first parboil can be enjoyed as adzuki tea. The liquid from the main cook has a subtle sweetness and savory depth — use it in anko, oshiruko, soups, or stews.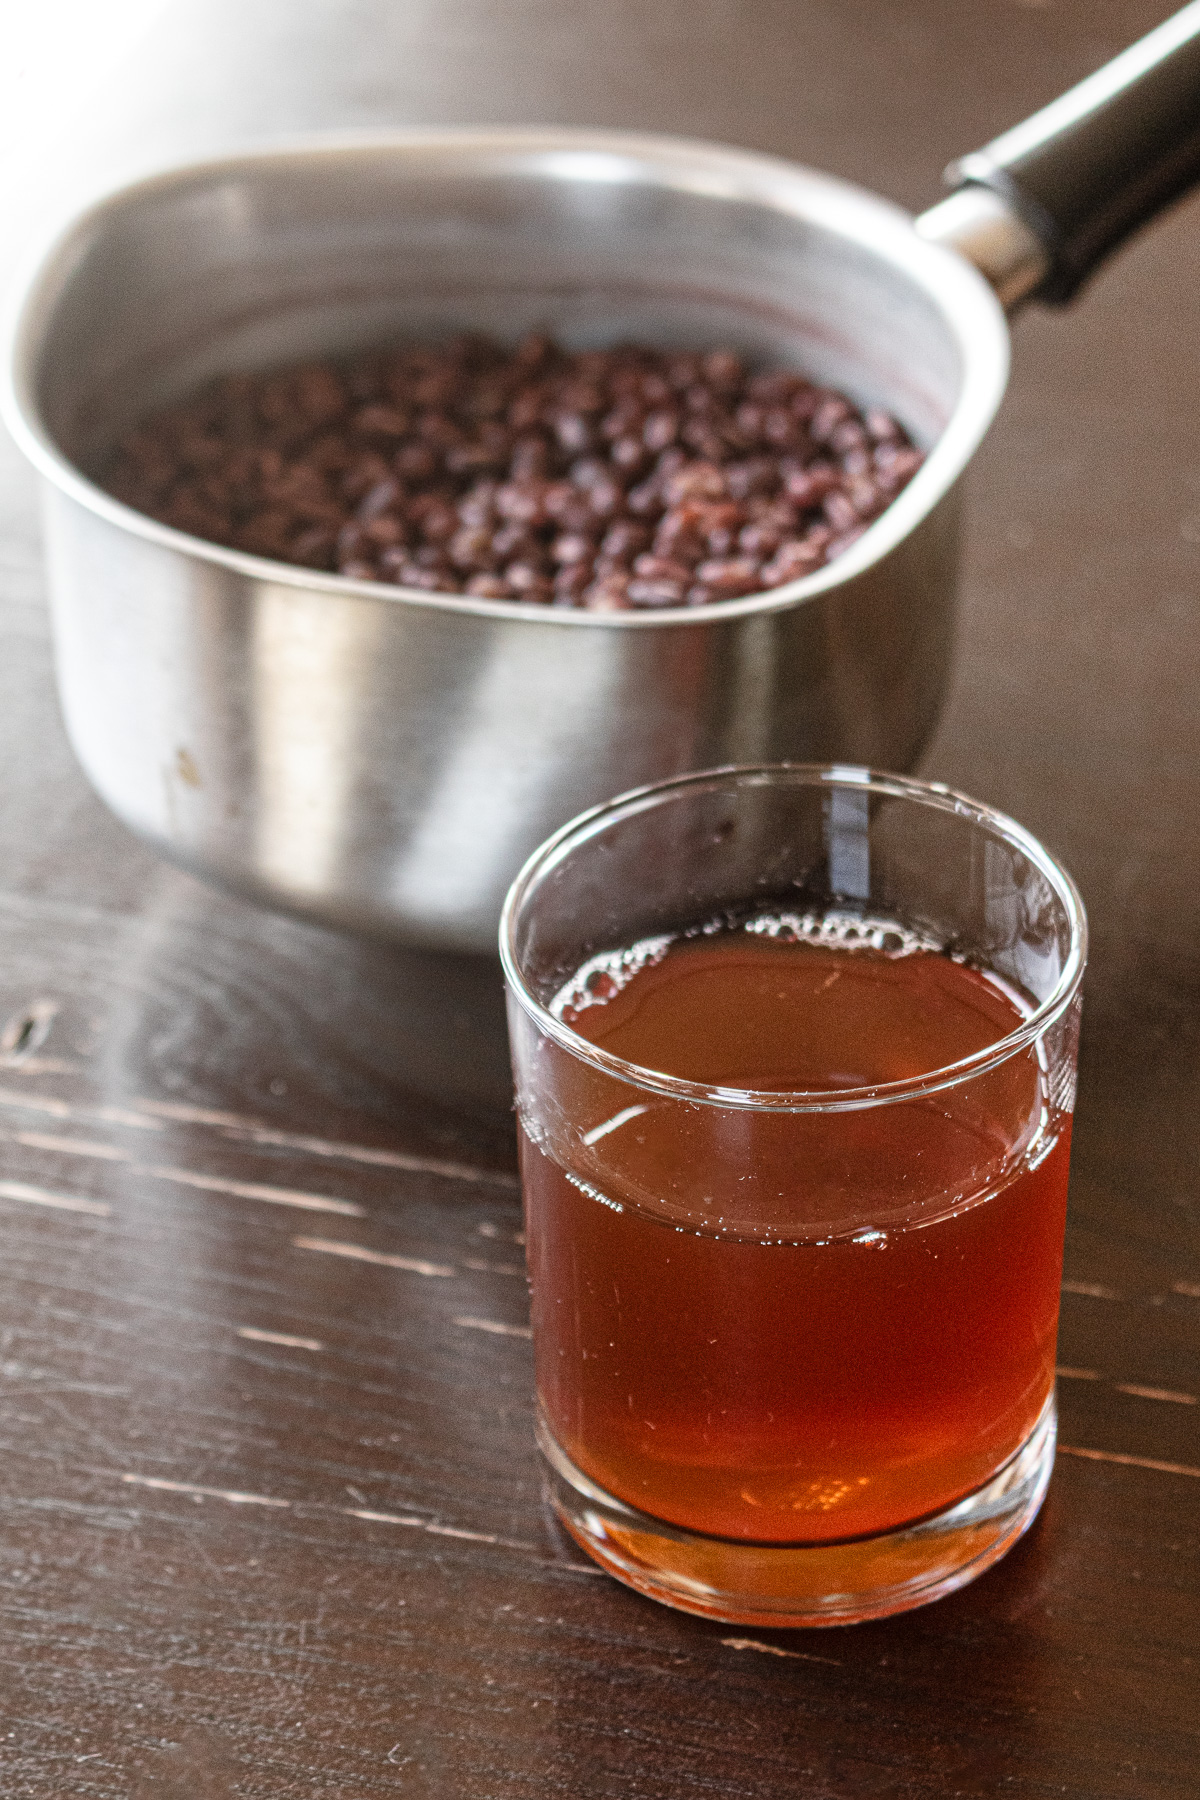
Wrinkled skins at this stage mean the moisture hasn't penetrated fully — you're likely to end up with unevenly cooked beans with a hard center. Take the time to make sure most beans look smooth and taut before moving on.
It softens the bitter, astringent edge of the beans — but it also removes some of the natural flavor and nutrients. Recent higher-quality adzuki beans may lose their bitterness naturally during cooking anyway.
Try it a few ways and see what works best for you.
🥮 Recipes using cooked adzuki beans
From desserts to savory dishes — there's a lot you can do with a batch of cooked adzuki beans. More recipes in the adzuki bean recipe roundup.
- Anko (sweet red bean paste) — the filling for many traditional Japanese sweets
- Ohagi — sticky rice balls coated in anko or kinako
- Oshiruko — a warm sweet red bean soup with mochi
- Adzuki porridge — a savory rice porridge with adzuki beans
- Korean-style adzuki porridge — creamy, comforting sweet rice porridge
- Simmered pumpkin with adzuki — a sweet Japanese stew enjoyed as a snack or side dish
- Adzuki oatmeal porridge — sweet and creamy porridge for an easy vegan breakfast
- Adzuki chocolate truffles — sugar-free vegan chocolate dessert
- No-bake salted chocolate rosemary oat cookies — soft vegan chocolate oat cookies


📘 Other basic bean cooking guides
A few more beans worth knowing how to cook:
🌸 Seasonal vegan recipes


If you feel like whispering a thought, asking a question, or simply saying hello — the comment section is always open 📮
✏️ Recipe Card
How to Cook Dried Adzuki Beans — Stovetop or Pressure Cooker
Equipment
- Saucepan
- lid
- pressure cooker - optional
- Sieve
Ingredients
A — First cook
- 200 g dried adzuki beans
- 600 ml water
- 600 ml water (after parboiling)
B — Second cook: stovetop version
- water (as needed)
B — Second cook: pressure cooker version
- 250–300 ml cooking liquid or water (just enough to cover the beans)
Instructions
A — First cook
- Bring 600ml of water to a boil in a saucepan.600 ml water
- Rinse 200g of dried adzuki beans quickly under running water and add to the pot.200 g dried adzuki beans
- Bring to a boil over high heat, then reduce to medium and cook for 5 minutes.
- Remove from heat and drain through a sieve (first parboil). Return the beans to the pot with 600ml of fresh water.600 ml water
- Bring to a boil over high heat, then reduce to medium-low to maintain a gentle simmer (the surface should bubble lightly, with the beans moving just slightly). Cook for about 15–20 minutes until the skins of most of the beans are smooth and taut (the plumping stage).
- Remove from heat, cover with a lid, and steam for 30 minutes.
B — Second cook: stovetop version
- Add just enough water to cover the beans.water
- Bring to a boil over high heat, then reduce to low to medium-low (the surface should barely move, with the beans not knocking against each other). Cook until the beans crush easily between your fingers, checking as they cook.
- Remove from heat, cover with a lid, and steam for at least 30 minutes.
- Drain through a sieve if needed and transfer to an airtight container. Refrigerate. If making anko or oshiruko, reserve the cooking liquid.
B — Second cook: pressure cooker version
- Drain the beans over a bowl to catch the cooking liquid. Return the beans to the pressure cooker.
- Measure the cooking liquid, then add water to bring the total to about 250–300ml. Add it to the pot — the water level should just cover the surface of the beans.250–300 ml cooking liquid or water
- Cover and bring to high pressure over high heat. Reduce to low and cook for 2 minutes. Turn off the heat.
- Let the pressure release naturally.
- Drain as needed and refrigerate. Reserve the cooking liquid if making anko or oshiruko.
Notes
- Parboil only if you want a cleaner, milder flavor — skip it to retain more of the beans' natural flavor and nutrients.
- The plumping stage (cooking until the skins are smooth and taut) is the key to evenly cooked, tender beans.
- The cooking liquid can be used as adzuki tea, or reused in anko, oshiruko, soups, and stews.
- A regular pot gives you more control over texture; a pressure cooker produces softer beans in less time.

If this recipe made its way into your kitchen, and you'd like to share that moment, feel free to tag @veginveganvegun or use #vegin_vegan_vegun.
Your quiet stories inspire me deeply 🕊️


Akiko says
They turned out perfectly!